Facebook gives you all the reasons to use the platform to engage with your friends. One of the best things about Facebook is how it keeps memories of things you did in the past.
It could be a post you shared or someone tagged you from a couple of years ago.
Memories are great, and when you can access your Facebook memories, there is no harm in sharing them with your Facebook friends.
To share a Facebook memory, access your account and go to the “Memories” page. Locate the memory that you want to share and click the “Share” button below the post. Add a description or comment about the post and click the “Share Now” option to share your Facebook memory.
This guide helps you understand what a Facebook memory is. Next, we will dive into the steps for accessing your Facebook memories and how you can share your memories on Facebook. That being said, let’s get started!
What Are Facebook Memories?
Facebook memories are a feature introduced by Facebook where it allows users to access their moments and posts from the past.
Your Facebook memories can date back to when you first created your Facebook profile, and there is no harm in seeing the progress you’ve made up to now.
Here’s the kicker, Facebook offers various categories for your Facebook memories.
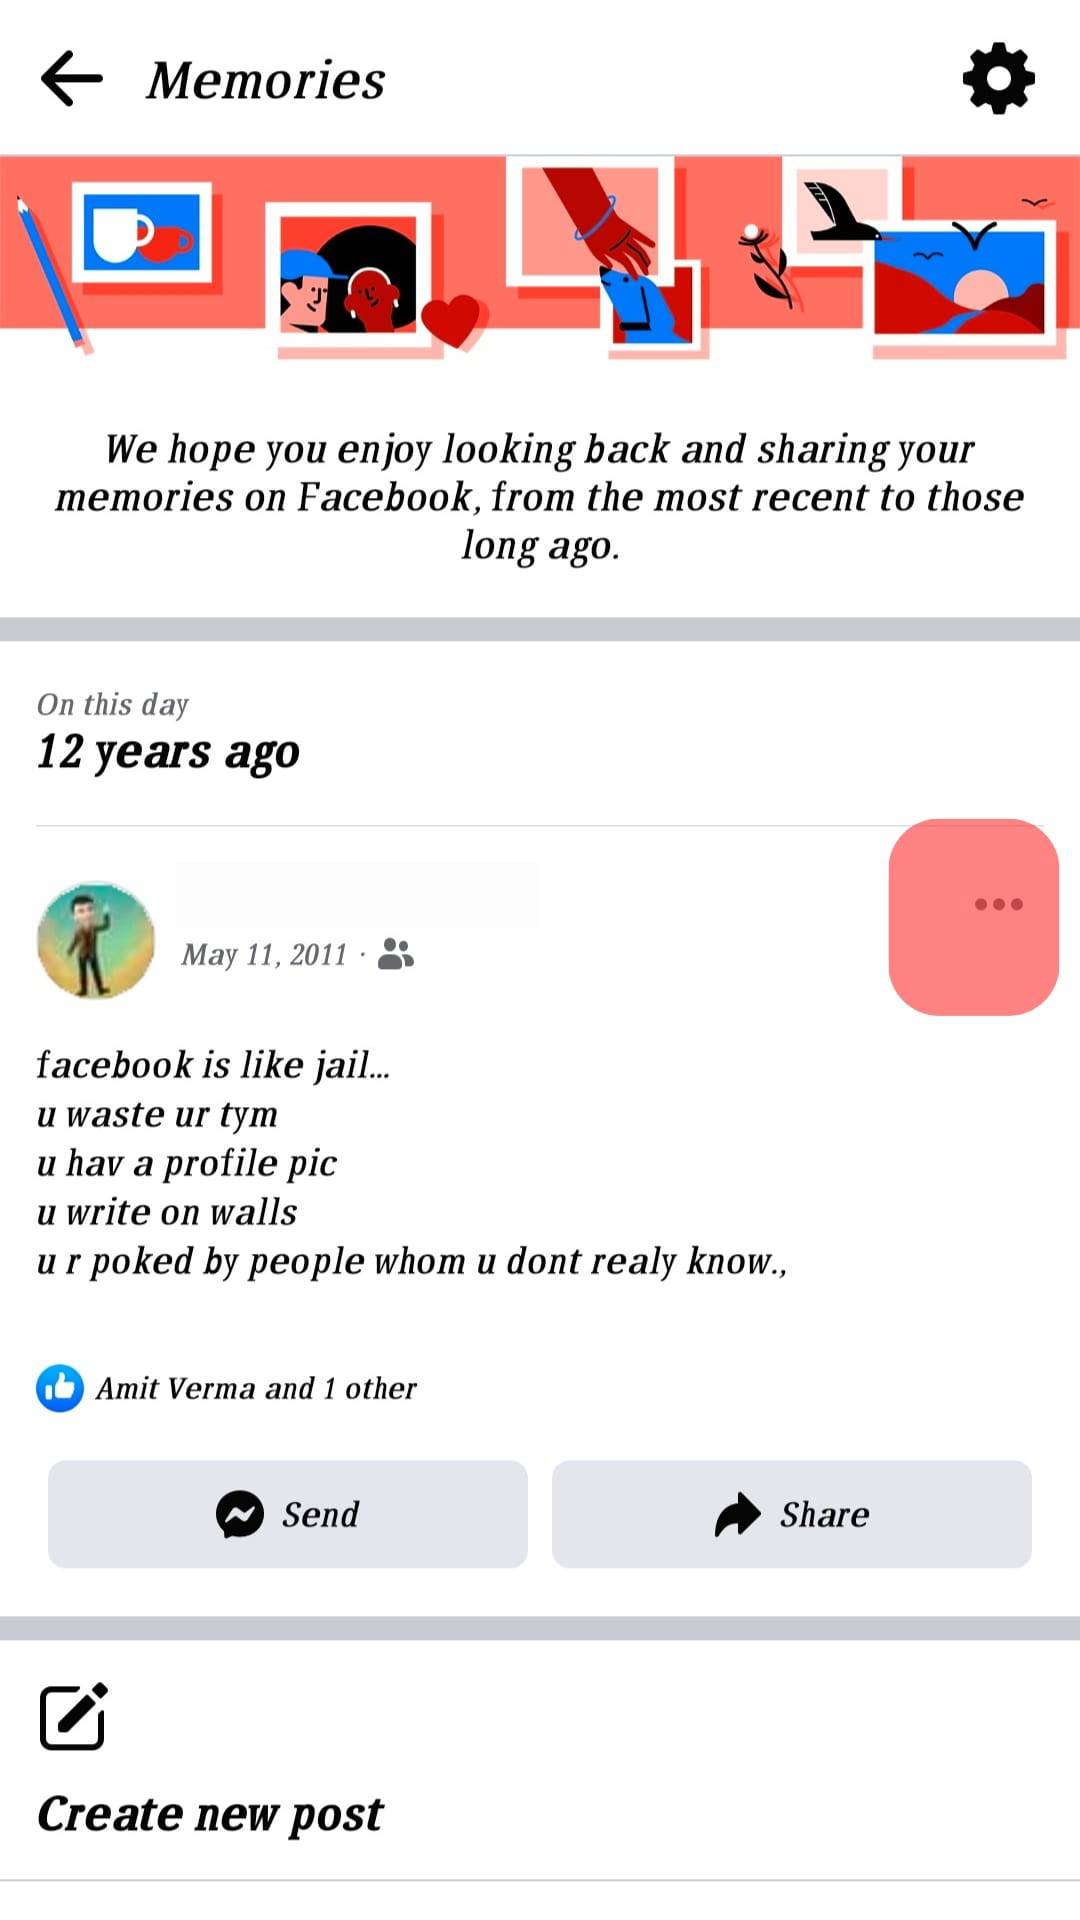
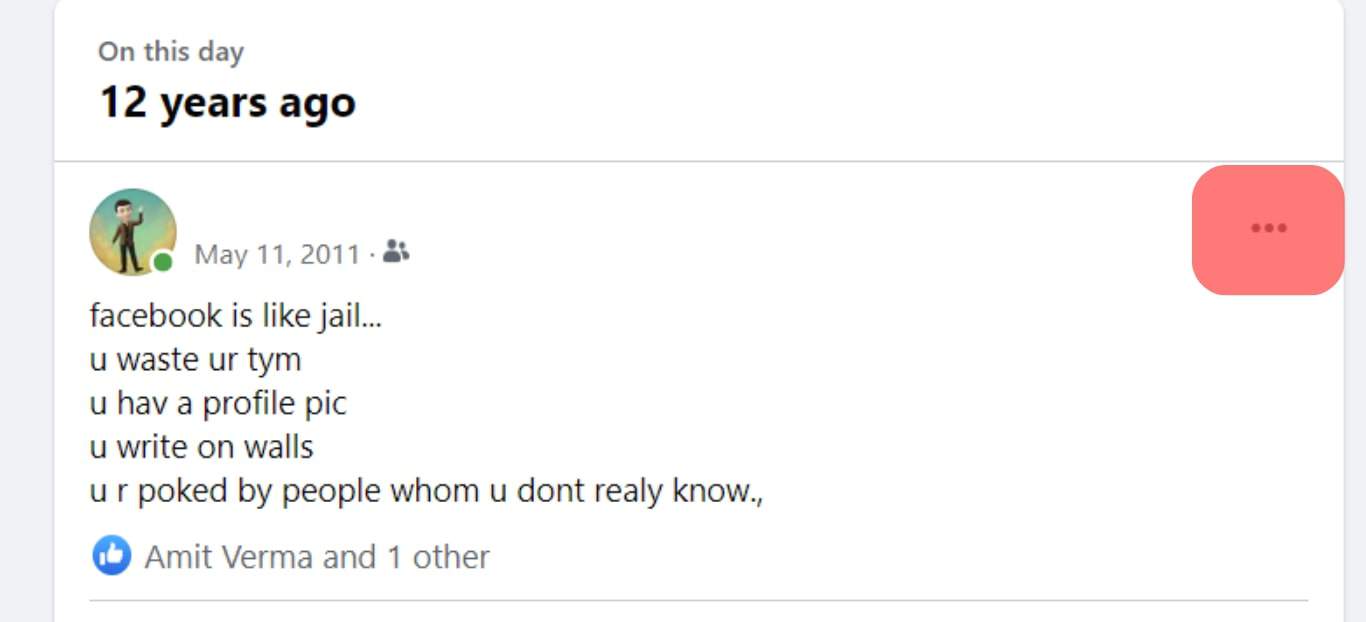
On This Day
All the important things that took place on a given day can be found in this section.
The memories go back even to several years, and if you are looking for something that happened years back, you can find it here.
Memories You Have Missed
This section highlights what Facebook believes you have missed, mainly from the past week.
Recaps of Memories
The section highlights memories that happened recently, like a month ago.
Friends Made on This Day
The section highlights memories of the Facebook friends that you made on a given day.
That way, you can track the date you became friends on Facebook with a given person.
How To Access Facebook Memories
If you’ve been active on Facebook, you can’t lack something under the “Memories” section of your Facebook account.
To check your Facebook memories, use the steps below.
On iOS or Android
- Open the Facebook app on your phone.
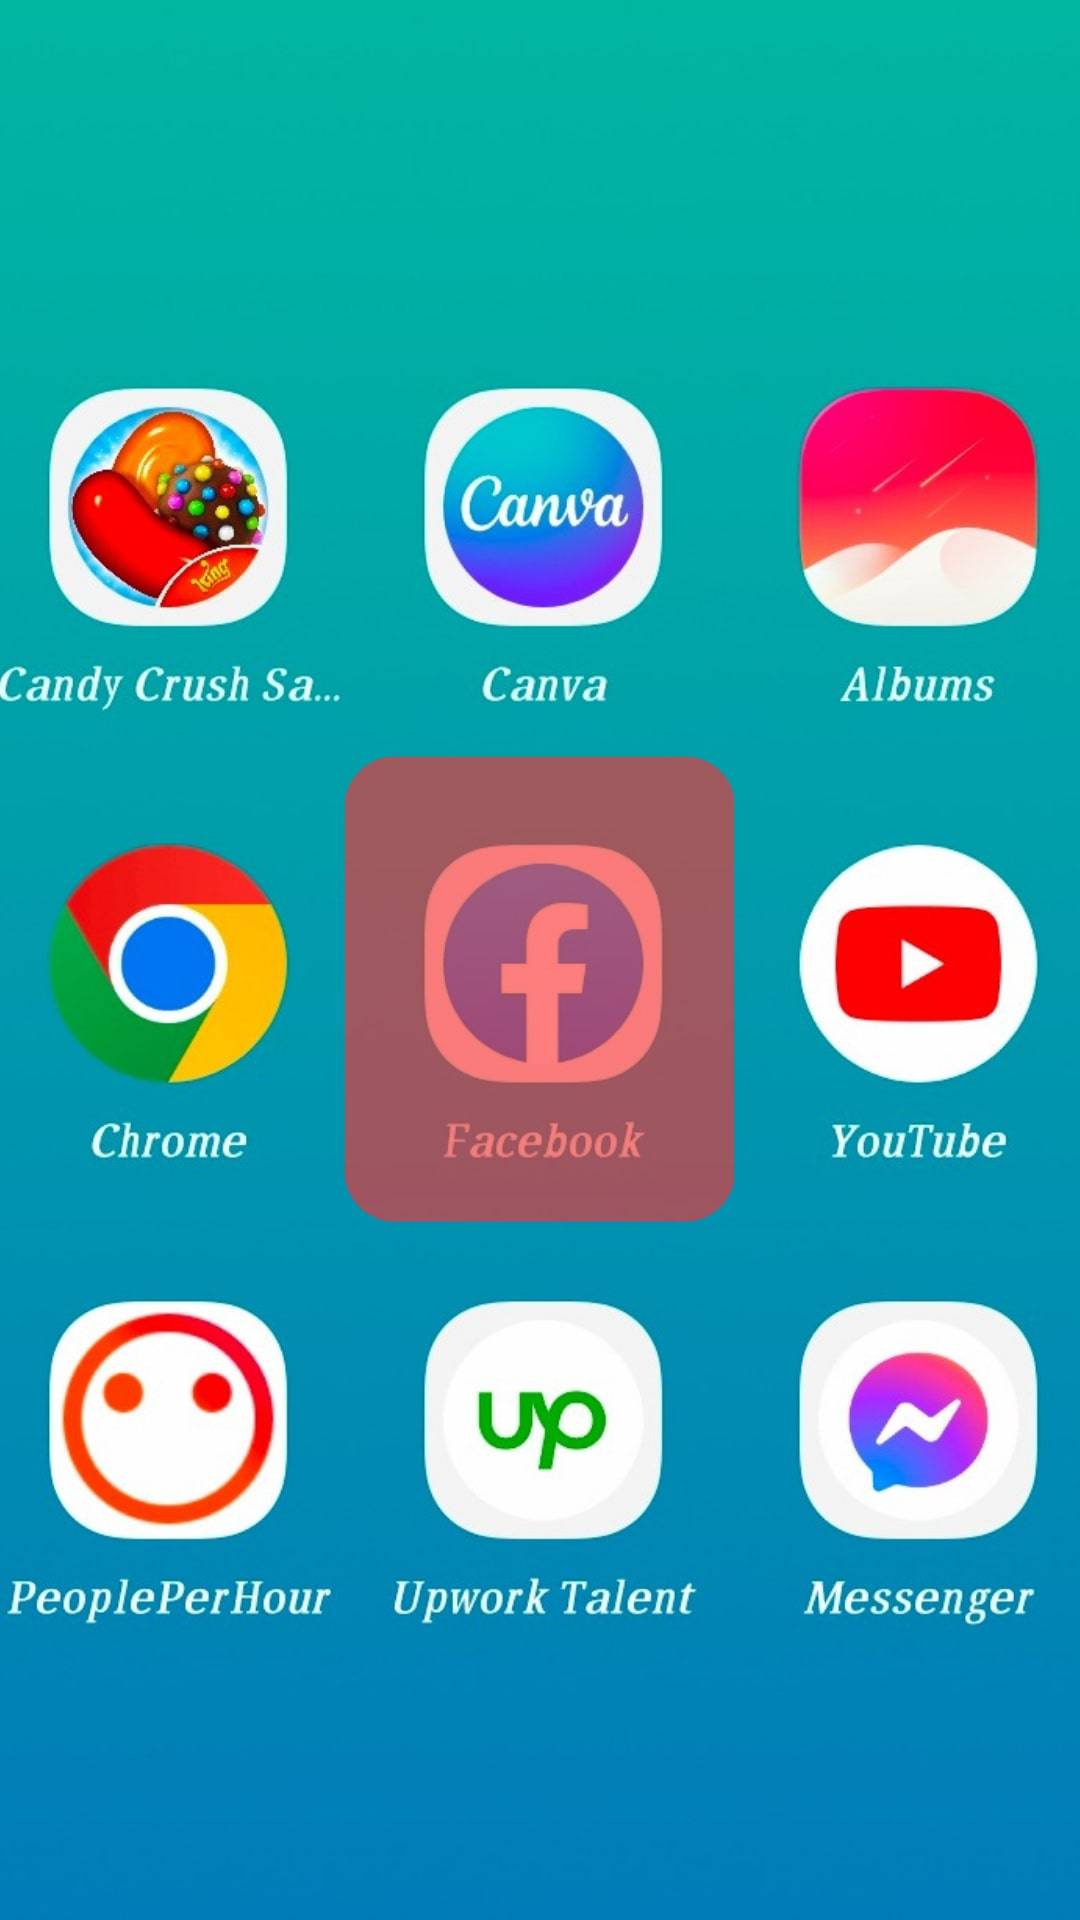
- Click on the “Menu” button.

- Select the option for “Memories”.
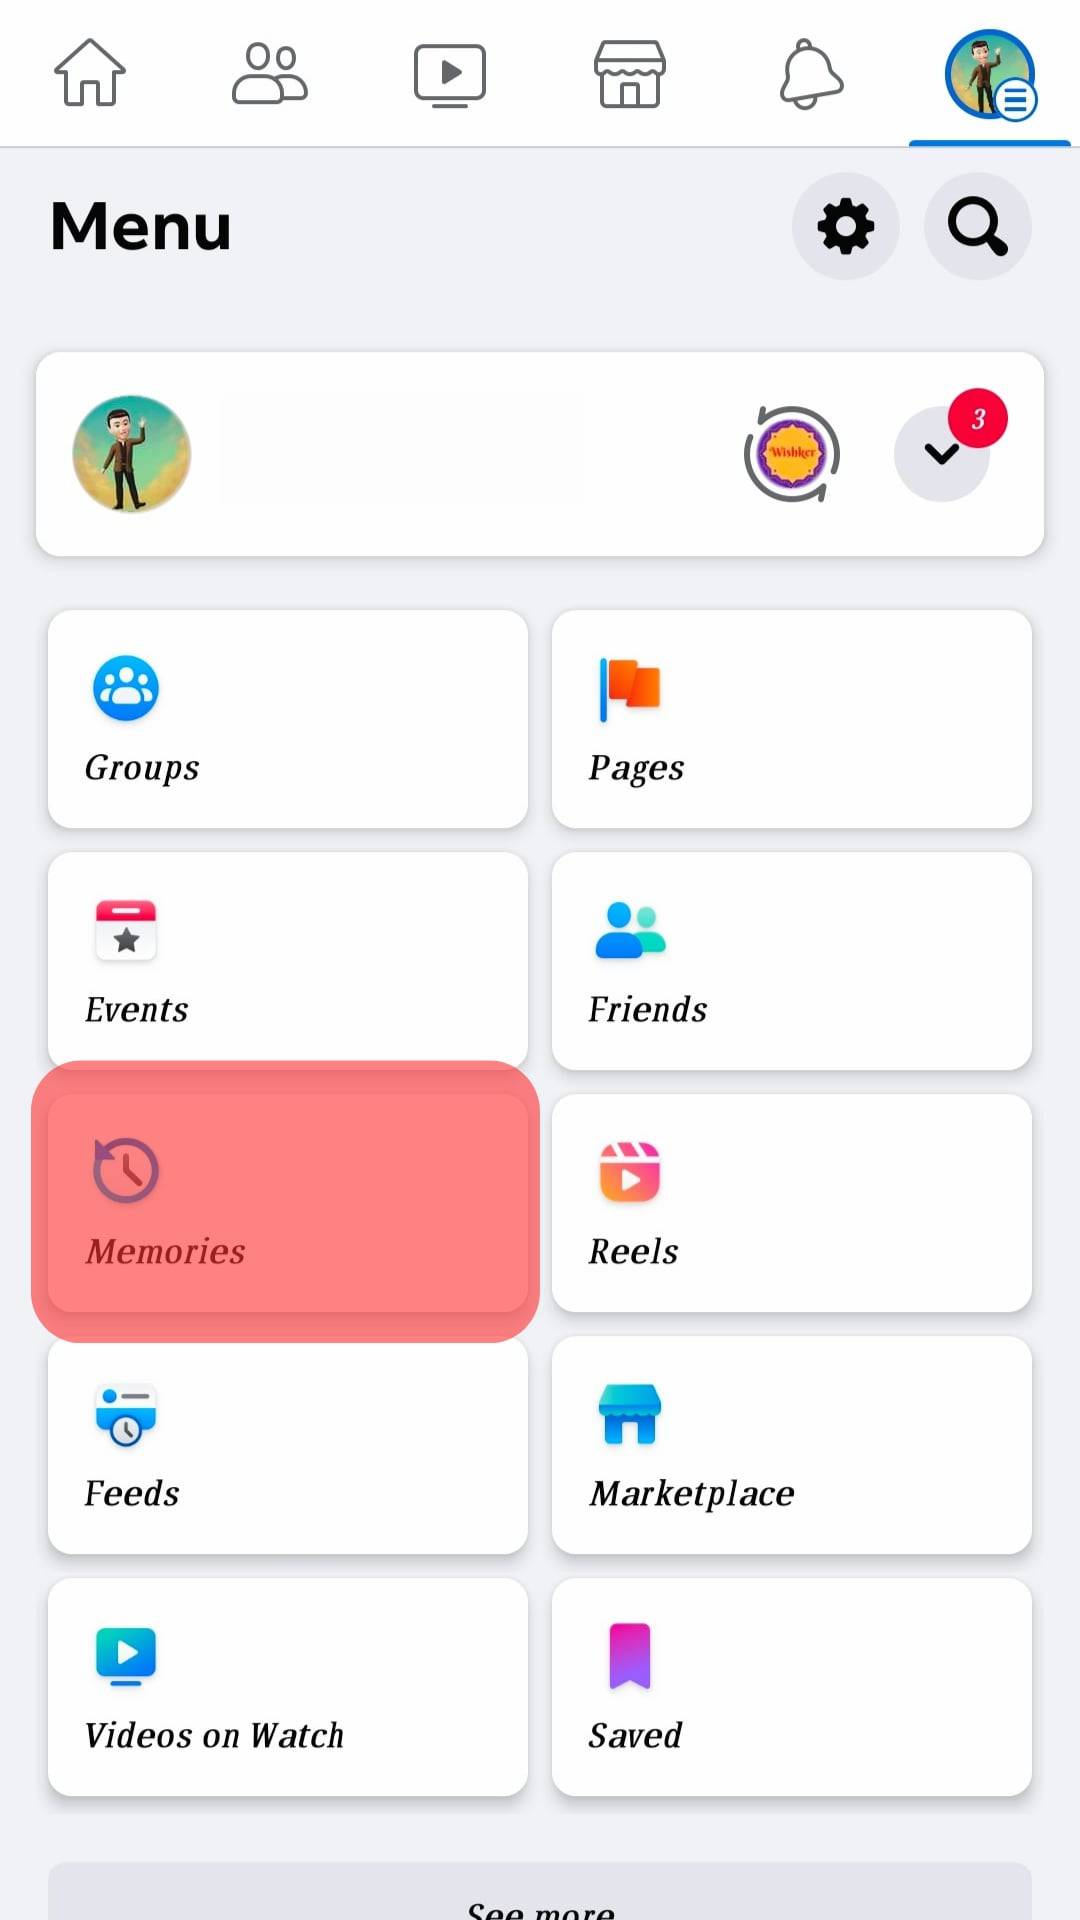
- If you have memories, they will be displayed under the “Memories” page.
On Facebook Desktop
- Open the Facebook website and access your account.
- On the “News Feed”, click the “Memories” tab. You might have to click the menu icon first to see the “Memories” option.
- The next window will display all your Facebook memories.
How To Share Memories on Facebook
The first thing before you share a memory on Facebook is to locate the memory itself. So, use the steps above first to access your memories page.
Once you’ve accessed the page, locate the memory that you want to share and click the “Share” button at the bottom of the memory.
You can share the post as a memory or write a post about the memory. Also, select the audience that you want to share the post with. It could be a public or selected set of your friends to view the memory that you share.
Note that memories will only display only after you share them. If you no longer wish to keep a given memory, you have the option to delete the memory.
How To Delete a Memory on Facebook
You have reasons for wanting to delete your Facebook memories; in that case, you can use the steps below to guide you.
On Facebook App
- Open your Facebook account.
- Tap the “Menu” button at the top (Android) or bottom (iOS).
- Click the option for “Memories”.
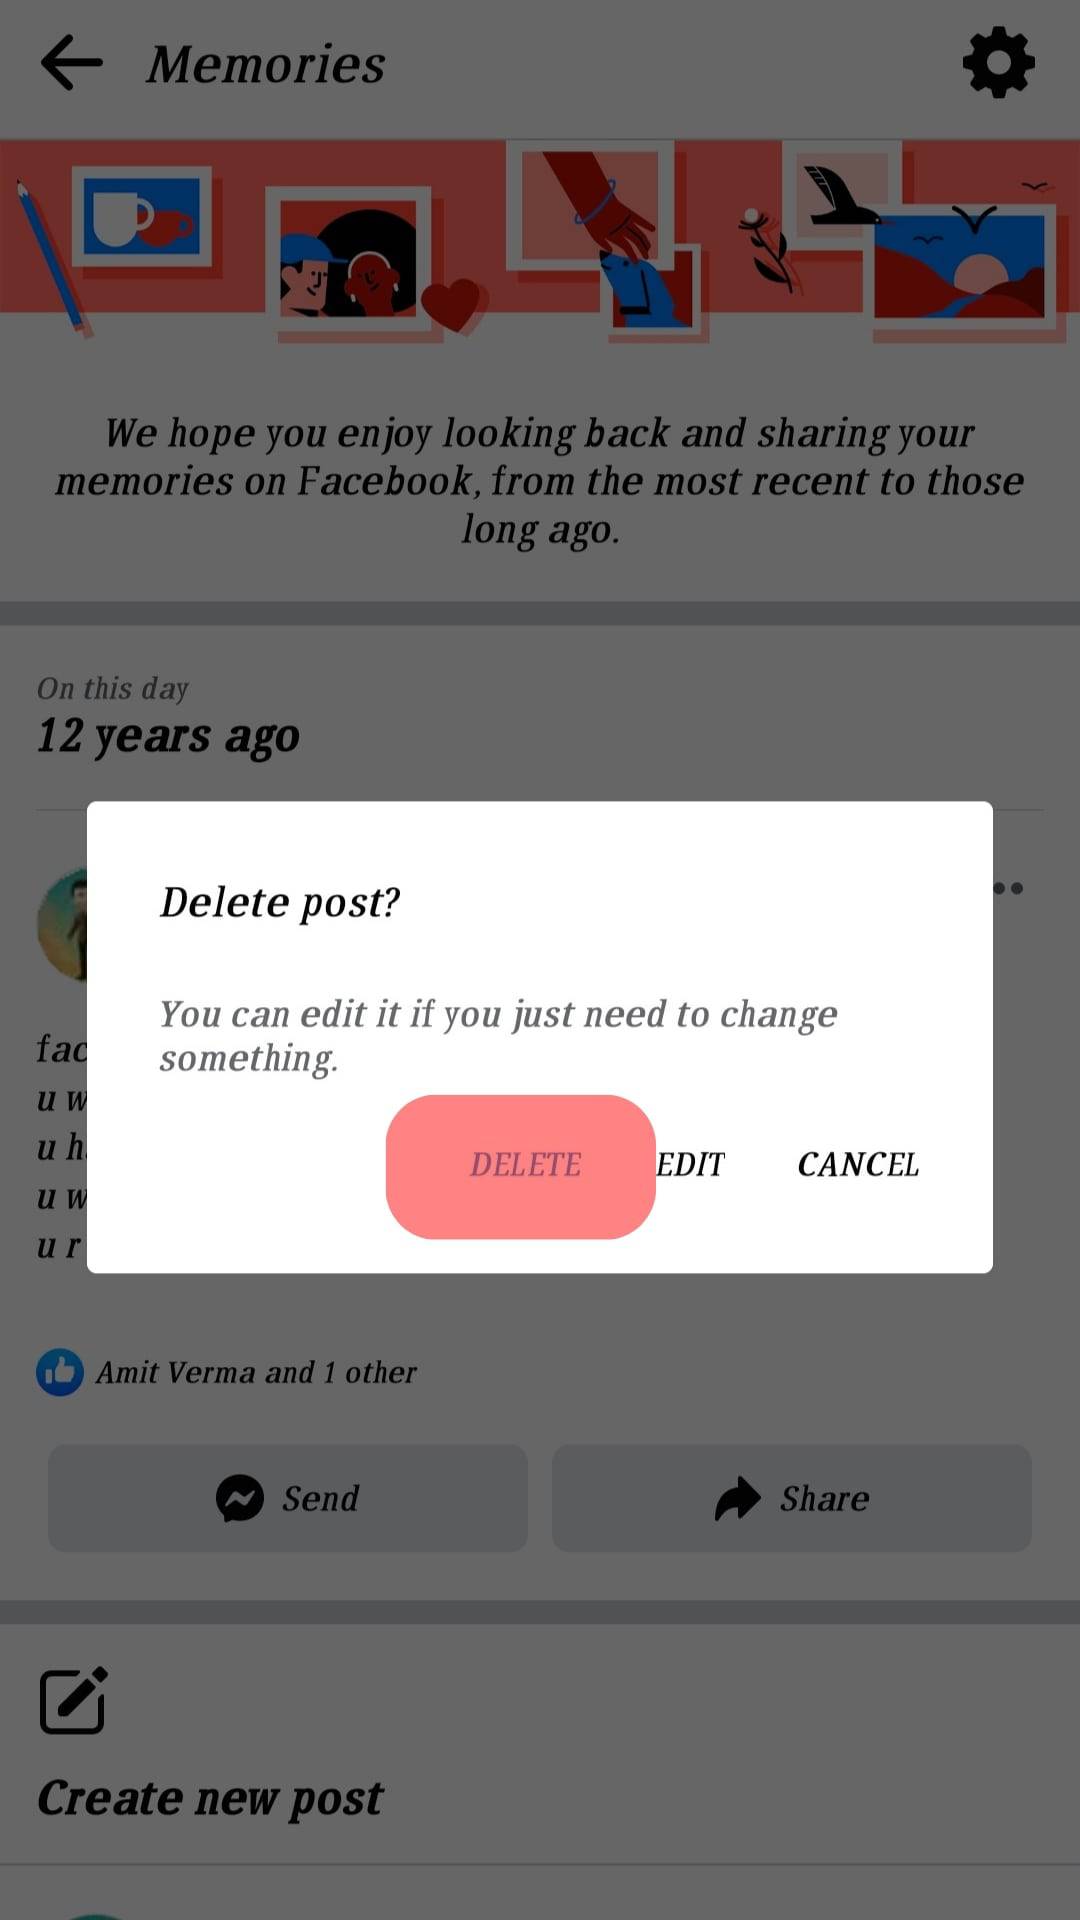
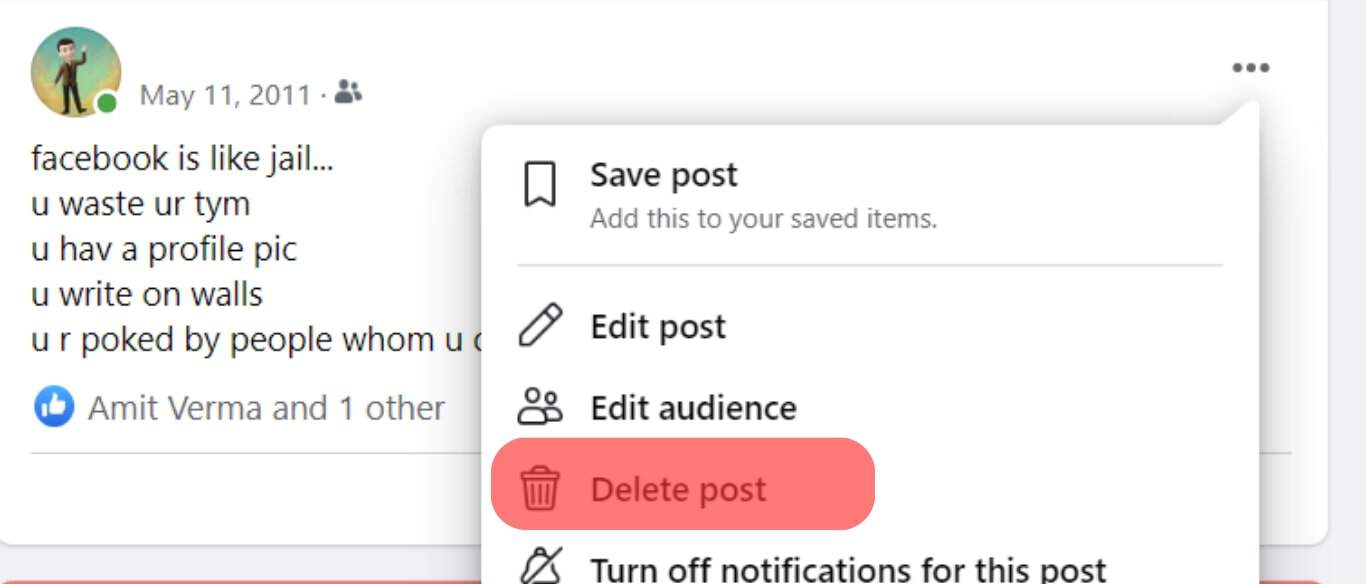
- Locate the memory that you want to delete and click the three dots next to the memory.
- On the menu options page, tap the option for “Delete”.

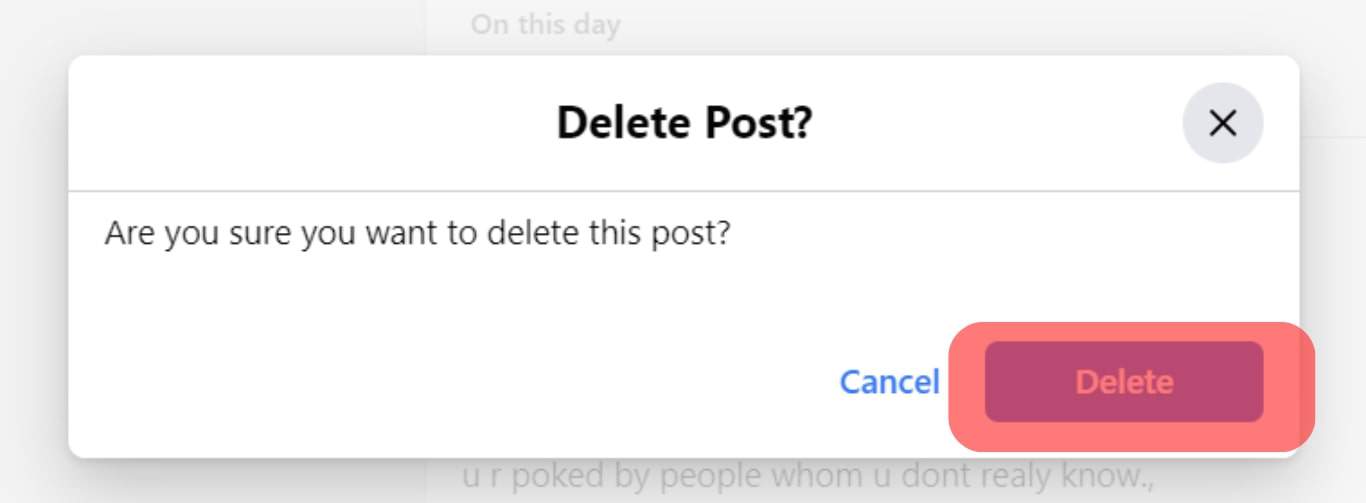
- Confirm the action by clicking on “Delete” again.
You won’t see the given Facebook memory again on your memories page.
On Facebook Website
- Open your Facebook account on a browser or the desktop Facebook app.
- Click on the “Memory” option on the left sidebar. You might have to click the menu icon first to see the “Memories” option.
- Locate a given memory and click the three dots next to it.
- Tap the “Delete Post” button.
- Confirm the action by clicking on “Delete” on the prompt.
Conclusion
Facebook memories are dear to you and contain a history of your past activities on Facebook.
It could be the posts you made a few years ago or the friends that you made on a given day.
This guide has presented the steps for accessing and sharing your Facebook memories.