Discord initially started as a platform where gaming and developer communities can come together.
Over the last few years, Discord’s users have grown to include creatives who use the platform to stream content.
Discord has native streaming features, but some users prefer third-party tools like OBS Studio, with more advanced features that enhance viewers’ experience.
Adding Discord as an audio or video source on OBS is relatively easy. You’ll need Discord Streamkit and Discord Desktop app.
Go to the Discord Streamkit Overlay page on your PC’s web browser. Click Install for OBS. Your Discord page will appear, asking to allow installation. Click “Authorize.” Revert to the Streamkit page and select the widget you want to add to OBS. We’ll use the Voice Widget in this example. Select Server and Voice Channel. Copy the URL on the right side of the screen. Open OBS and click the plus icon under the source category. Paste the link you copied. Name it, then click OK.
Read this article to the end to learn how to add Discord as a source in OBS.
Overview of Adding Discord as a Source in OBS
Discord’s native recording and streaming features are popular with gamers who want one-on-one interactions with server members.
While these Discord features work well, they are limited to specific capabilities. For example, you can only choose from external or built-in webcams when you go to Discord’s audio or video settings.
Additionally, Discord only allows you to choose the entire screen or a specific app when screen sharing. This is where tools like Open Broadcaster Software (OBS) come in.
OBS Studio has several features for recording, live streaming, video production, and more.
It also has many plug-ins like NDI support, Stream Deck controls, and VTS plug-ins that enhance the overall streaming and viewing experience.
Besides having superior features, OBS enables Discord users to overlay features like chat and voice widgets when streaming.
Adding Discord as a source in OBS, whether voice or chat, lets you have a more interactive experience with your viewers. You can customize your Discord source while depicting your chard or audio activity when gaming.
Remember you have to first install OBS before adding Discord as a source.
Follow the instructions below:
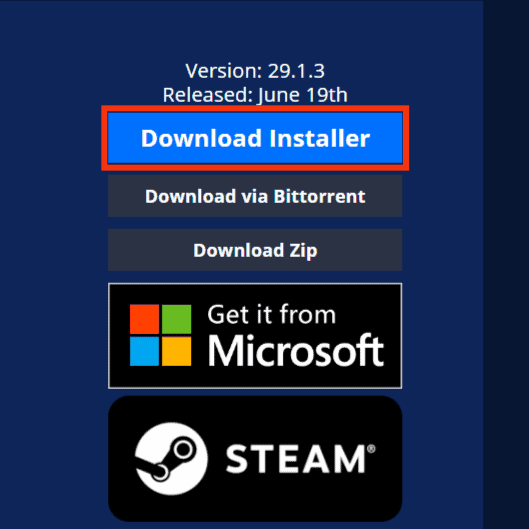
- Open your PC’s web browser.
- Go to obsproject.com/download.
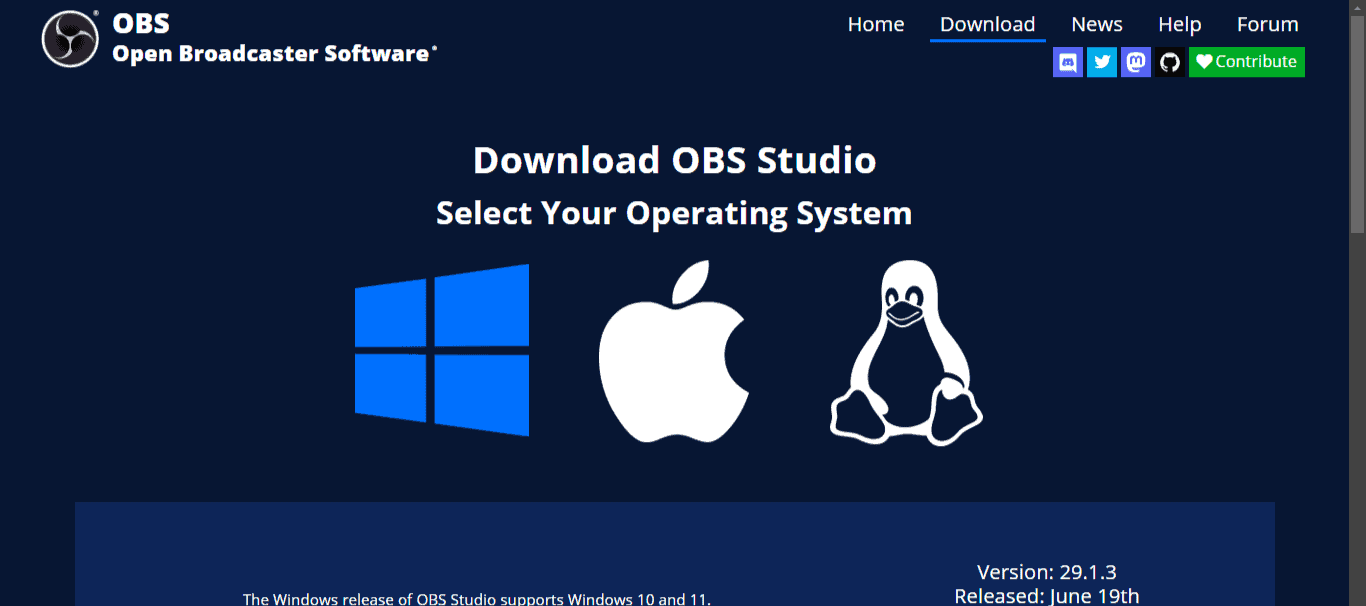
- Choose your PC OS, for example, Windows, Mac, or Linux.
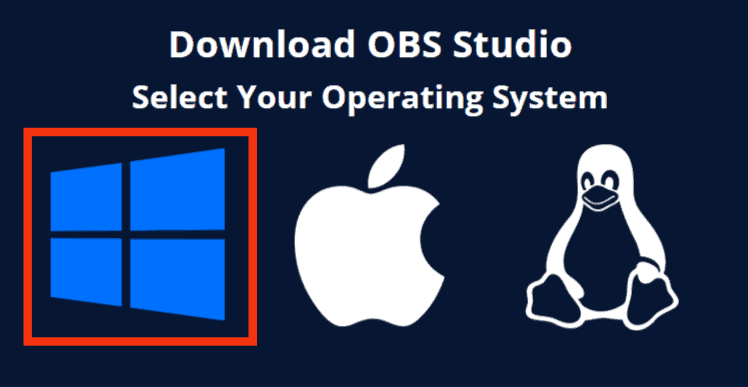
- Click “Download Installer.”
Next, we cover the primary steps to adding Discord as a source in OBS.
Step-by-Step Guide on Adding Discord as a Source in OBS
As noted earlier, you’ll need the desktop app and Discord Streamkit to add Discord as a source on OBS.
The steps to doing this are as follows:
- Open your PC’s browser and go to streamkit.discord.com/overlay.
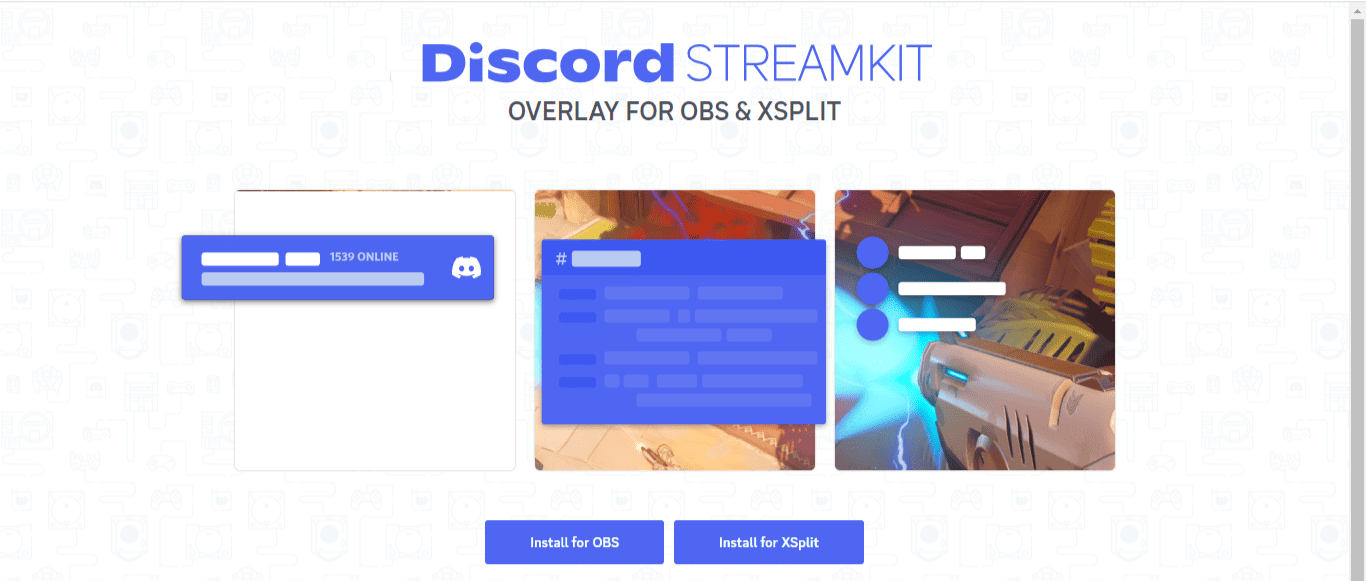
- Click “Install for OBS.”
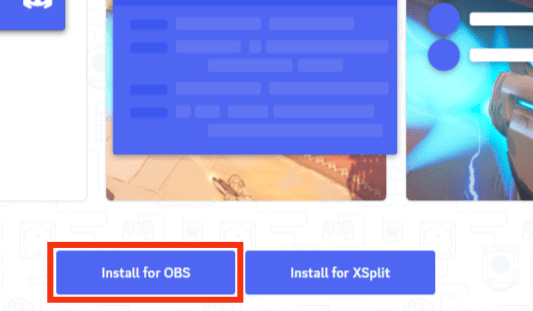
- Your Discord app will open. Click “Authorize” at the bottom of the page.

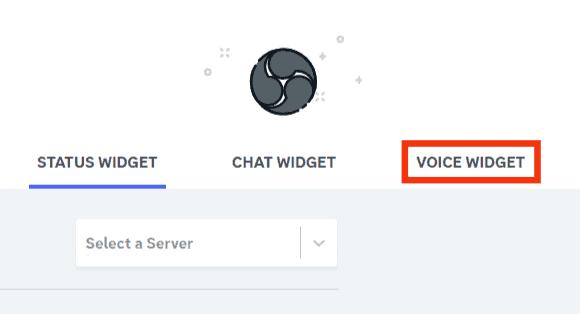
- Revert to the Streamkit page and choose the Discord source you want to add to OBS. It can be chat or voice. We’ll use the Voice Widget example. Click “Voice Widget.”
- Select the server for voice permissions.

- Select the voice channel.
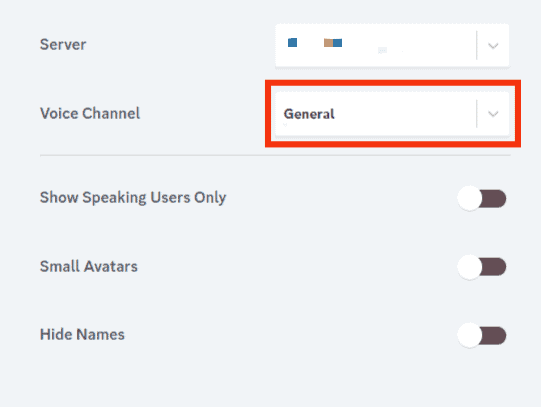
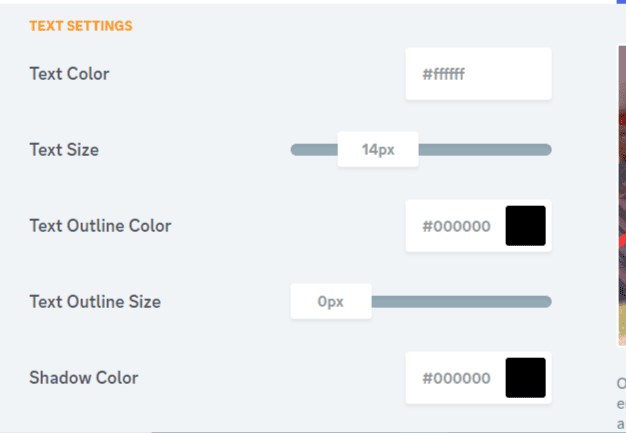
- Adjust text or display settings to your preference.
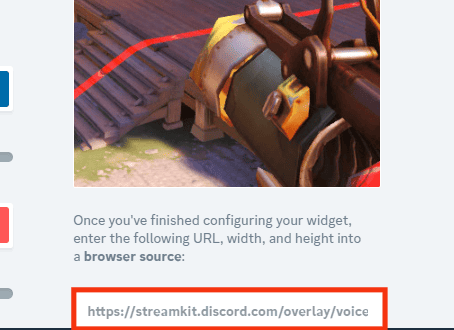
- Copy the Voice Widget URL in the text field on the lower-right side of your screen.
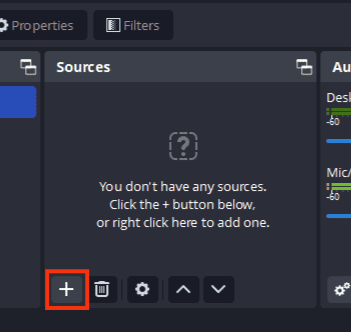
- Open OBS Studio.

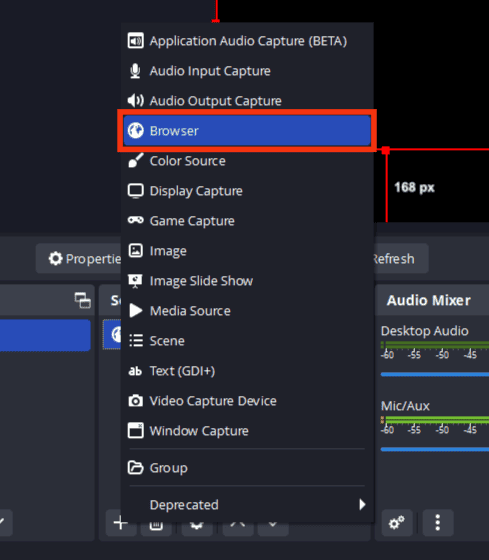
- Click on the plus icon at the bottom of the “Sources” window.
- Click on the “Browser” tab in the drop-down menu.
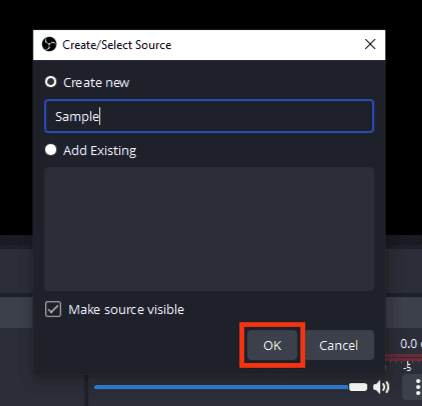
- Enter a name under the “Create new” option.

- Click “OK.”
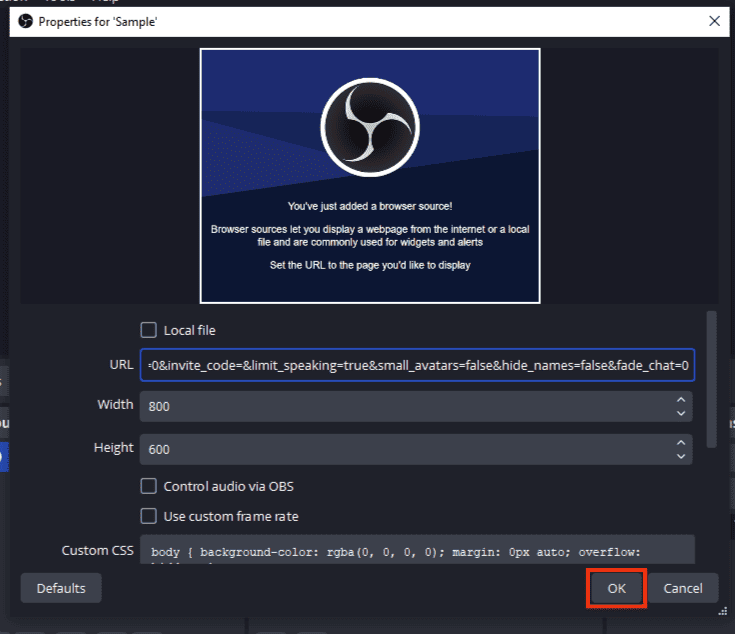
- Paste the Voice Widget link you copied in the “URL” box.
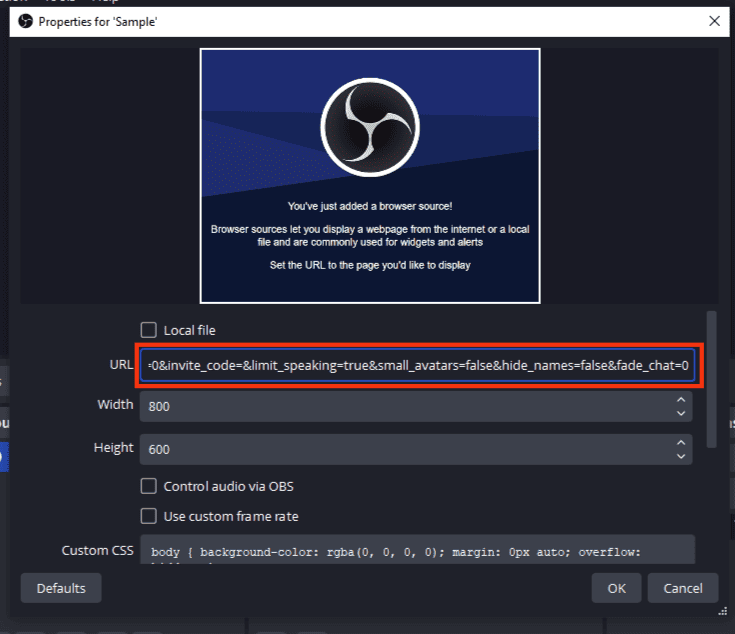
- Click “OK” to save changes.
Please note that the same steps apply to adding a chat or status widget instead of a voice.
Discord’s streaming feature is one of the reasons this app is popular with creatives and gamers alike. Besides being easy to use, it gives you control over your server’s content and channel functionality.
Additionally, it makes it easy to integrate it with tools like OBS Studio that provide multiple functions and improve the viewer’s experience.
Adding Discord as a source, whether video or audio, can help you better engage with your audience, as they can participate in your stream in real time.
Summary
OBS Studio is a tool Discord users use to record and live stream.
It has various features, including audio and video capturing, webcams, capture cards, and many more.
Adding Discord as a source in OBS is an excellent way to ensure better engagement with your audience as you see chats in real-time, depending on the source you add.
Remember you need to go to the Discord Streamkit page to add a Discord source in OBS.