Most millennials and zoomers have grown together with Facebook. Just like we don’t want to share our every childhood memory, we don’t want to show all those embarrassing teenage pictures to the world.
But Facebook is full of them! So, how to get rid of multiple photos on Facebook?
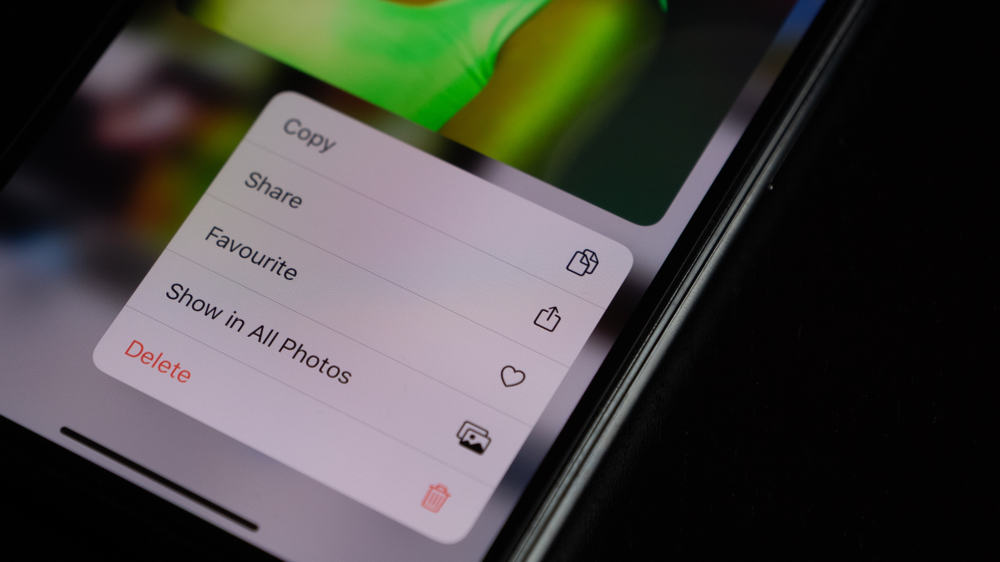
To delete photos on the Facebook app, you must go to your profile page and open “Photos”. Next, go to “Uploads” and select the photo you want to delete. Click on the three dots option and tap “Delete photo”. Confirm that you want to delete the picture, and it will be deleted.
However, do you know how to delete albums? What about the desktop site, can you delete pictures from there? And how far can you go with deleting? Scroll down to learn more.
How To Delete Multiple Photos on Facebook Using a Desktop Site
One limitation of Facebook’s delete option is that you cannot mark and mass-delete photos. You either have to delete one picture at a time or entire albums, even if you created them and not Facebook.
Step #1: Log In to Your Facebook Site
Go to the Facebook site on your desktop. If you have not logged in before, you will be required to type in your email address and password first. Otherwise, you will directly land on the “News Feed” page.
Step #2: Go to Your Profile
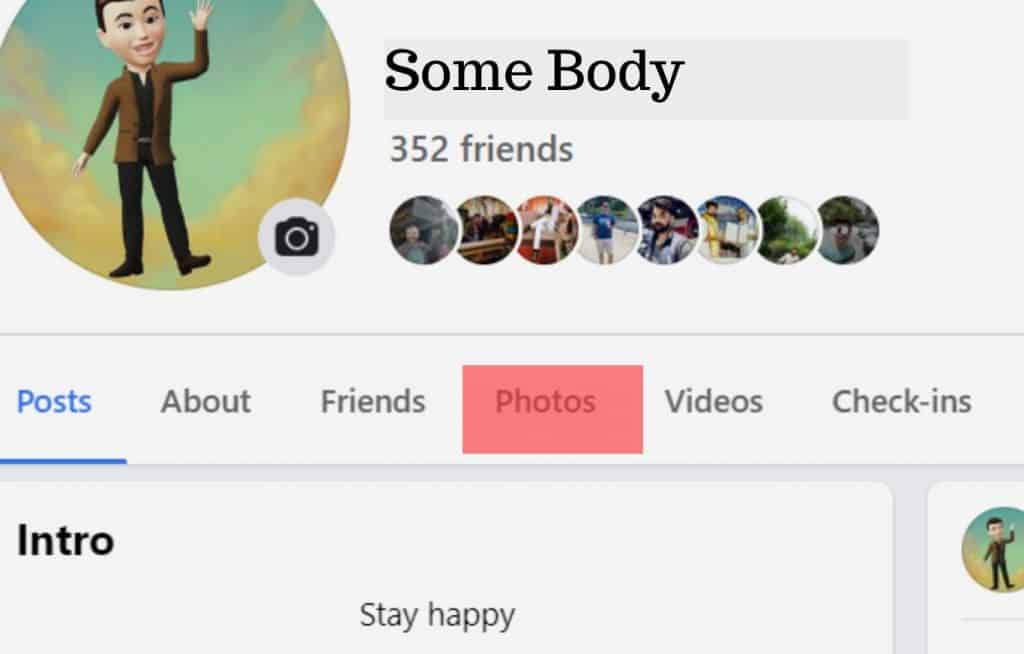
In the top left corner, you will see your profile picture. Click on it and then tap on your name. You will be directed to your profile page.

Step #3: Open Photos
Below the cover and profile picture, you will see a series of options, the first being “Post”. Click on “Photos” and open “Your Photos.” All the photos you have uploaded on Facebook till now will appear.
Step #4: Click on the Pencil Icon
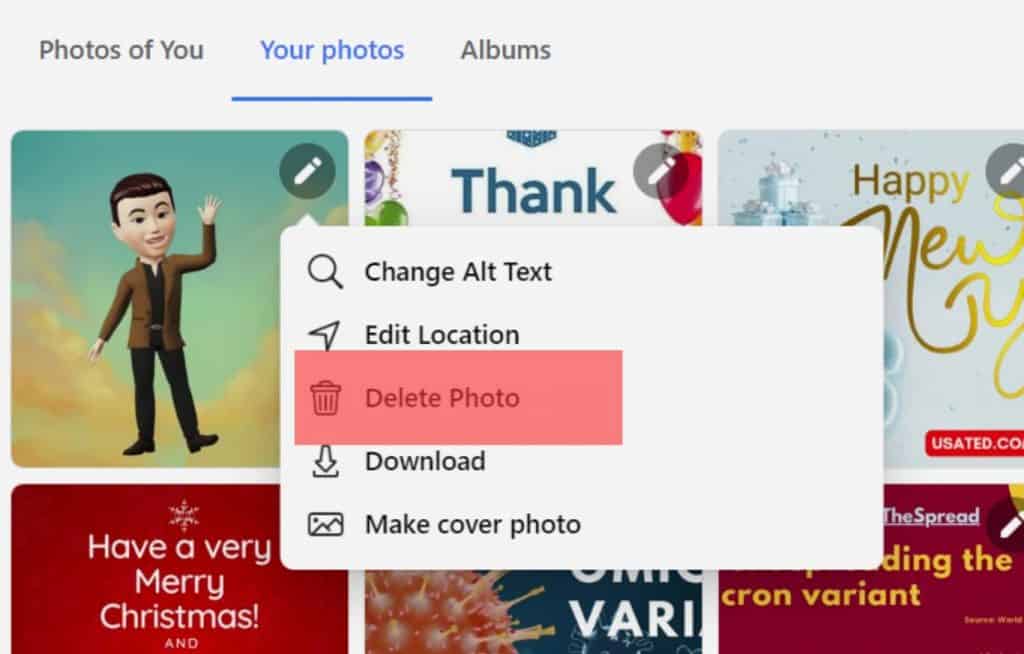
Hover your mouse over the photo you want to delete. Click on the edit option (the pencil icon) in the top right corner, and a drop-down menu will appear. The third option from the top will be to delete photos.
Step #5: Wipe Out Photos or the Whole Album
Select the “Delete photo” option, and tap “Delete” when prompted. The picture will vanish from your uploads. Next, move the cursor to the next photo you want to delete and follow the same steps.
You can also delete albums on Facebook. For this, you must go to the “Albums” category beside the “Your Photos” option. Click on the three dots option in the upper right corner.
The third option will be “Delete Album”. Tap on it and then confirm to delete the album. You will end up deleting a bunch of embarrassing pictures altogether.
You can only delete the photos you have uploaded or the albums you have created. Therefore, the pictures in the “Photos of You” category cannot be deleted. Also, the albums made by Facebook (e.g., profile pictures or cover photos) cannot be removed.
How To Delete Multiple Photos on Facebook Using Mobile App
Step #1: Open Your Facebook App

Go to your Facebook app and log in if required. The News Feed will open up.
(Avoid getting distracted by a new post.)
Step #2: Go to Your Profile
The Android users will see their profile picture in the top left corner. For iPhone, it will be at the bottom. Tap on it, and you will enter your profile page.
An alternative to opening your profile page is to click on the three bars (☰) option at the top or bottom. Next, tap on your name.
Step #3: Tap on Photos
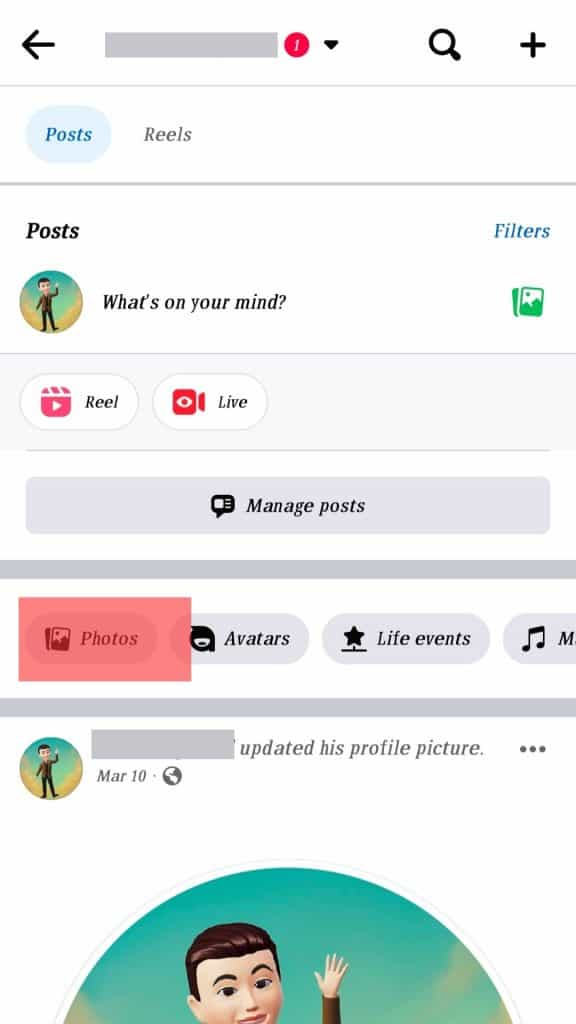
Once you have entered your profile page, you will find the photos tab below the “Post” section. Go to uploads and click the image you want to delete.
Step #4: Locate the Three Dots Option
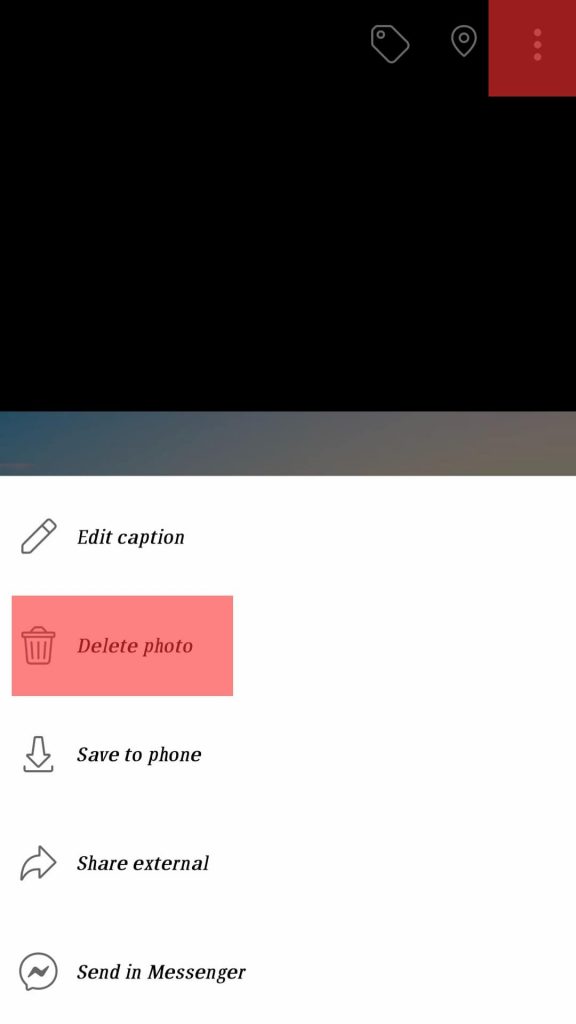
Click on the three dots arranged horizontally (for iPhones) or vertically (for Androids). A drop-down menu will pop up. The “Delete photo” option is in the second position.
Step #5: Delete Photos or the Album
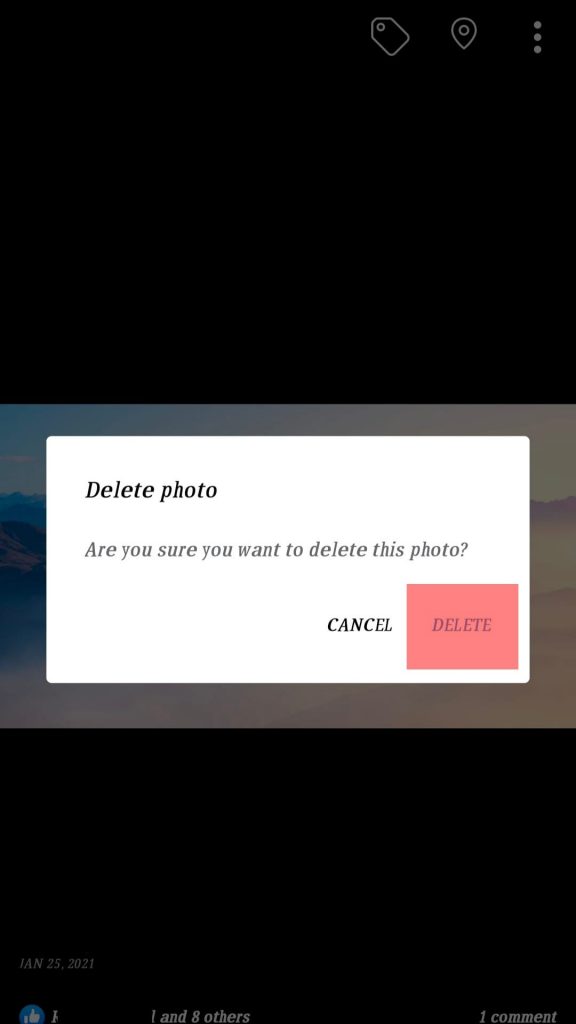
Select “Delete photo” and click “Delete” when prompted. Go to the next photo you dislike and delete following the same steps.
To delete an album you created, go to the “Albums” option. It is on the right of uploads.
For an iPhone, click the “Edit” option at the top right corner. An “X” will appear on the top left corner of every album. Tap “X” on the album you want to delete. Press “Delete” to confirm, and you are done!
However, for Androids, it’s a bit different. You need to open the album you want to delete and tap the three dots option in the top right corner. Now select “Delete” and confirm. The album will be deleted.
Other Alternatives
Though you cannot delete the pictures someone else has uploaded, you can always ask for a favor privately. Tell the other person how important this is for you, and we bet most of them won’t turn down your request.
Well, some rudies might not listen. In such situations, you can block them (kidding!). You can hide the post from your timeline and remove the tag. For this, go to the post, tap on the three dots option, and select hide post or remove the tag, or both. We hope you won’t see that post again.
Wrap Up!
Deleting photos can become all-important in certain situations. Given the criticality, we have written this comprehensive post to help you in all possible ways.