When you have a Discord server with many members, you will likely create multiple roles to assign manually or automatically to the members.
Having many roles requires you have a way of categorizing these roles.
The good thing is that Discord supports creating role categories which is a good way of separating your Discord roles by moving them to their respective categories. When assigning roles, they will appear under a category.
To create role categories, start by opening your Discord account, accessing the “Server settings”, and then opening the option for “Roles”. Click the “Create new role” button, add the role name, set a custom color to make it invisible, check the permissions, and save the changes. Still, on the role name, add the special character “——” or spaces before and after the role name, save the changes, and then move the created categories upwards. Create other categories, then arrange your roles by moving them to their correct category.
This guide discusses what role categories are and why you need them. Next, we will cover the steps for creating role categories and how to assign roles from a given category to users.
What Are Role Categories in Discord?
When you have a Discord server, you must create roles to moderate the server.
For instance, when you want to have an admin to help manage the server, that’s a role you must create and assign the member. Besides, some roles are set to assign to new members or after a given period automatically.
When you have plenty of roles, adding role dividers makes your server appear professional and sets it apart. Besides, role categories make it easier to quickly locate a role based on its category when assigning members.
How To Make Role Categories in Discord
Creating a role category follows the same steps as creating roles, except for adding special characters to create a role divider for your roles.
Check out the steps to create a role category using the Discord desktop application.
- Open your Discord account using the desktop application.
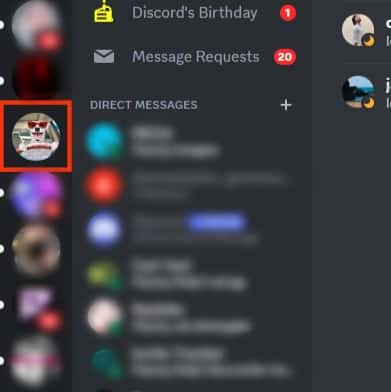
- Locate the target server on the left and click on it.
- Tap on the drop down icon next to the server’s name at top.
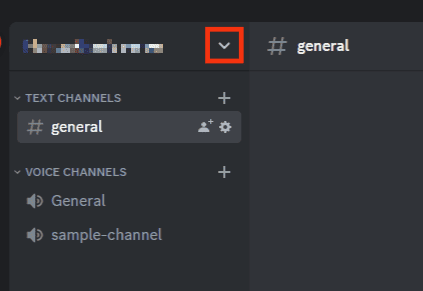
- Click on the “Server settings” option.
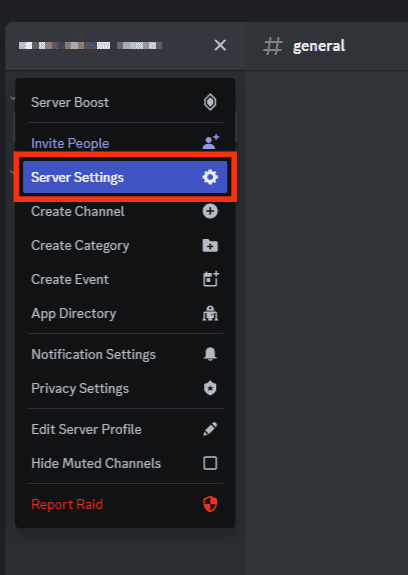
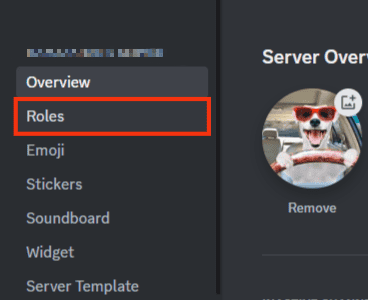
- Click on the “Roles” option.
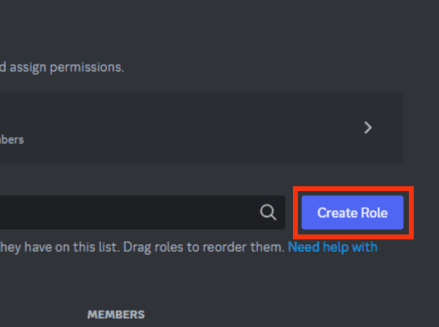
- Click on the “Create Role” button.
- Next, add the name of the role you are creating.
Ensure you add a descriptive name, as that will be the category under which other roles will fall.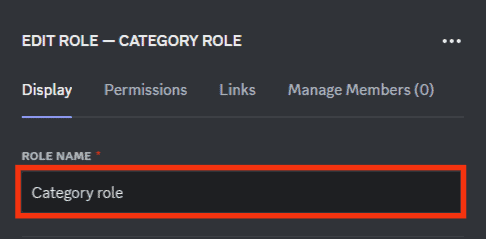
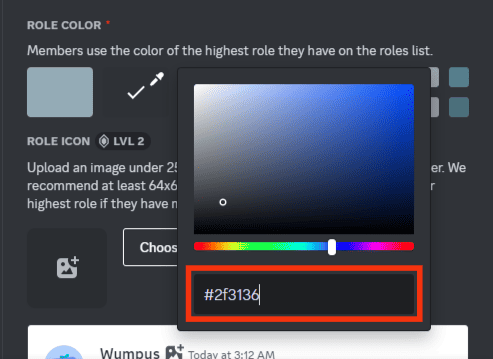
- Under “Role Color”, click on the option for custom color and set it to #2f3136.
- Click on the “Permissions” tab at the top and set the permissions the created role should have.
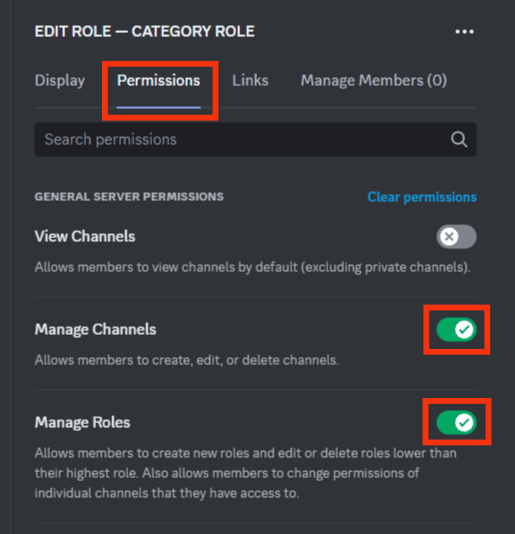
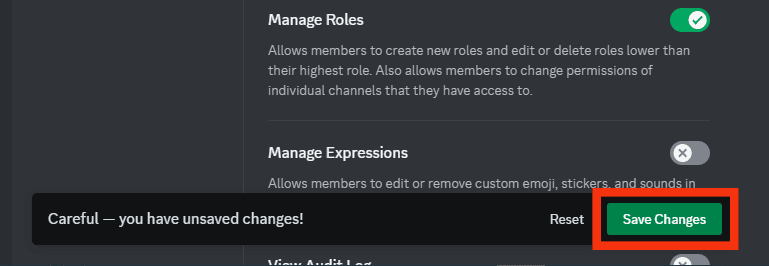
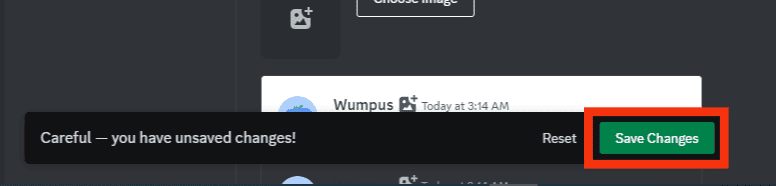
- Tap on the “Save Changes” button at the bottom.
- Go back to the “Display” tab, copy this character “──────” and paste it before and after your role name.
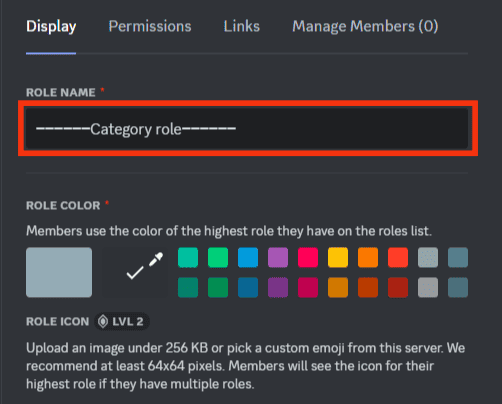
- Once you’ve edited the role name, click the “Save Changes” button.
So far, you’ve created a role category containing a divider and added a special character to make the role stand out.
Move the created role category upwards, then create other categories using the same steps. When you create a new role, you can move it to its respective role category.
For instance, if you create a role category named “Administrators”, you can create an admin role and place it under this category.
Any other administrative roles will fall under this category, such that when you want to assign the roles to members, you can quickly access the Administrators role category to assign administrative roles.
Here’s how to assign roles to members on Discord.
- Open your Discord app.
- Locate and click on the targeted server.
- Click on the drop down icon next to the server’s name at the top.
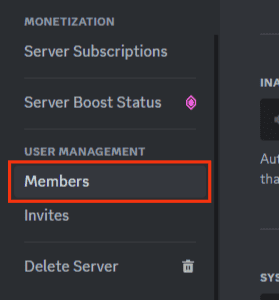
- Tap on the “Server settings” option.
- Scroll down and click the option for “Members” on the left.
- Once the “Server Members” appear, locate the target member you want to assign a new role.
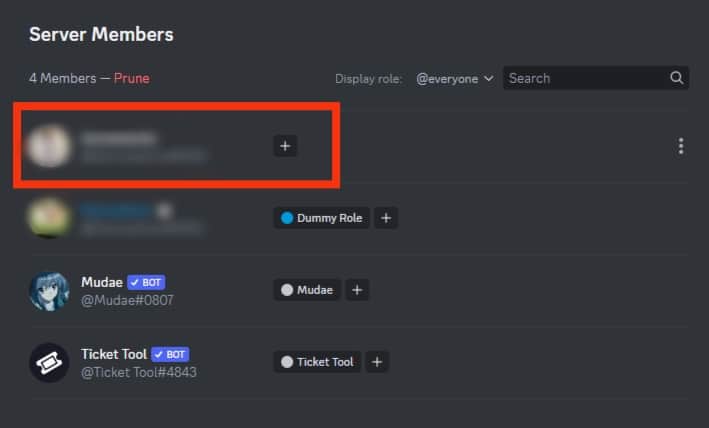
- Click the plus icon next to the member.
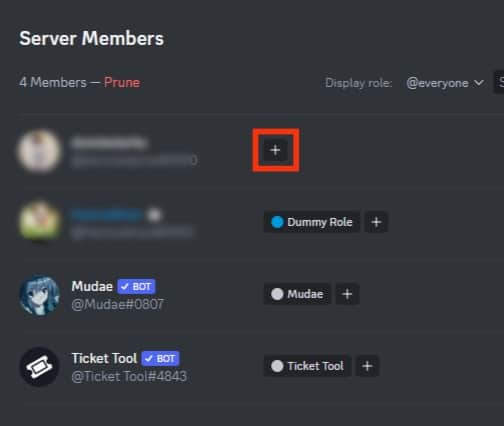
- Select the role you want to add to the member from the listed role categories.
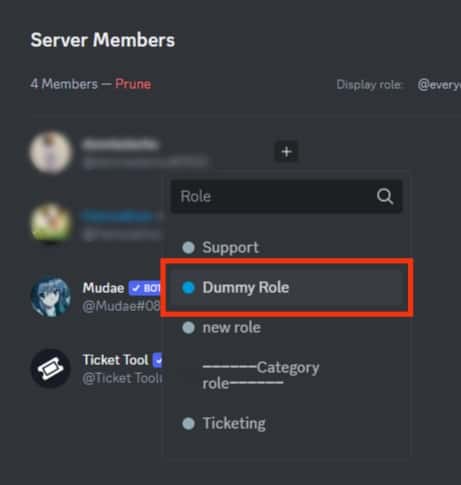
You will note Discord displays the role categories created earlier neatly so that you can quickly locate any role when you have multiple roles based on its categories.
Conclusion
Role categories are an excellent way of separating Discord roles for quick access and making your Discord roles look professional.
This guide has detailed all the steps for creating Discord role categories.
Frequently Asked Questions
Open your Discord account and access the “Roles” section. Create a new role and add special characters as dividers in its name. Set the permissions, set an invisible color, save the changes, and move the role category upwards. Lastly, add roles under it.
You must add a bot like Dyno to your server to automatically assign roles to new members. Once you do, access the Dyno bot’s site and find the “auto roles” option under the “Modules” section. Click on the settings option, set the role to assign automatically, and set the duration.