Discord is a popular social media platform people use to connect with friends, family, and people with similar interests. You might still need to familiarize yourself with the Discord server system if you’re new to Discord.
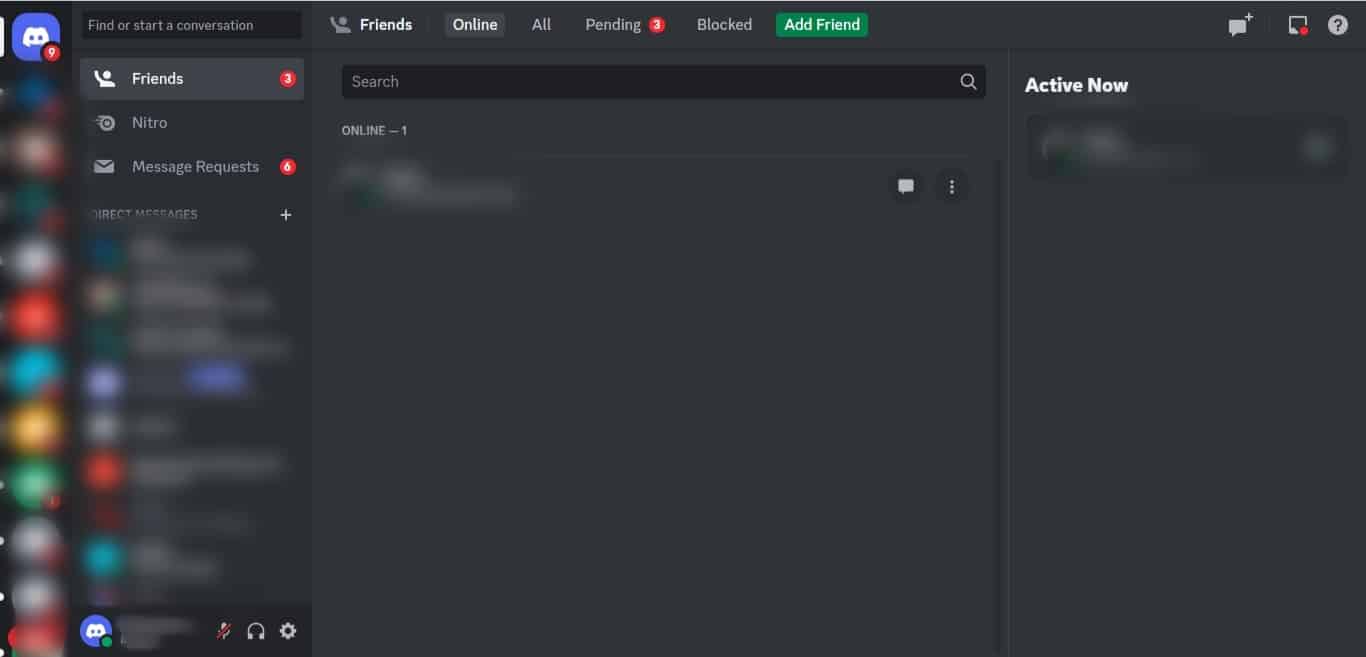
Servers are spaces made up of communities. These communities could be similar-interest groups like gamers or artists or simply friends or family. Most servers are small and rely on invitations to add members, while some are public, and any interested party can join.
Sometimes you might wonder if your server is public or private. There’s one easy way to tell if your server is public.
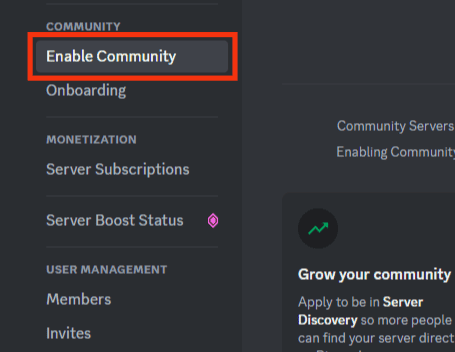
The most straightforward way to know if your server is public is to check for the ‘Enable Community’ tag in your server settings. Find the ‘Community’ section in your server settings and see if there’s an ‘Overview‘ option. This option indicates that your server is public. The server is private if there is an ‘Enable Community’ option.
Read on to learn more about public and private servers and how to make your server public.
Overview of Knowing if Your Server is Public
Setting a server to private or public depends on its purpose. If a server comprises family and friends, it’s sensible to make it private. You’ll have to send invitations to specific people to add them to the server.
If your server is community-oriented, like a group of gamers, developers, or book lovers, it’s best to make the server public. You can still make a private server public by enabling community settings.
The main difference between private and public servers is that only the creator can add members to a private server (or if someone else has permission). They share links to the server with potential members, who then click to join.
Private servers are excellent for closely-knit communities that don’t need public participation. They are also excellent at avoiding spam and inactive accounts.
Public servers, on the other hand, are open to all users. The creator allows members to share links to join the server. Links to public servers are also available on the internet and other social media apps. If you’re new to Discord, you can discover public servers in many interesting niches by searching Disboard, a public server listing.
Even though public servers are essential to establishing a well-founded community of particular interest, they are susceptible to bots and malware attacks. Scammers infiltrate public servers and create malicious links that help them steal your personal information.
If your Discord server is public, ensure you establish server requirements like email verification to prevent bots and spammers from joining your server.
Next, we cover how to check if your Discord server is public.
Step-by-Step Guide on Checking if Your Discord Server is Public
You can verify your server is public by checking the community section in settings. Follow the steps below:
- Open Discord on your PC.
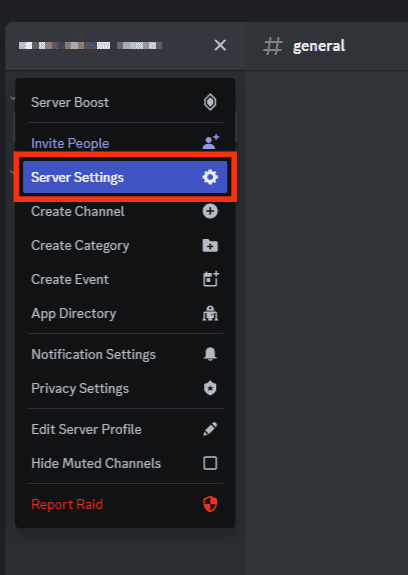
- Select the server from the left navigation.
- Click on the drop down icon next to the server’s name at the top.
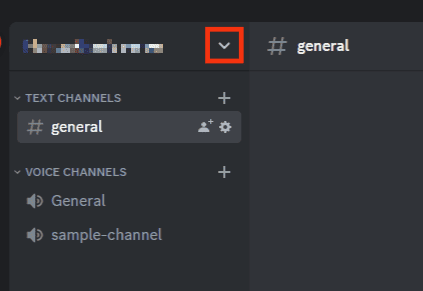
- Select ‘Server Settings‘ from the menu.
- Find the ‘Community‘ section from the left navigation.
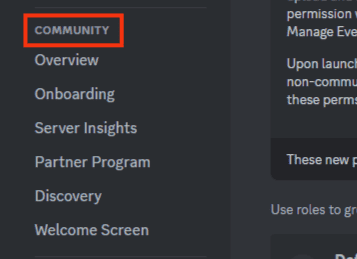
- Ensure there’s an ‘Overview‘ option.
- Seeing the ‘Overview‘ option indicates your server is public.

- If you see an ‘Enable Community‘ option, your server is private.
- Seeing the ‘Overview‘ option indicates your server is public.
How To Make Your Server Public?
You can make your server public by following the steps below:
- Launch Discord on your PC.
- Click on the server you want to make public.
- Click on the drop down icon next to the server’s name at the top.
- Click on “Server Settings”.
- Select “Enable Community” from the left navigation.
- Click on “Get Started”.
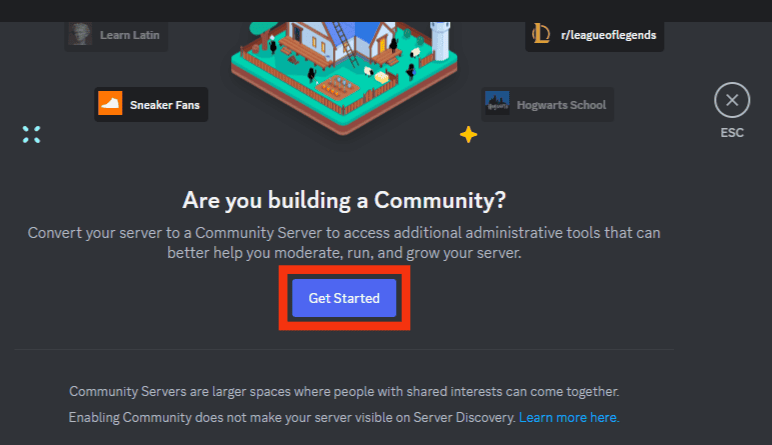
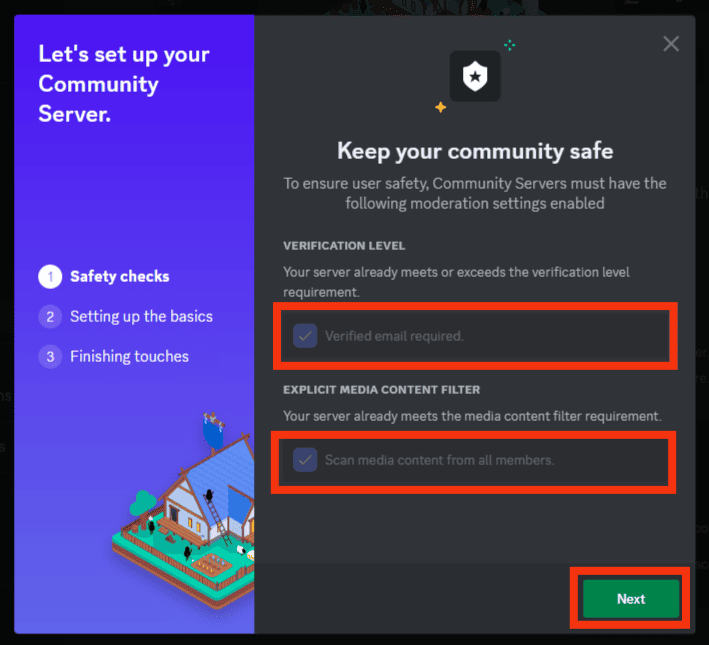
- Verify the moderation settings and click “Next”.
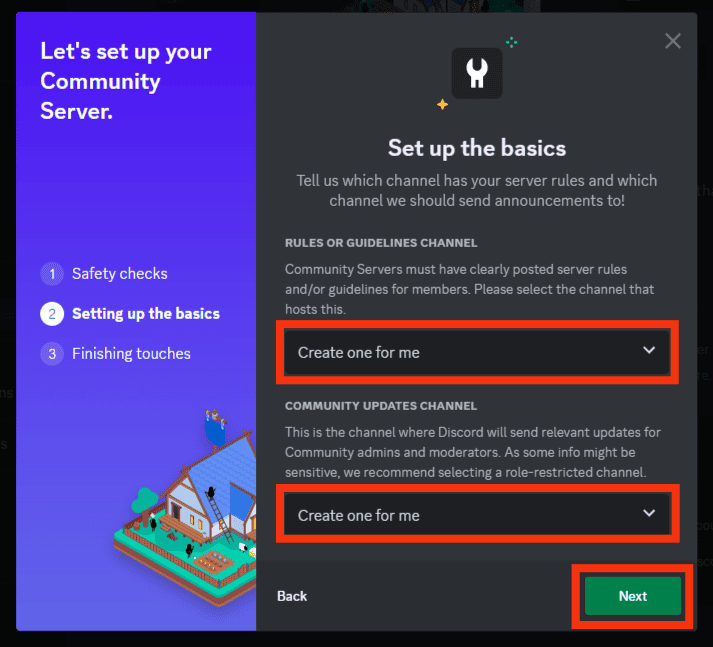
- Review the setup basics, then click “Next”.
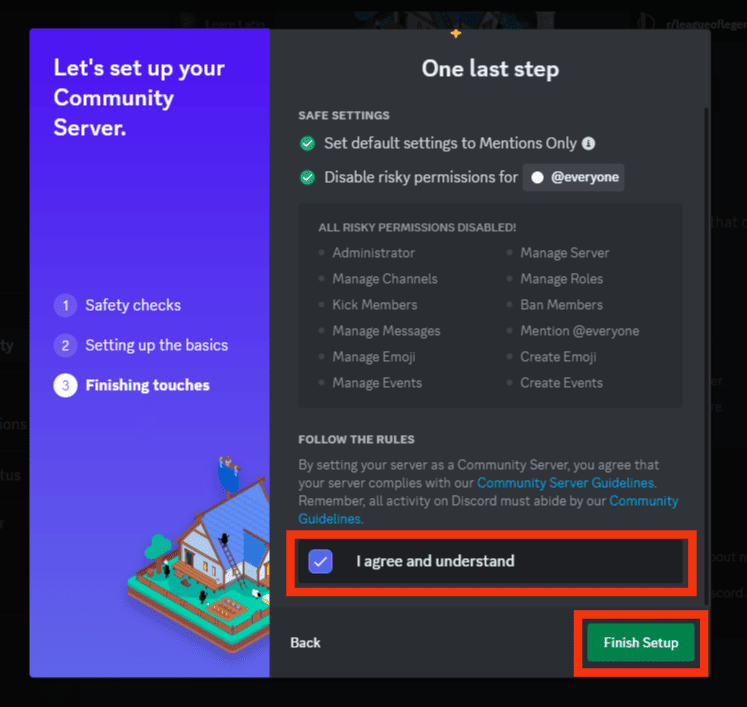
- Tick the “I agree and understand” box, then click on “Finish Setup”.
Your server is now public.
How To Make Your Server Private?
In case you wish to revert to private, follow the steps below:
- Open Discord on your PC.
- Click on the server you want to make private.
- Click on the drop down icon next to the server’s name at the top.
- Click “Server Settings”.
- Scroll down to “Community” in the left navigation.
- Click on the “Overview” tab.
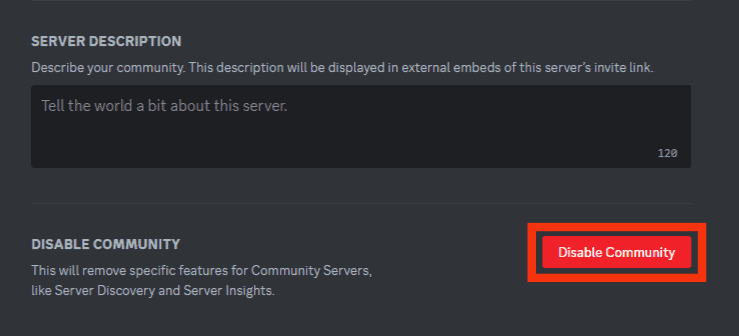
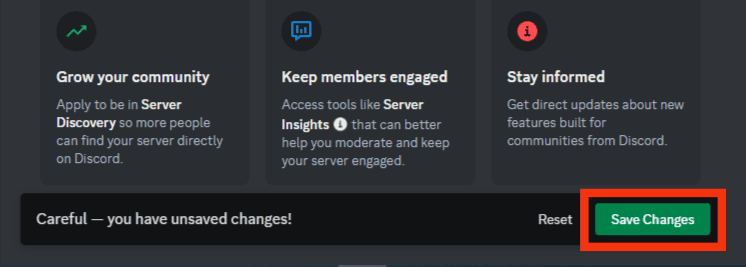
- Scroll down and click on “Disable Community” at the bottom.
- Click the “Save Changes” button.
Summary
The best way to know whether your Discord server is public is to check if the community section option is listed as ‘Enable Community’ or ‘Overview.’ If it’s listed as ‘Overview,’ your server is public.
Private servers are ideal for small communities of friends and family, while public servers are best for similar interest groups like artists, gamers, or developers.