
The truth is, some of our Facebook photos don’t look so great anymore.
Even though Facebook has been around for some time, simple processes like hiding all photos can seem complicated.
If you’re looking for a way to hide your Facebook photos for privacy or other reasons, this article is for you.
To hide your Facebook photos using a PC:
1. Navigate to your Facebook profile.
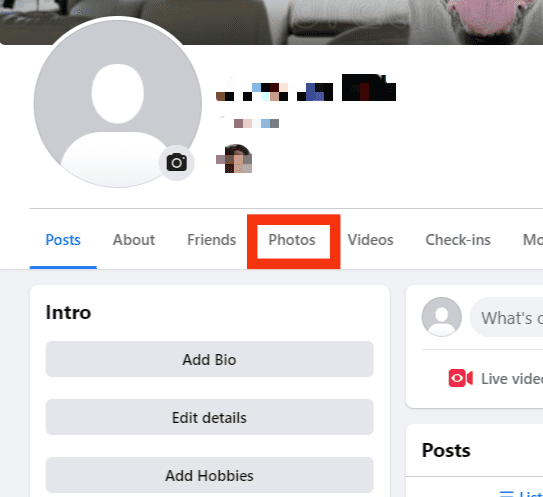
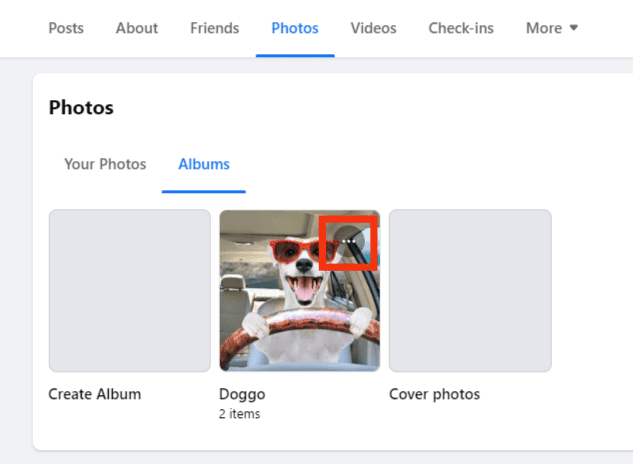
2. Click on the “Photos” tab.
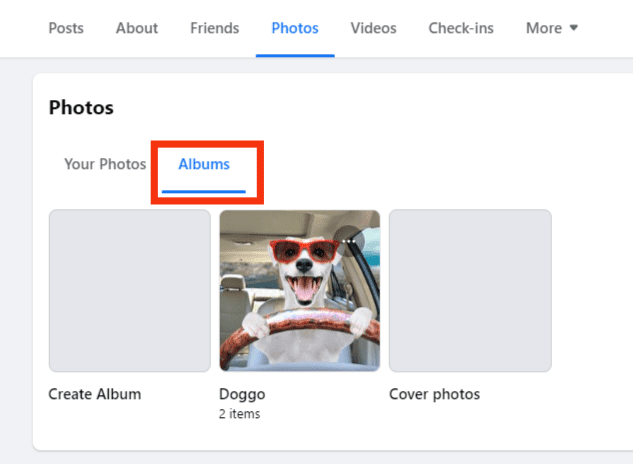
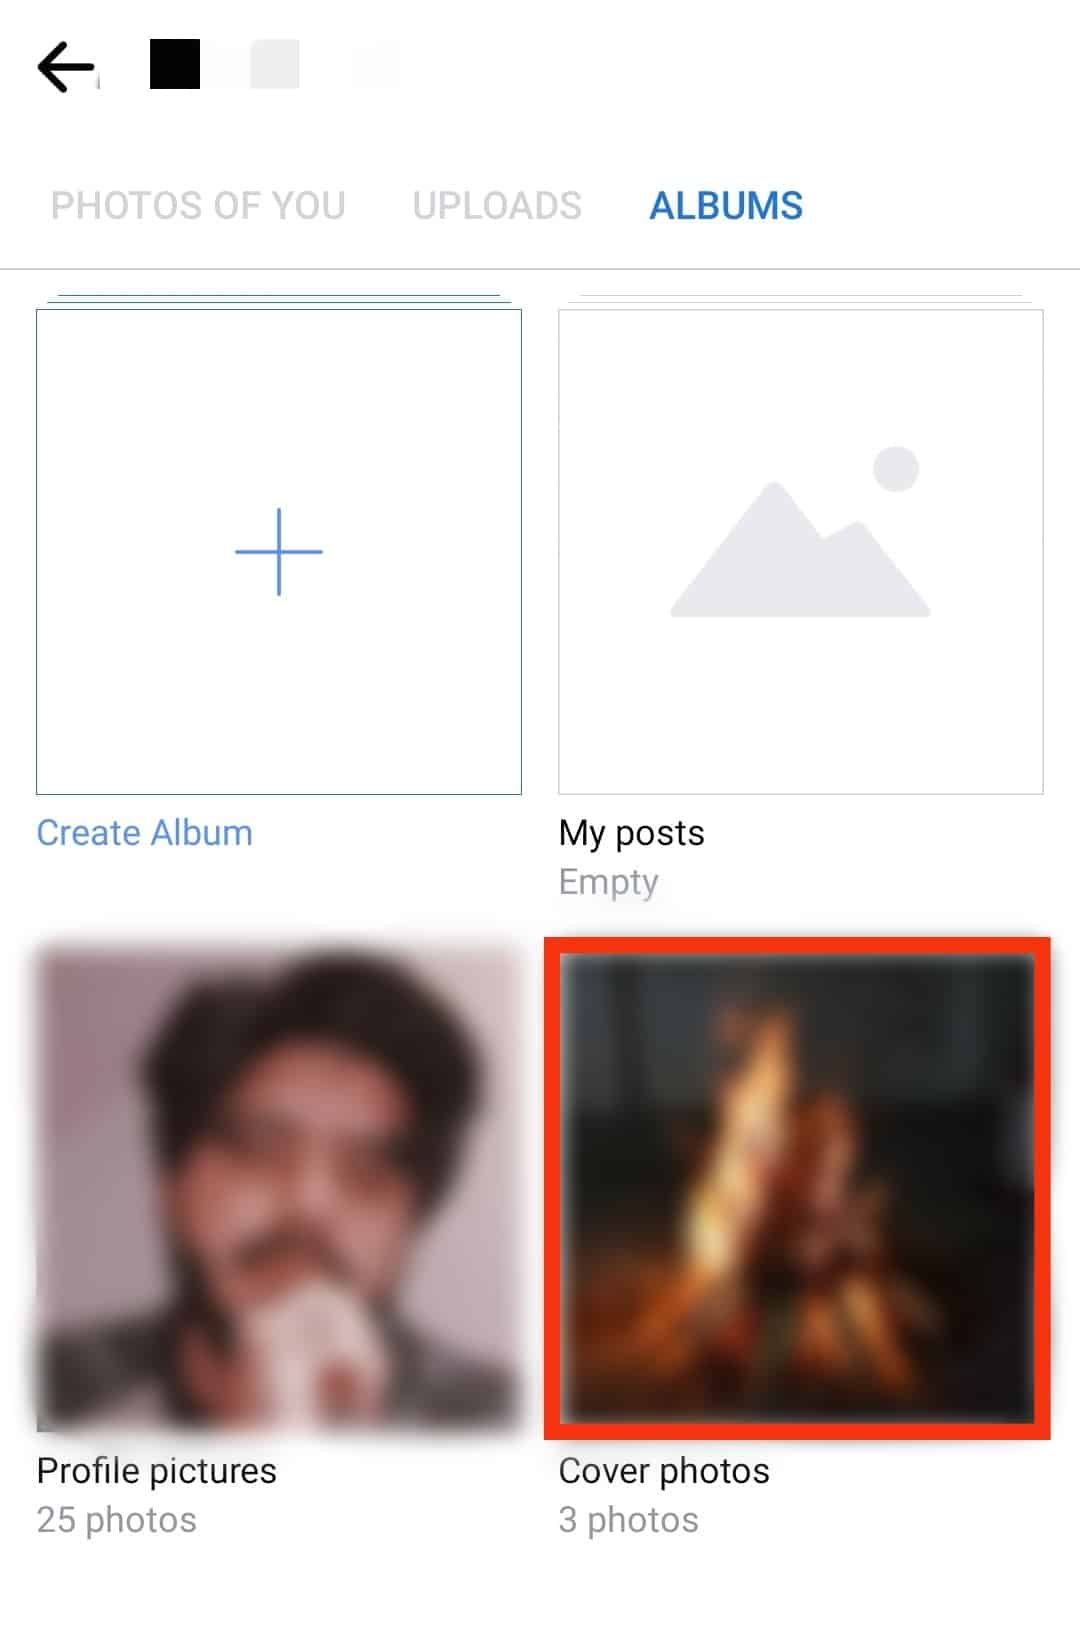
3. Click on the “Albums” tab.
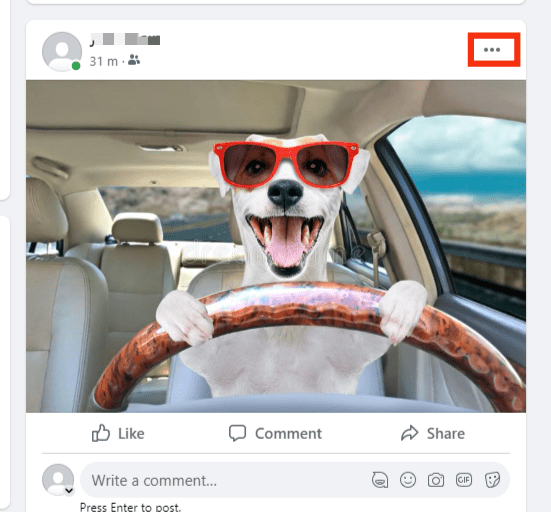
4. Click on the three dots at the top right corner of the album you want to hide.
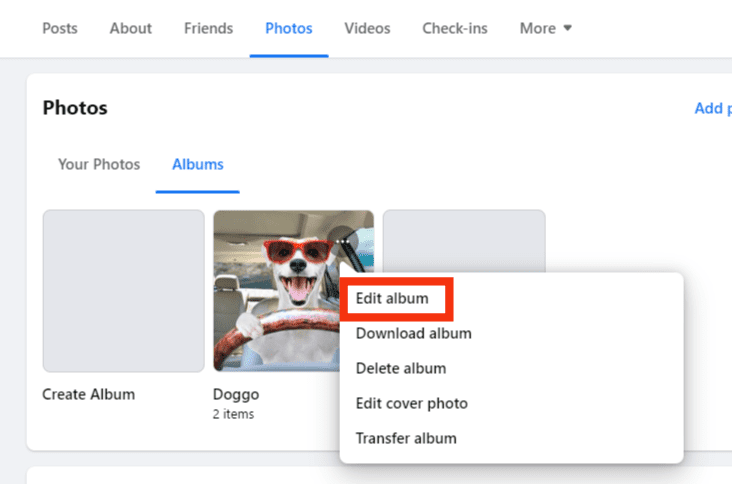
5. Select “Edit album” then “Only me” as a privacy option.
To hide Facebook photos using the Facebook app:
1. Navigate to your Facebook profile.
2. Scroll down and tap on “Photos.”
3. Tap on the “Albums” tab.
4. Select the album you want to hide, then tap on the three dots at the top right corner.
5. Select “Edit album” then “Only me” as a privacy option.
Read on to learn more about hiding all your photos on Facebook.
Overview of Hiding All Photos on Facebook
When looking to hide all your photos on Facebook, it’s essential first to learn the difference between the various photo privacy settings on Facebook.
Essentially, hiding photos on Facebook enables a privacy setting that prevents the public from viewing them on your wall or in your pictures section.
But, if you don’t have the correct information, you can sometimes mistake archiving or removing photos for hiding.
Archiving photos on Facebook limits who sees the photos by transferring them to the archive section. Only you can see your Archived Facebook photos.
Archiving photos differs from hiding because you don’t have audience selection options. But, when hiding Facebook photos, you can choose who to hide the pictures from, between the public and friends, or keep them to yourself.
Removing Facebook photos, on the other hand, is permanently deleting the images, so they no longer exist on the Facebook app.
Next, we delve into the exact steps to hiding all photos on Facebook.
Step-by-Step Guide on How To Hide All Photos on Facebook
You can hide your photos on the mobile app and the web version. We’ll explain both below.
On a PC
Follow the steps below to hide your photos on Facebook using a PC:
- Log into your Facebook account.
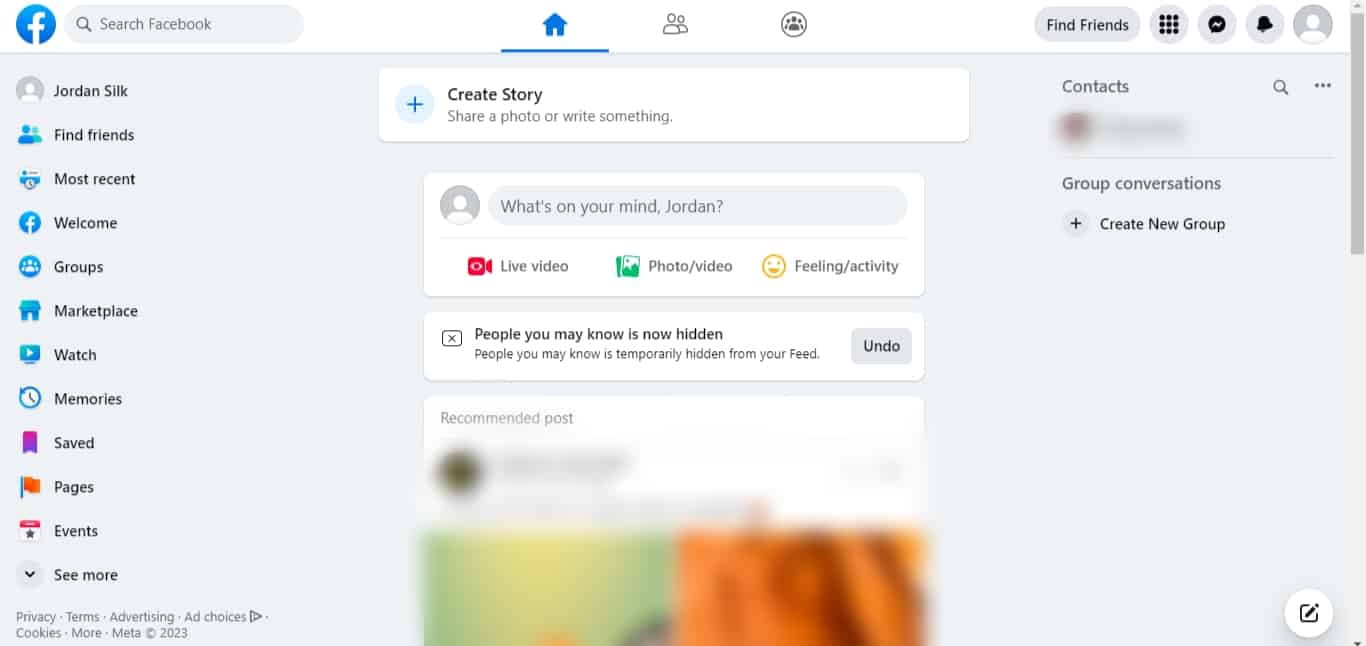
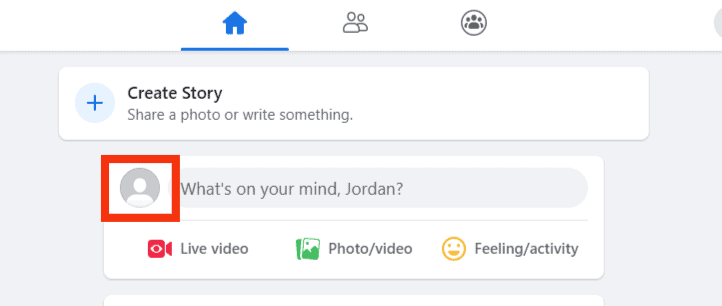
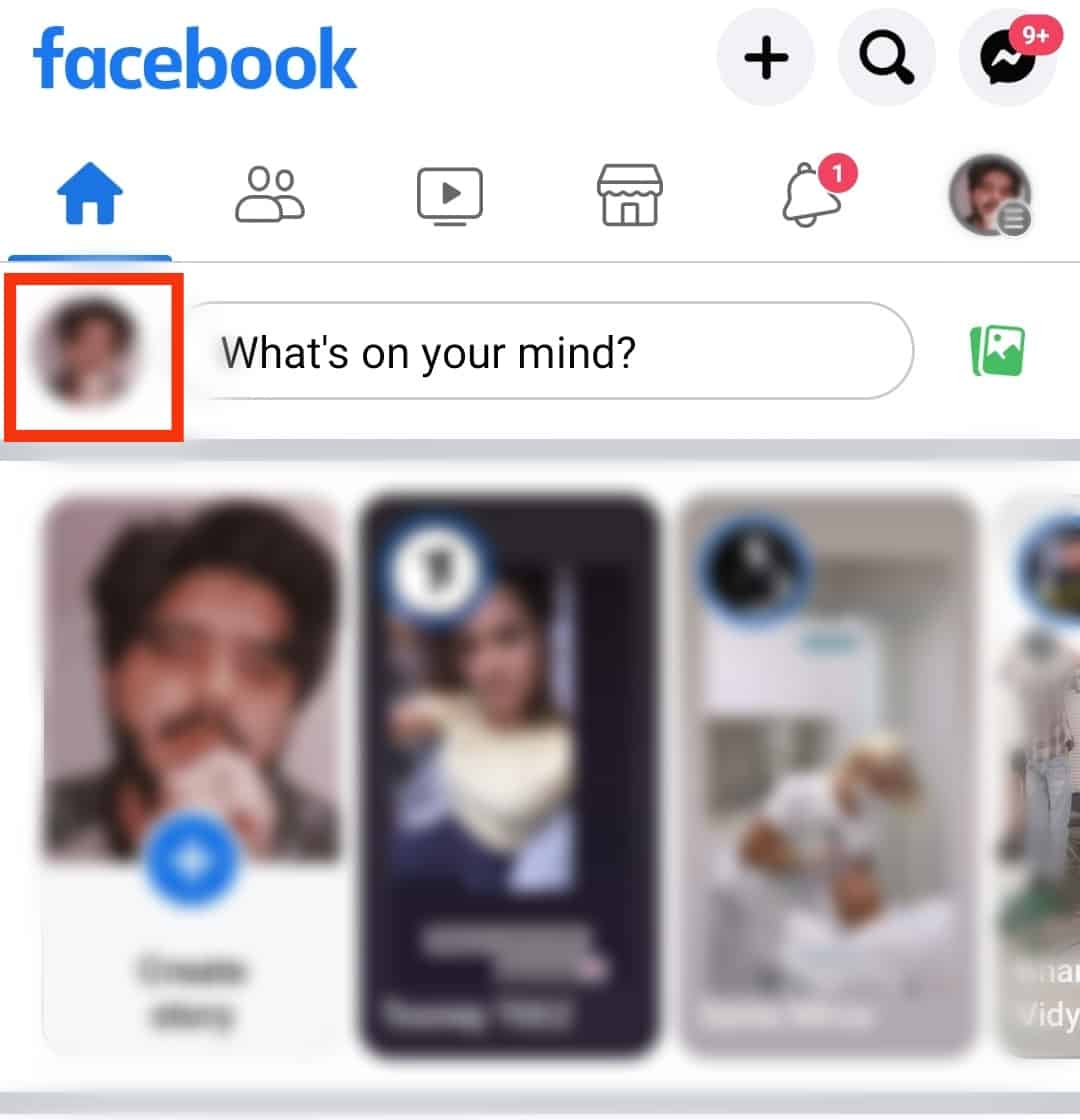
- Click on your profile picture next to the ‘What’s on your mind?’ text box.
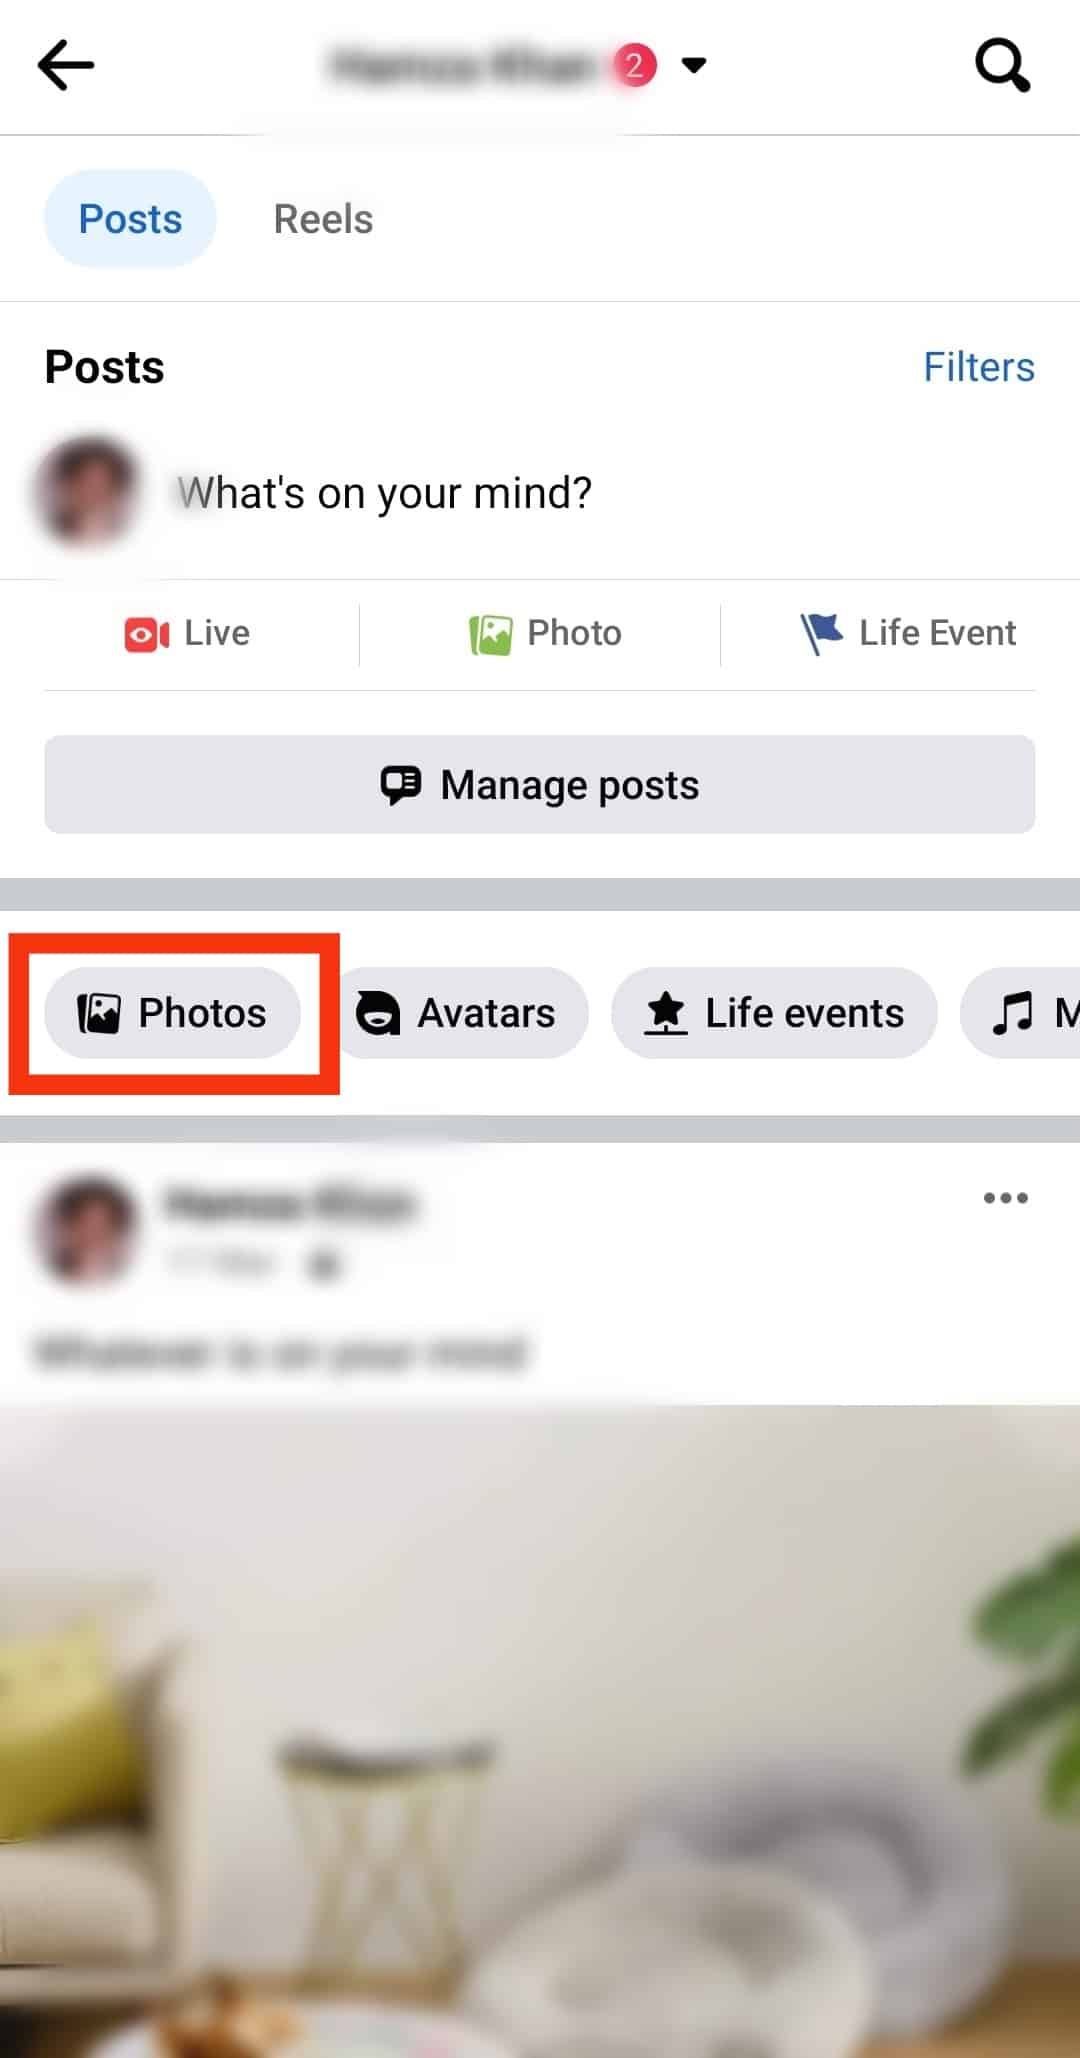
- Click on the “Photos“ tab.
- Under “Photos,” tap on the “Albums” tab.
- Tap on the three dots at the top-right corner of the album you want to hide.
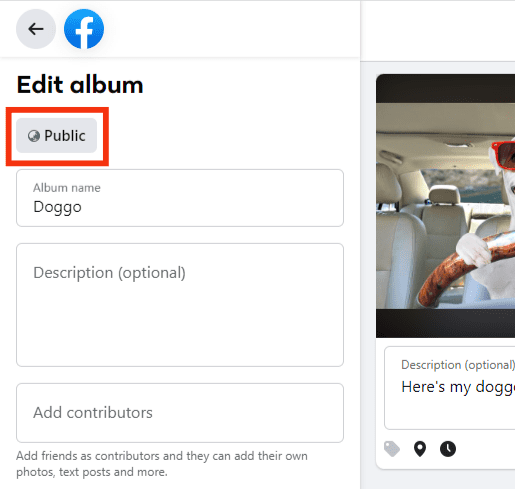
- Select “Edit album.”
- Click on the audience button in the top left corner.
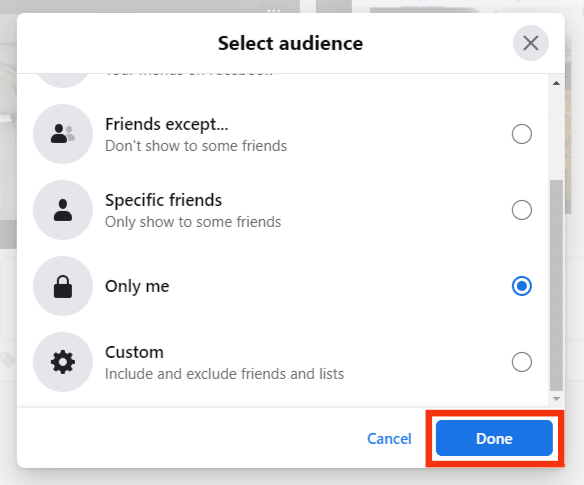
- Change the audience from “Public“ to “Only me.”

- Click on the “Done” button.
- Repeat the above steps for all Albums you want to hide.
On the Mobile App
Follow the steps below to hide Facebook photos using the Facebook app:
- Launch the Facebook app.

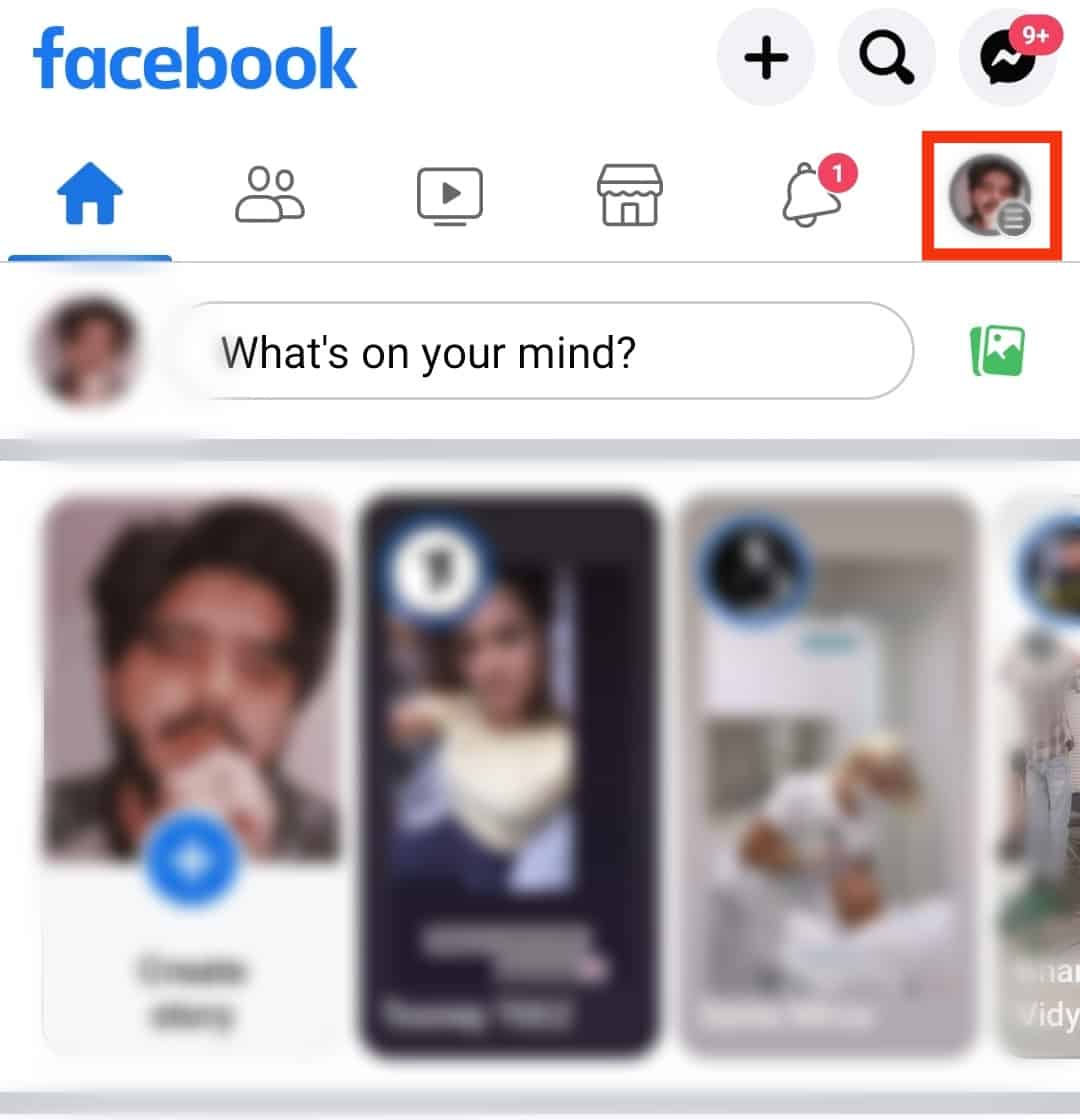
- Tap on your profile photo next to the ‘What’s on your mind?’ text box.
- Scroll down the profile and tap the “Photos” option.
- Next, you’ll see all your Facebook photos organized into different categories.
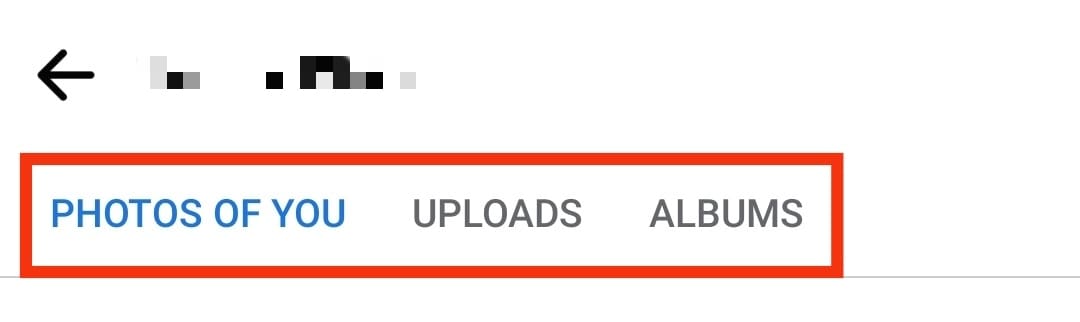
- Tap on the “Albums“ tab.
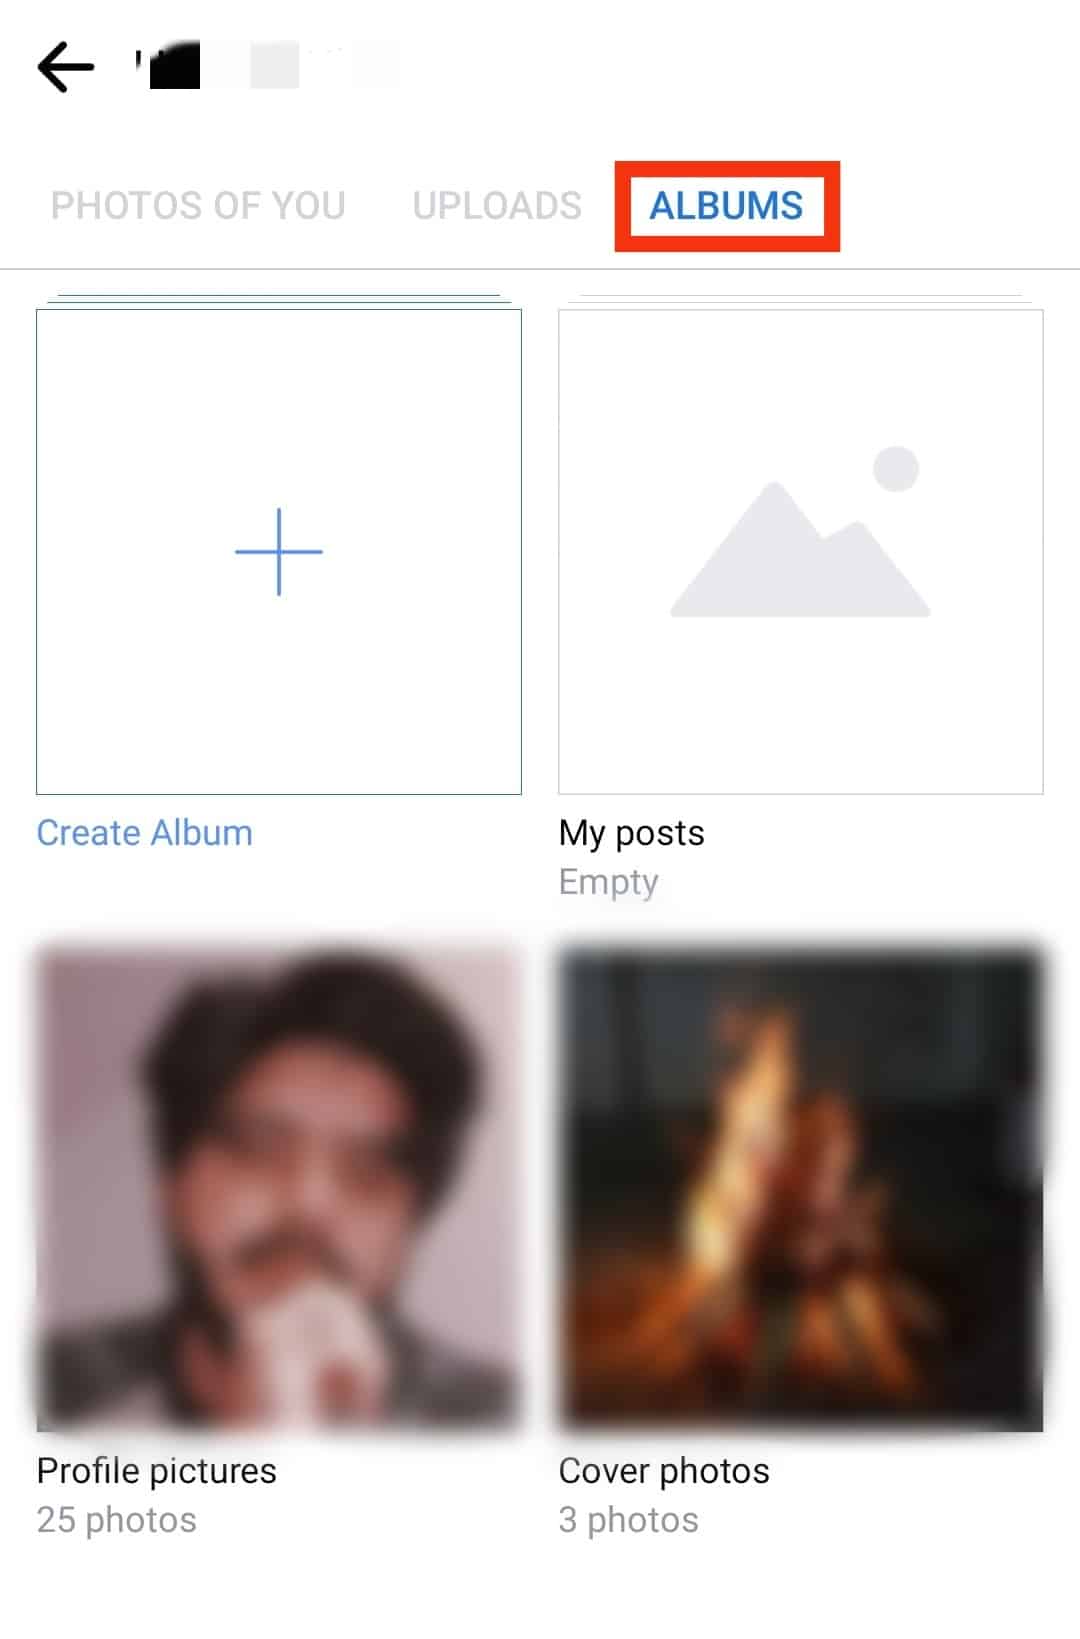
- Select the album you want to hide.
- Open each photo one by one.
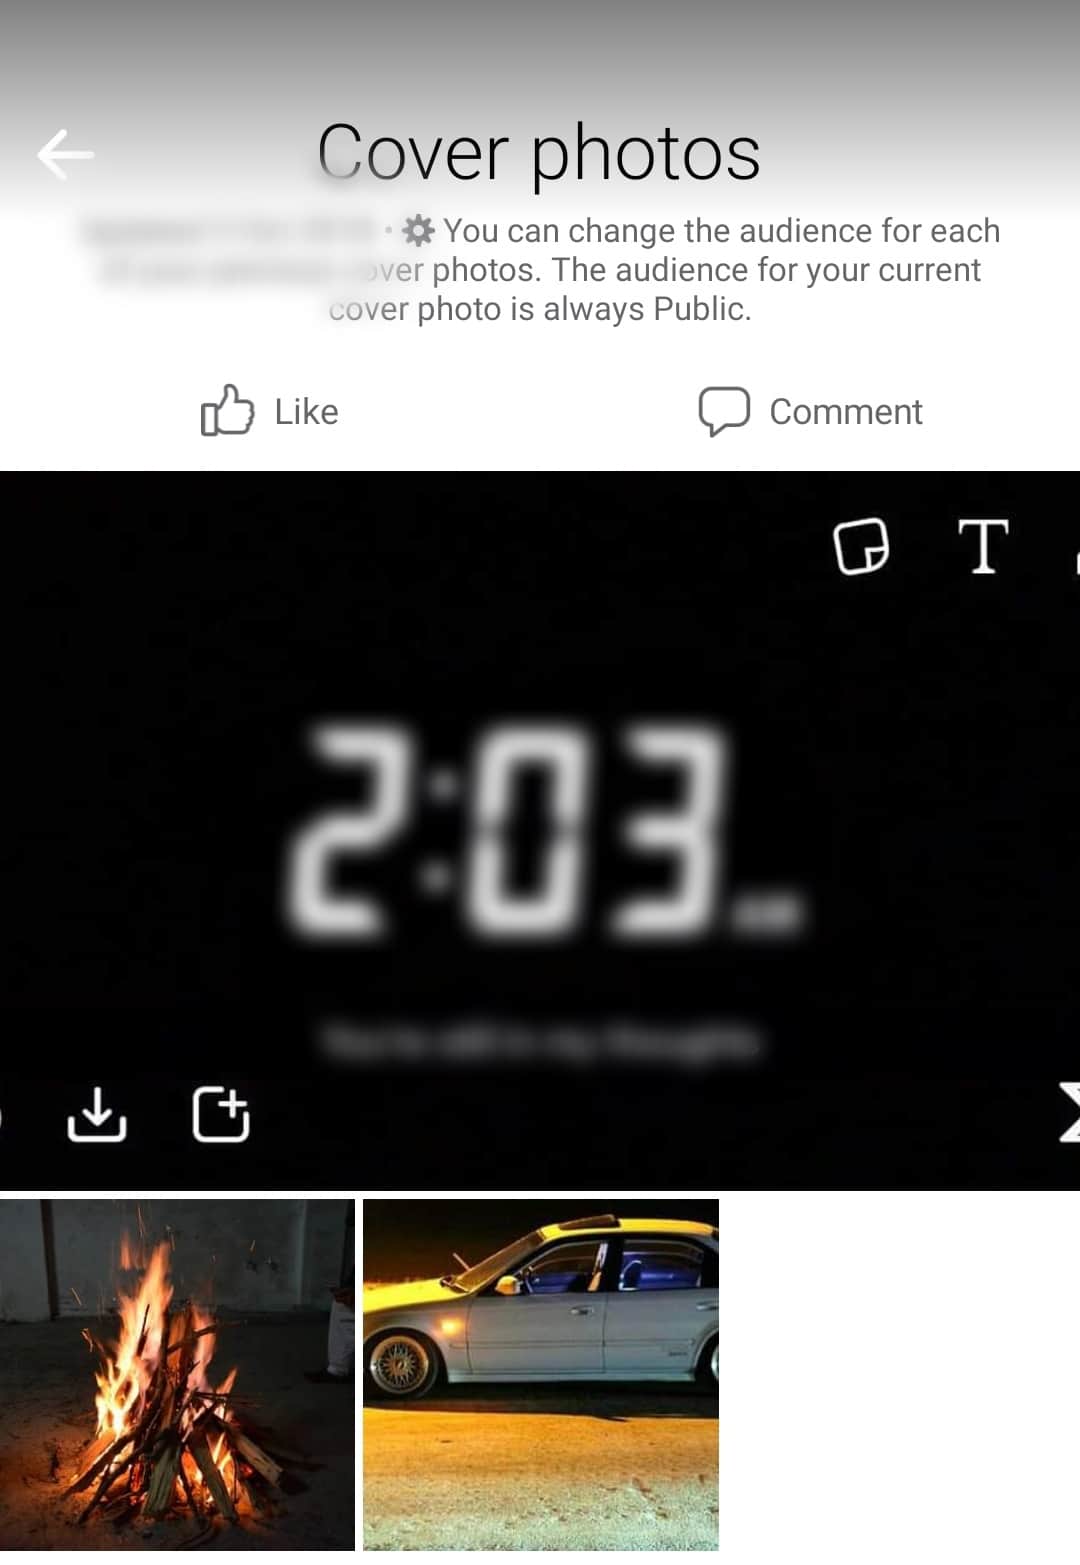
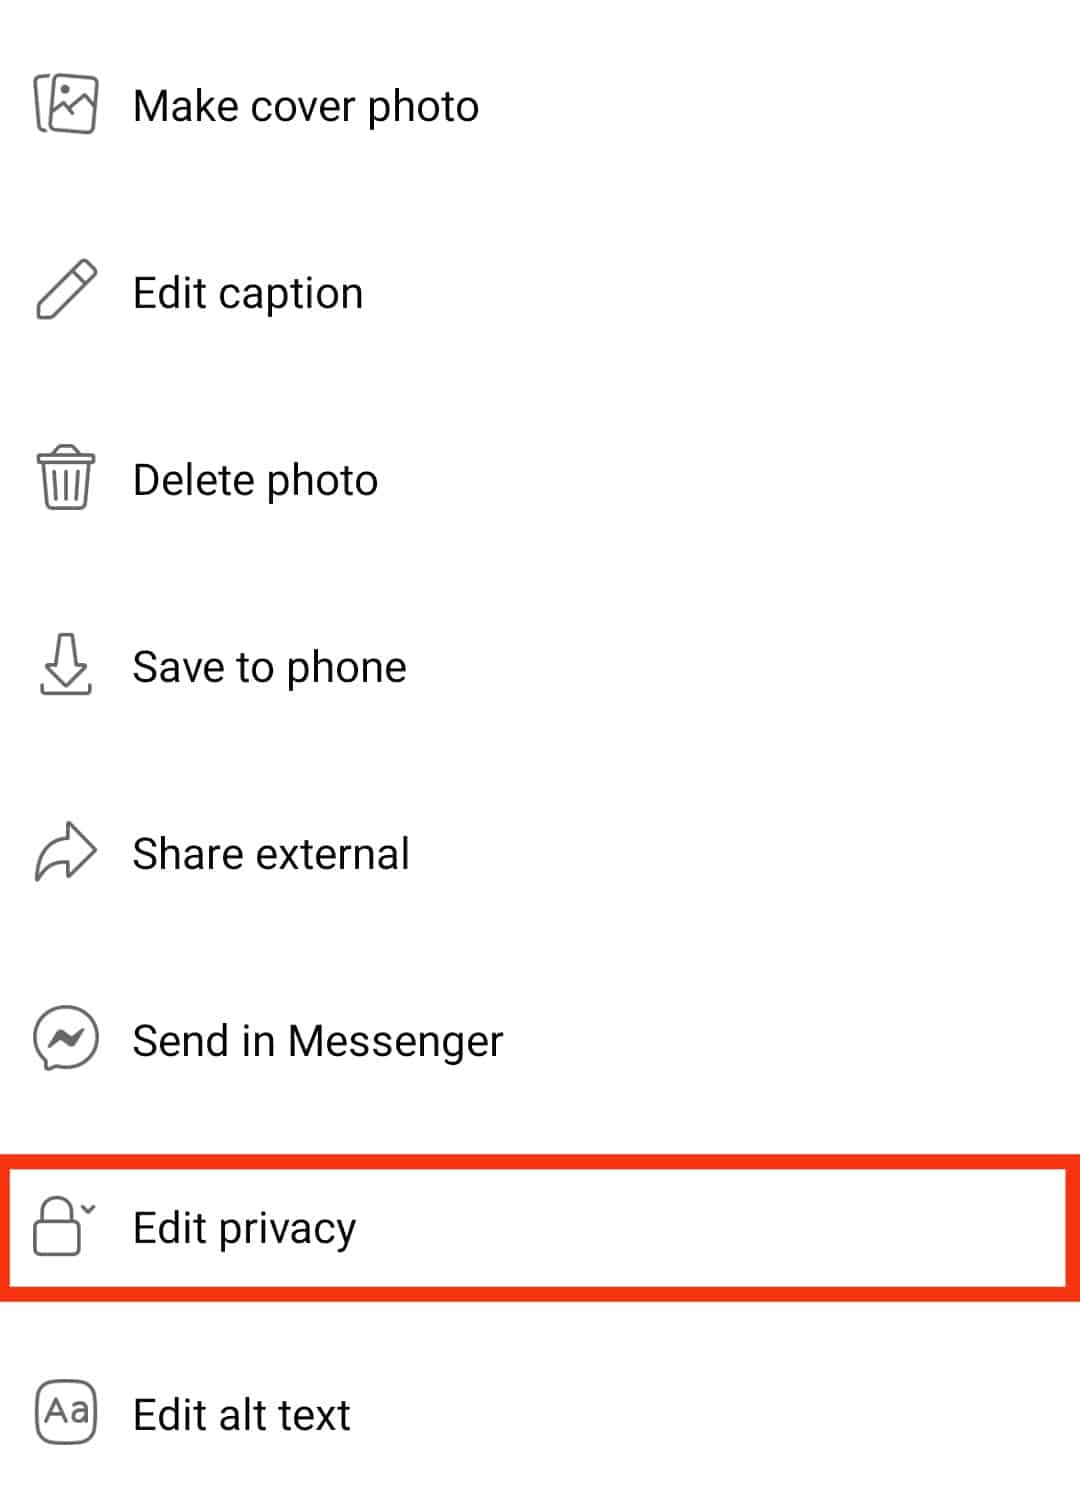
- Tap the three dots at the top-right corner of the photo.

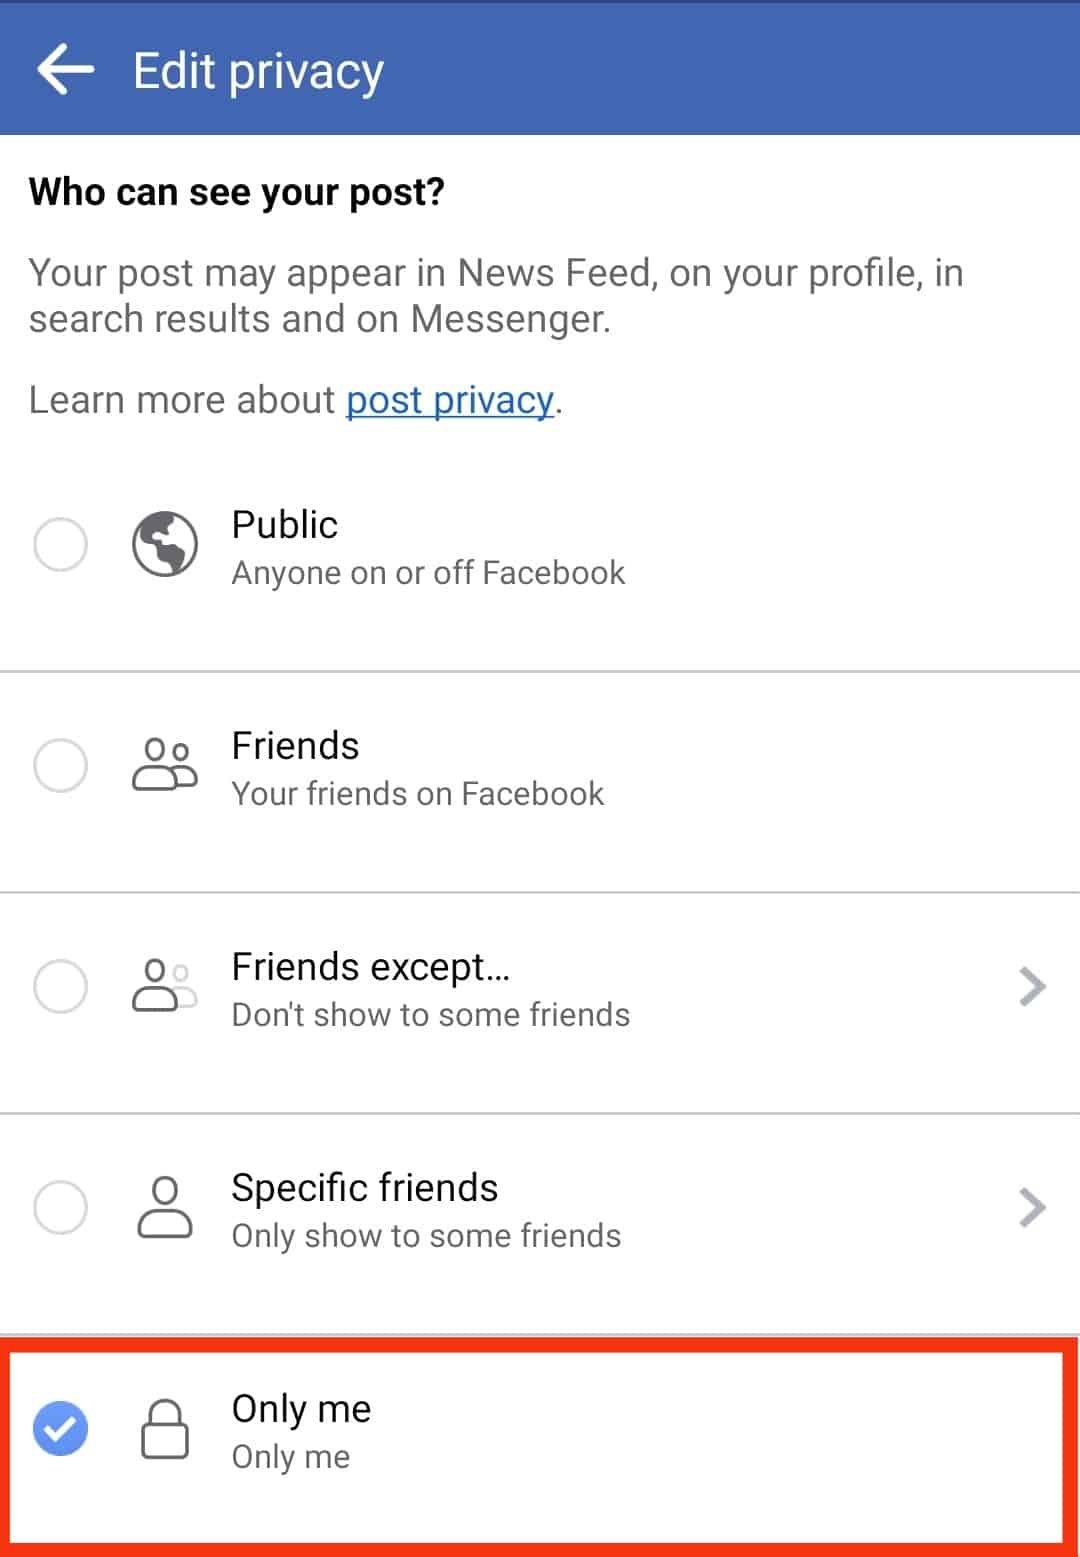
- Tap on “Edit privacy.”
- Tap on “See more.”
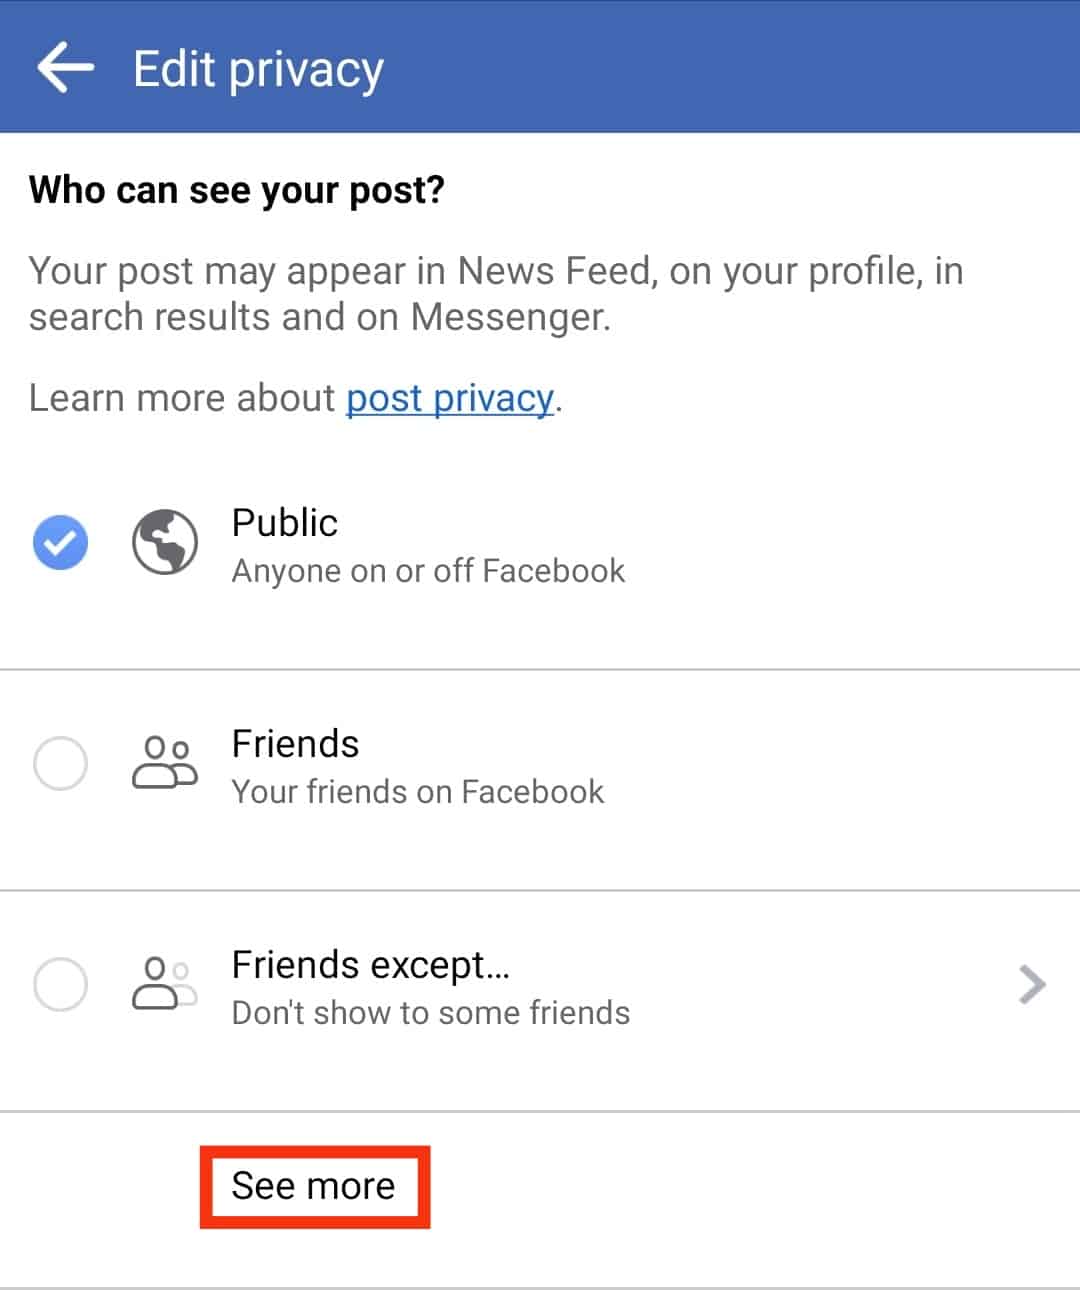
- Change the audience from “Public“ to “Only me.”
- Repeat the above steps for all albums you want to hide.
How To Hide Photos You Are Tagged In?
When you use the above steps to hide Facebook photos using either a PC or the Facebook app, you will hide the majority of your photos. Unfortunately, these may not include the images friends tag you on.
Here’s how you can hide Facebook photos that friends tag you on:
- Open the Facebook app and log in to your account.
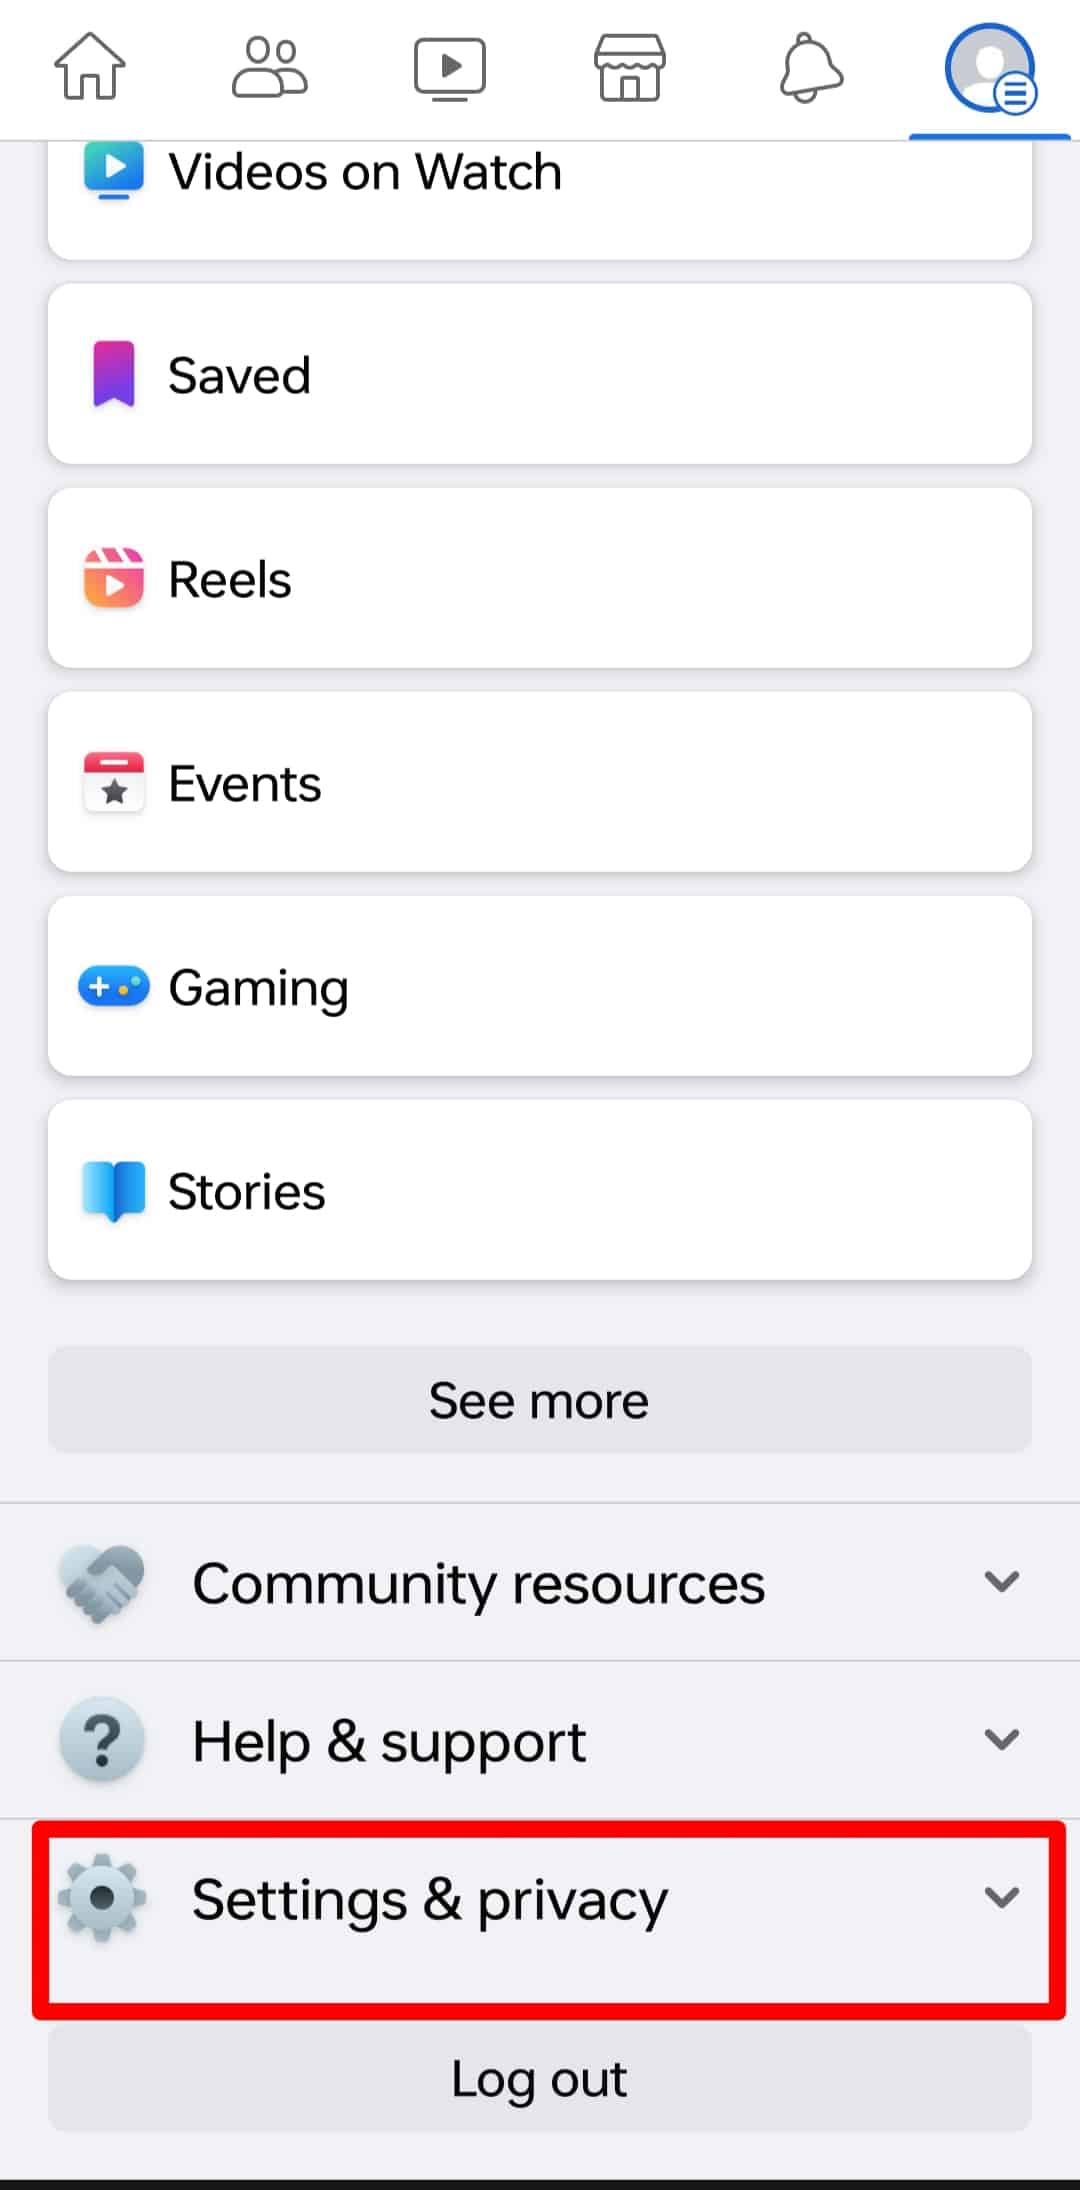
- Tap on the menu icon represented by your profile picture with three parallel horizontal lines.
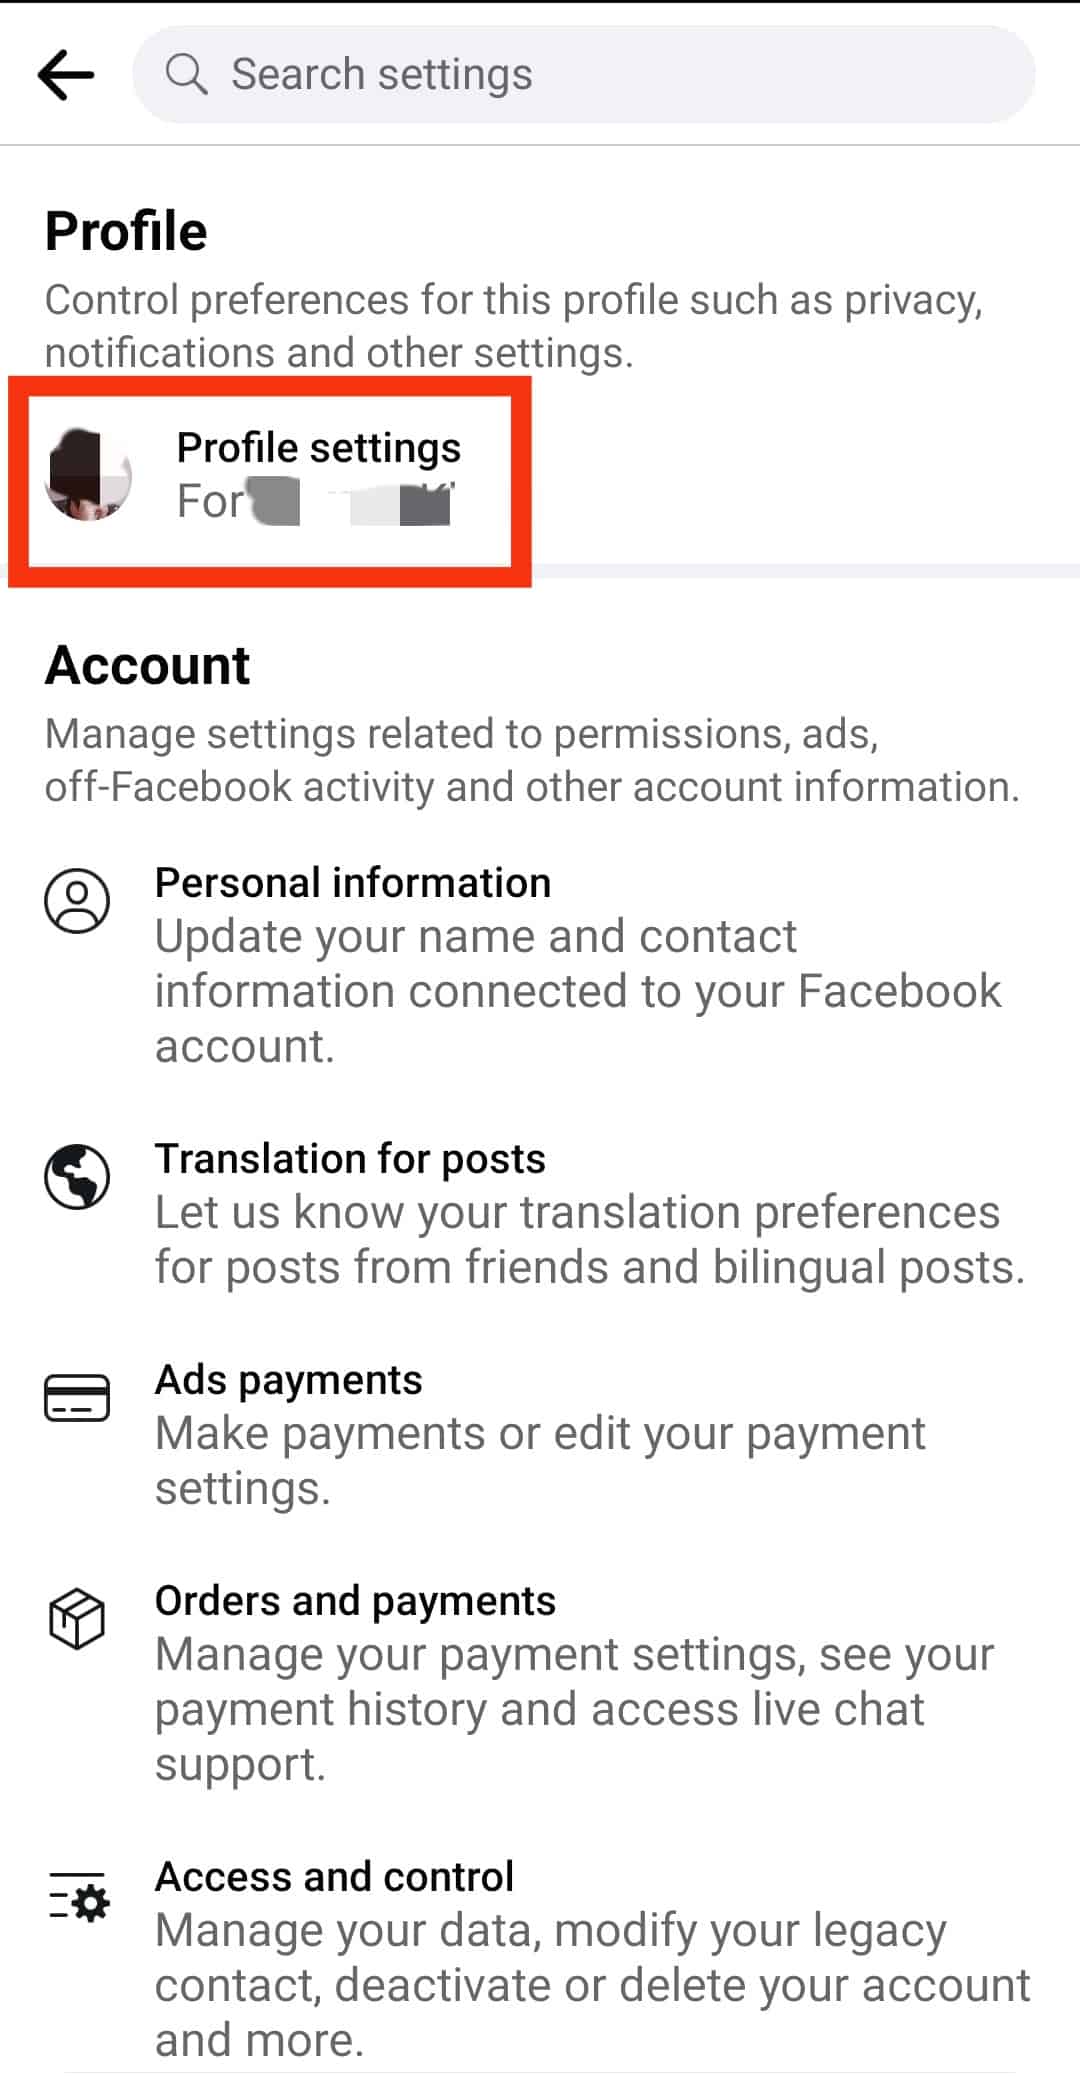
- Scroll down the menu options until you reach “Settings & privacy.” Tap on it.
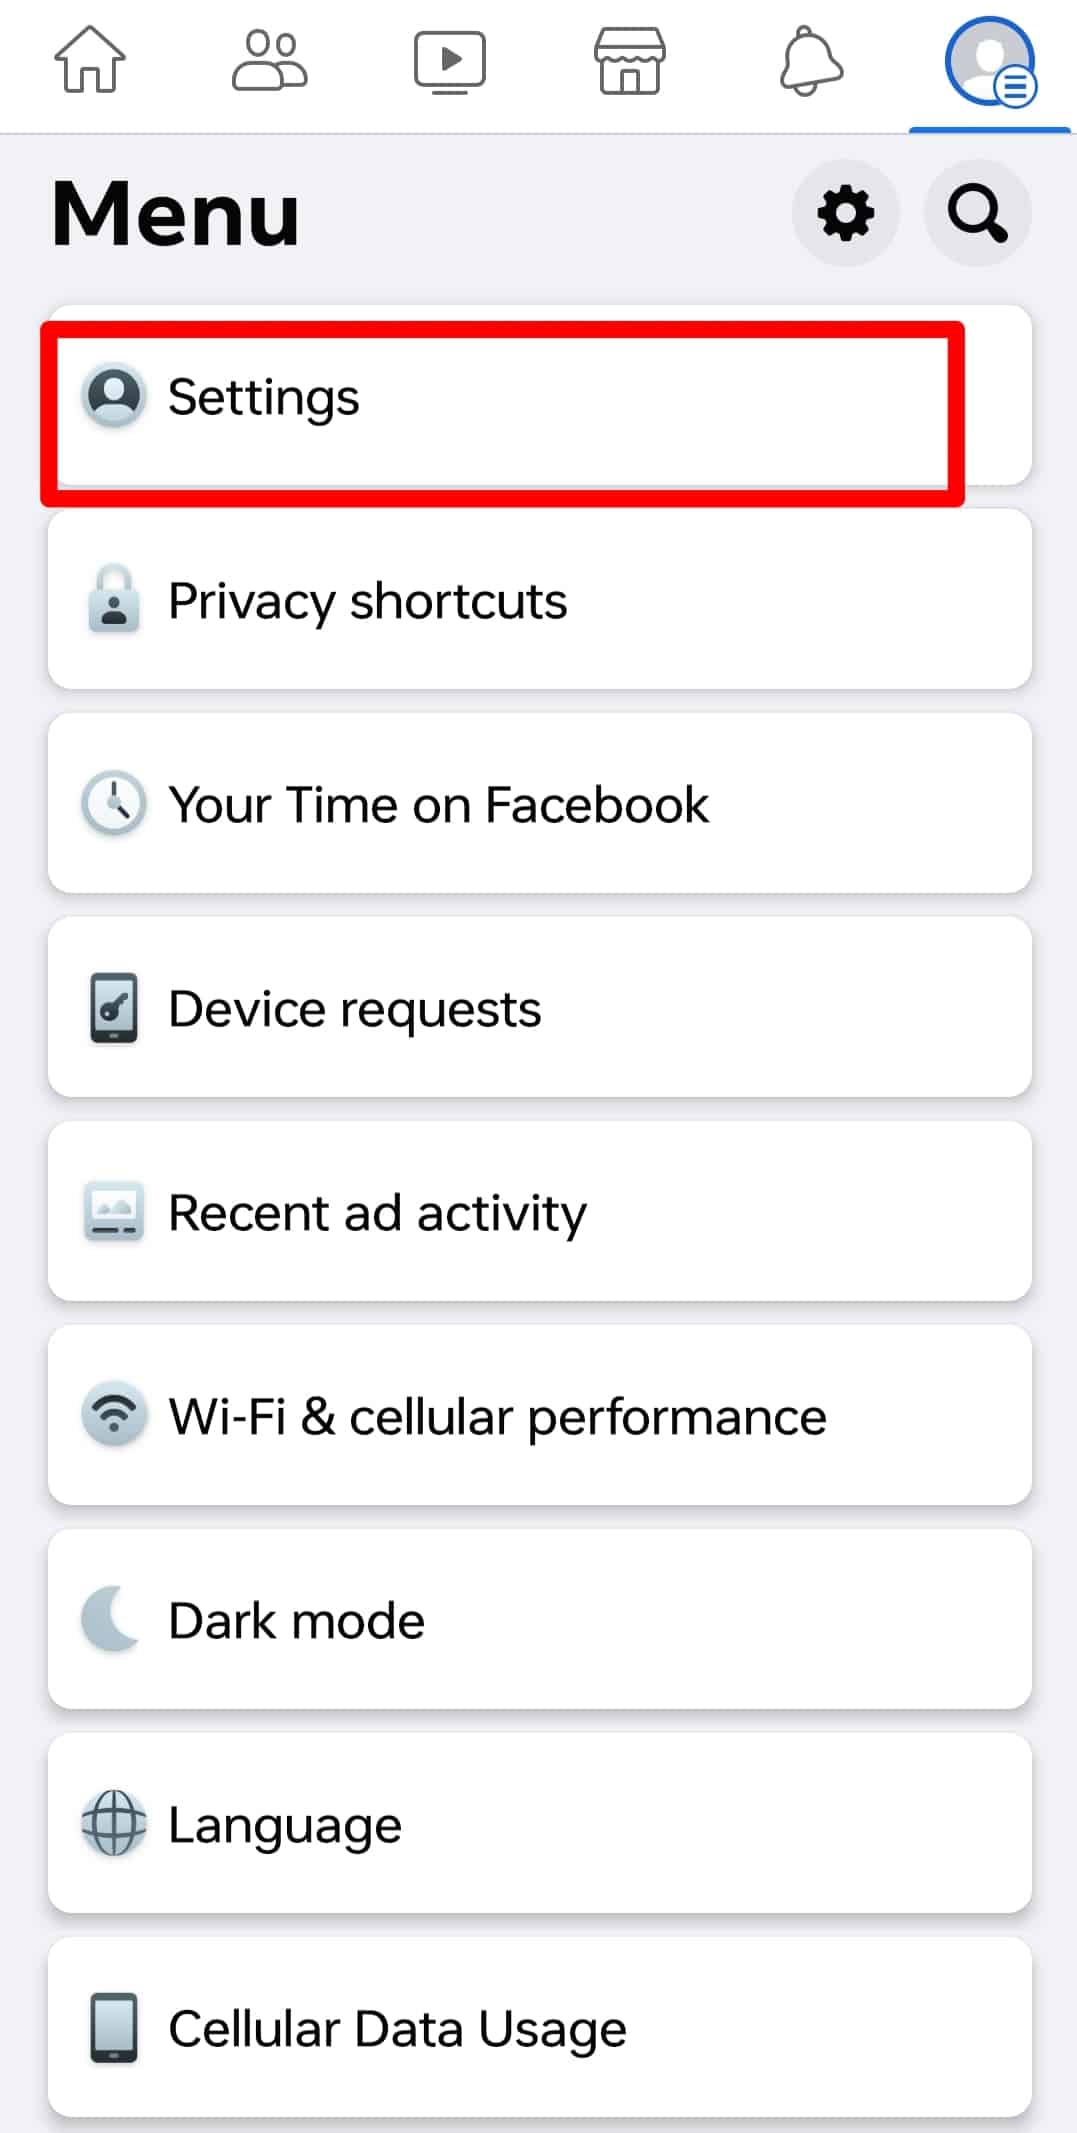
- Next, tap on “Settings.”
- Tap on “Profile settings“ at the top.
- Tap on “Profile and tagging.”
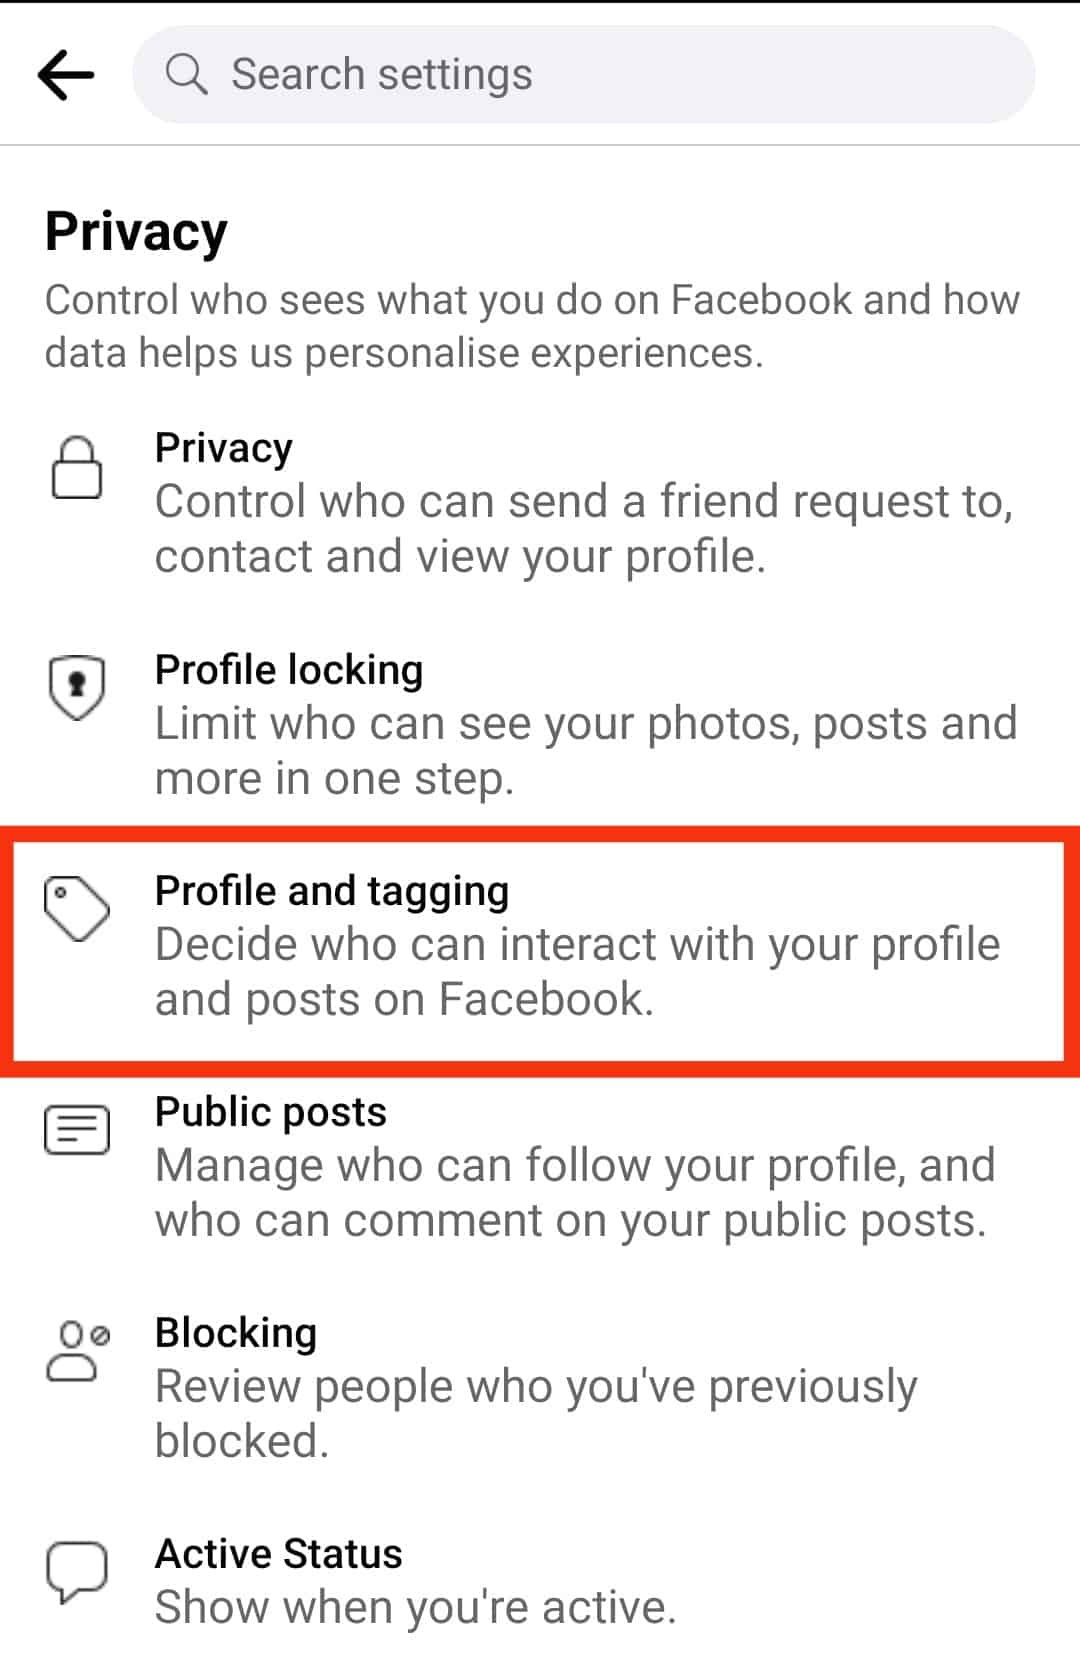
- Tap on ‘Who can see posts that you’re tagged in on your profile?‘ under “Tagging.”
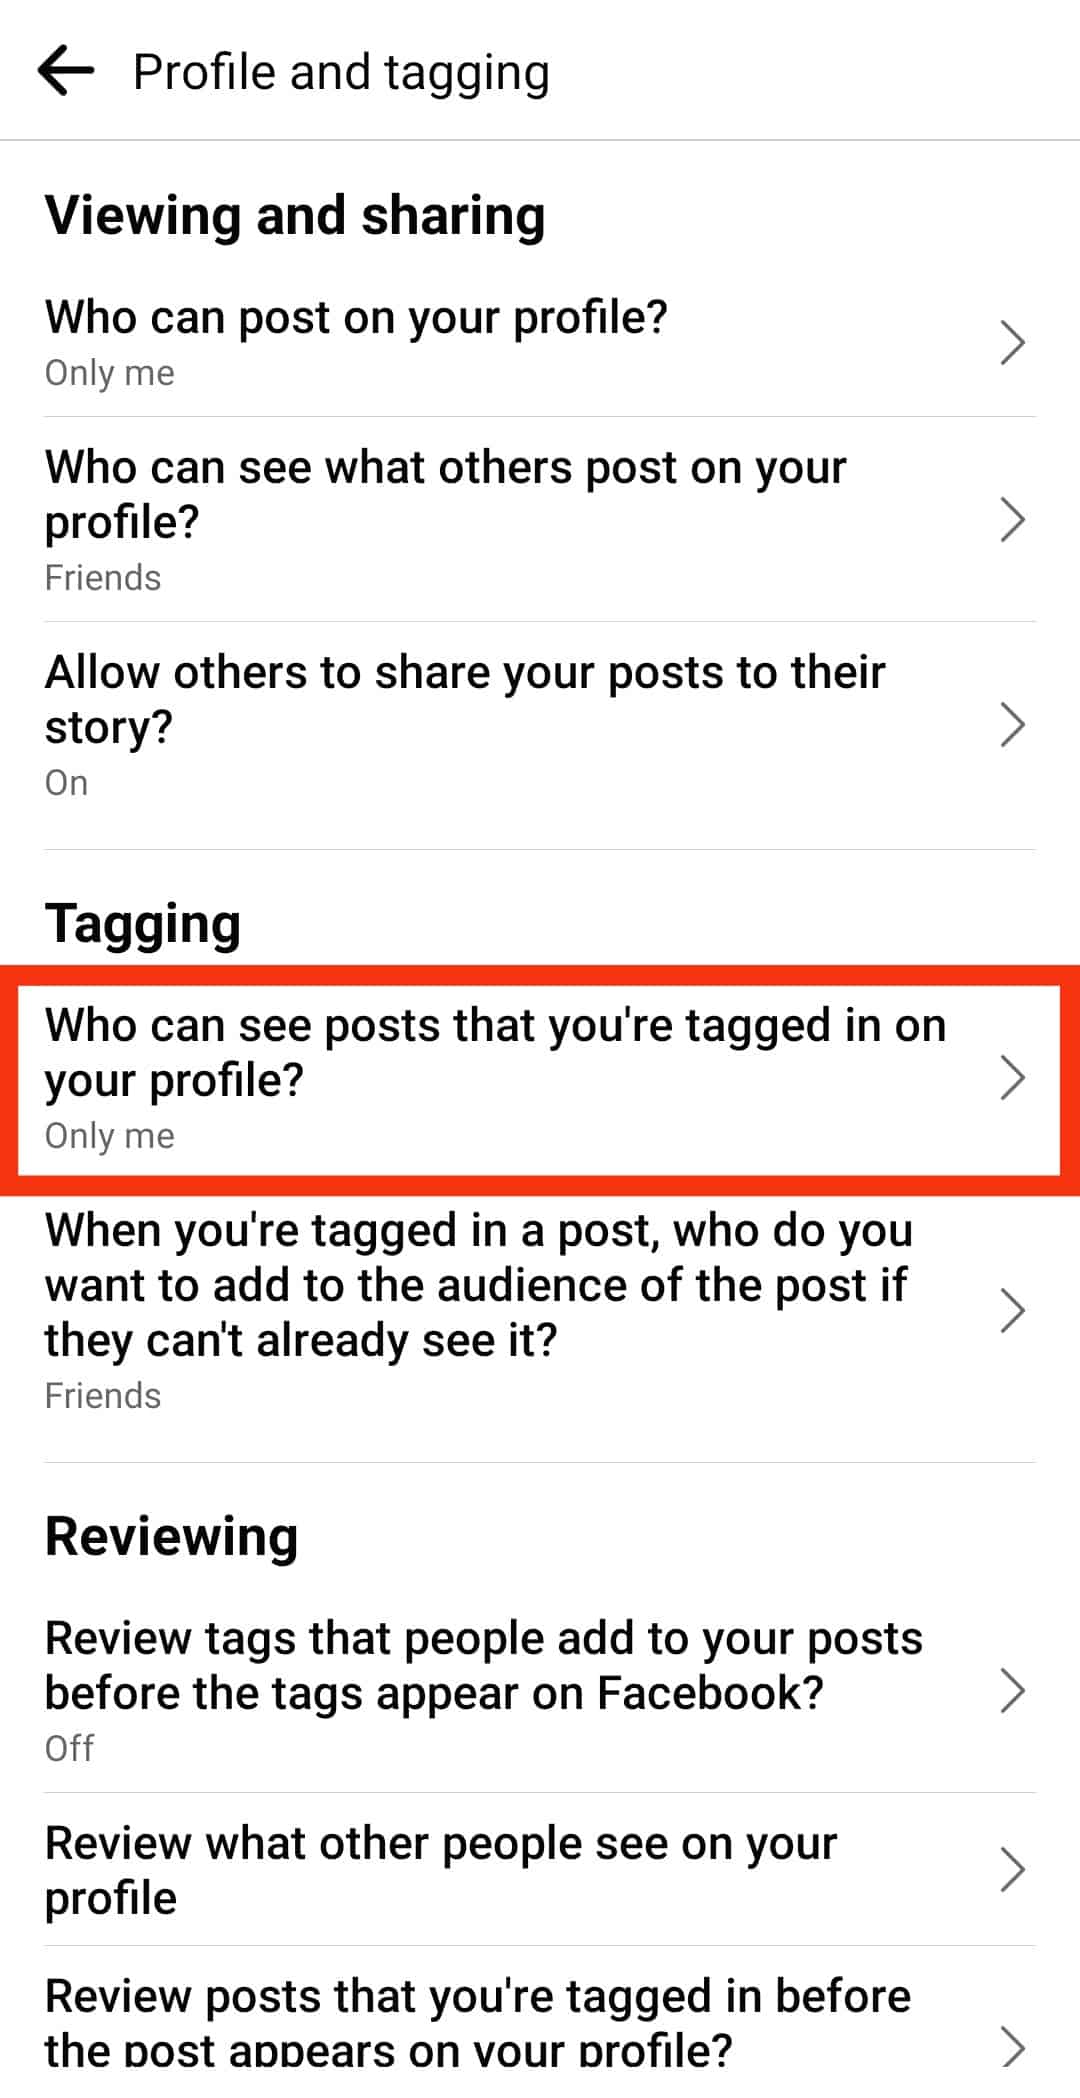
- Select “Only me.”
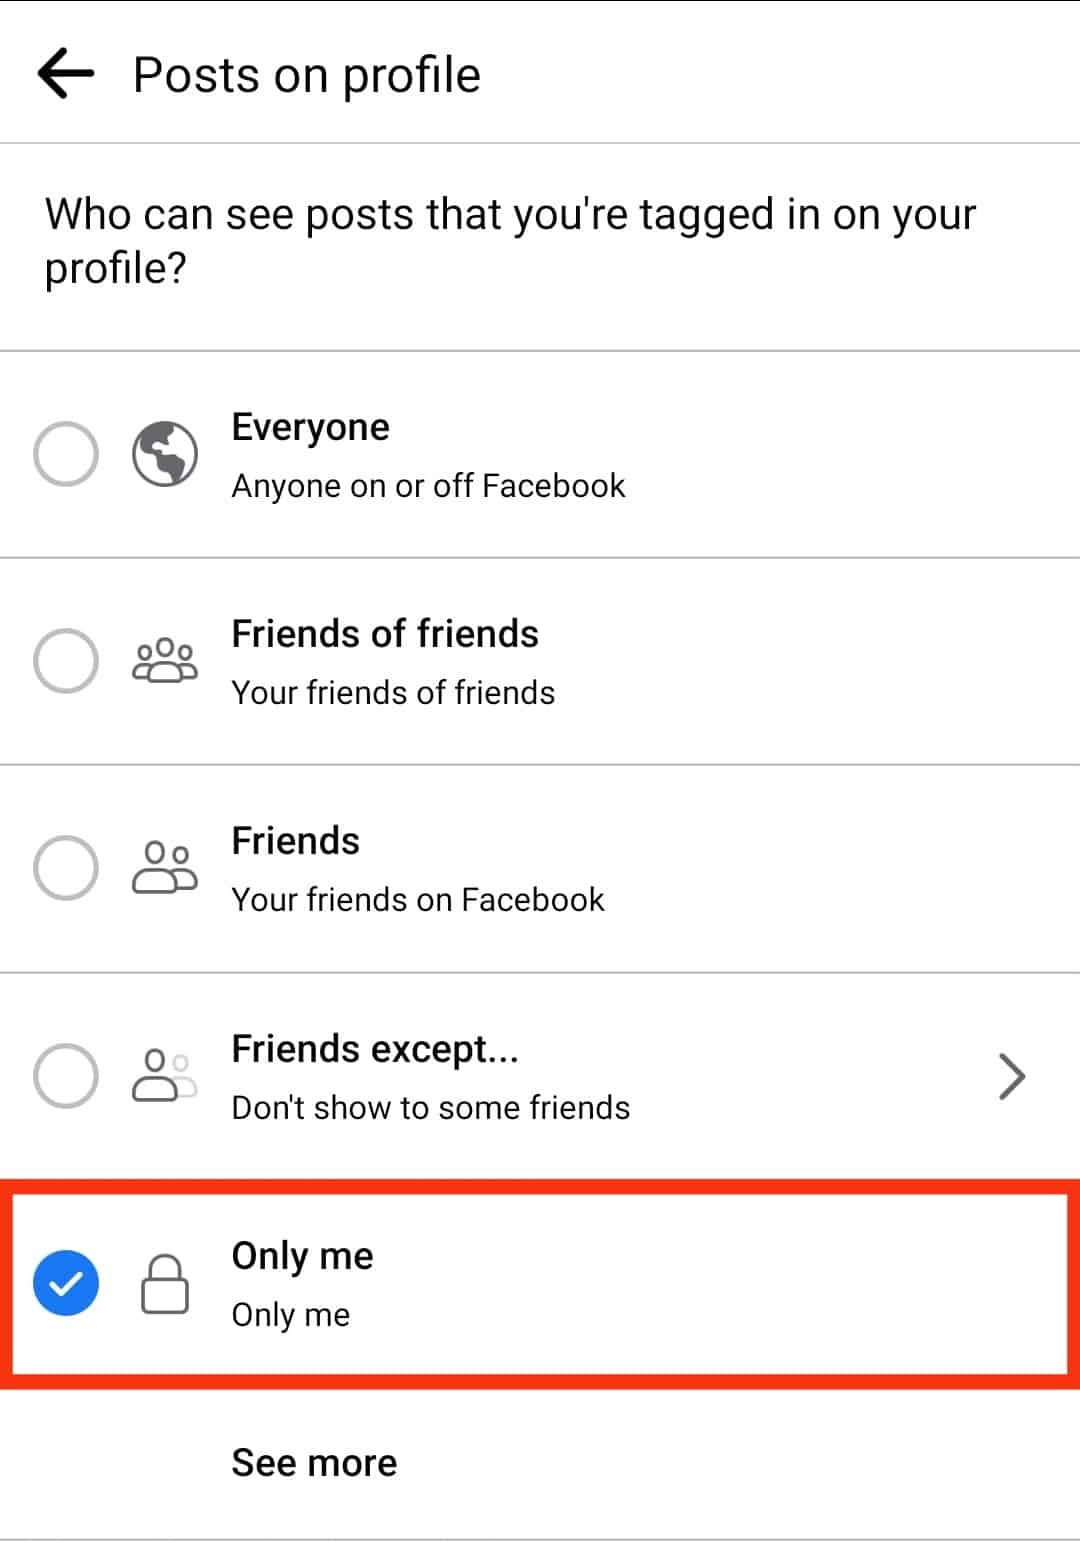
- After adjusting this tagging setting, only you can view photos friends tag you on.
How To Archive a Photo?
Hiding the photos may prevent other users and friends from viewing them and instead see a “This content isn’t available right now” message when they click on a hidden photo.
You can archive the photo if you don’t want your friends to see this message. To archive an image on either the Facebook mobile app or the web version:
- Go to your Facebook profile and locate the photo you want to archive.

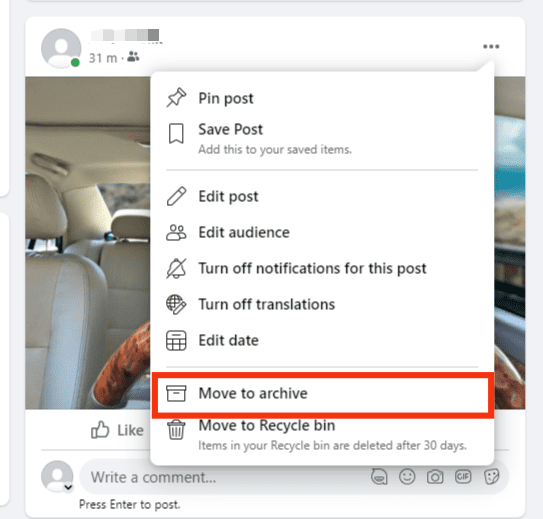
- Tap on three horizontal dots at the top-right corner.
- Next, select “Move to archive.”
Summary
As you’ve learned, hiding all photos on Facebook only takes a few simple moves.
If you hide your Facebook photos for privacy reasons, changing your profile picture and cover photo to a generic image that doesn’t identify you is essential.
Remember, Facebook’s public information policy prevents you from hiding your username, gender, user ID (account number), profile picture, and cover photo.