Discord is arguably the best free voice chat application that gamers worldwide love. Its features made it easy for game lovers to transition to the platform from native in-game VoIPs.
Discord is user-friendly and seamless, allowing users to link to some game apps. One of them is known as Blizzard, a.k.a. Battle.net.
So, how can you add the Blizzard app to Discord?
You can link Blizzard to Discord by going to Discord’s settings. Next, select ‘Connections,’ and tap on the Blizzard (Battle.net) icon. Finally, follow the on-screen instructions to connect your Blizzard account.
This article focuses on how anyone can connect their Discord account to Blizzard.
What Is Blizzard (Battle.net)?
Blizzard Entertainment developed Battle.net, an internet-based social networking service, online game, digital rights management, and digital distribution platform. This unique service was established on December 31, 1996.
A few days after the launch, i.e., on January 3, 1997, Blizzard released Diablo, a stunning action-role-playing video game. Battle.net was formally renamed ‘Blizzard Battle.net’ in August 2017. But this change was reverted in January 2021.
Blizzard Battle.net is the first online gaming service directly incorporated into the games that utilize it. This was in contrast to the popular external interfaces other online services used at the time. The ease of creating accounts alongside this feature and no member fees made it popular among gamers.
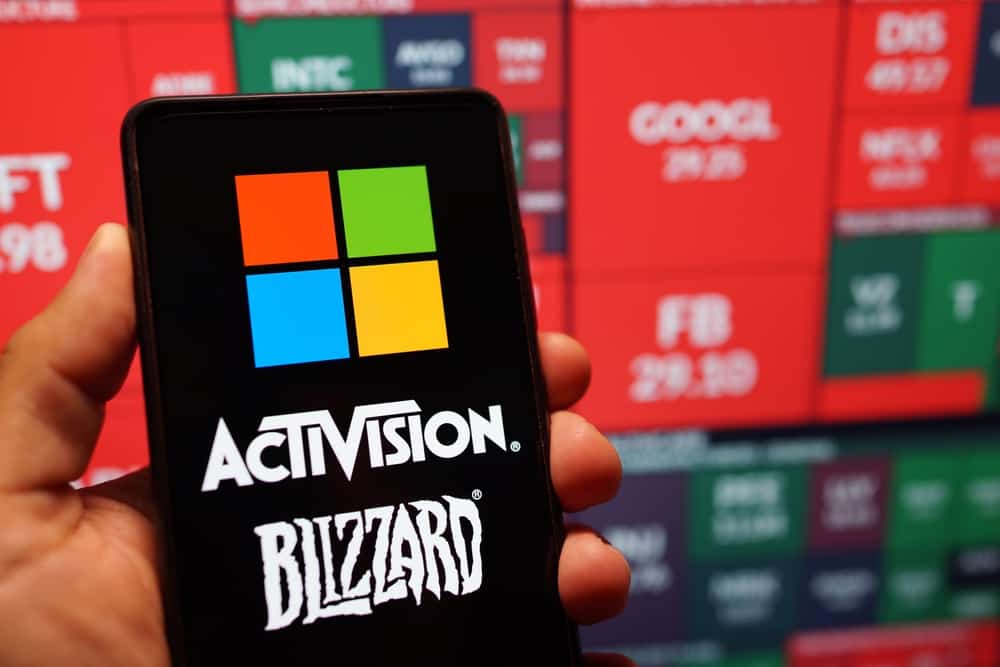
Activision Blizzard owns Blizzard Entertainment. The latter is the publisher of the Warcraft franchise. Other titles Blizzard has created include StarCraft, the Diablo dungeon crawler series, etc.
Within the third quarter of 2022, up to 31 million monthly active users accessed Blizzard Entertainment gaming titles.
How You Can Link Blizzard to Discord?
Linking Blizzard to Discord is a straightforward process. Follow the steps outlined below.
Step #1: Open Discord
Open Discord on any device. This tutorial focuses on the PC app, but the steps are almost the same for the mobile app.
Step #2: Access User Settings
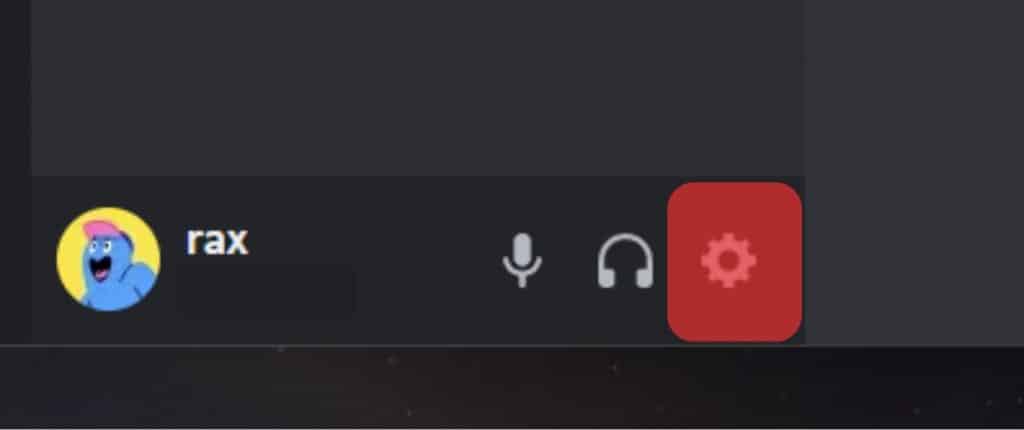
Click on the settings icon located at the bottom left next to your username. This will take you to user settings.
If you use Discord’s mobile app, tap on the hamburger menu icon in the top left corner and then your profile picture in the bottom right corner.
Step #3: Select Connections
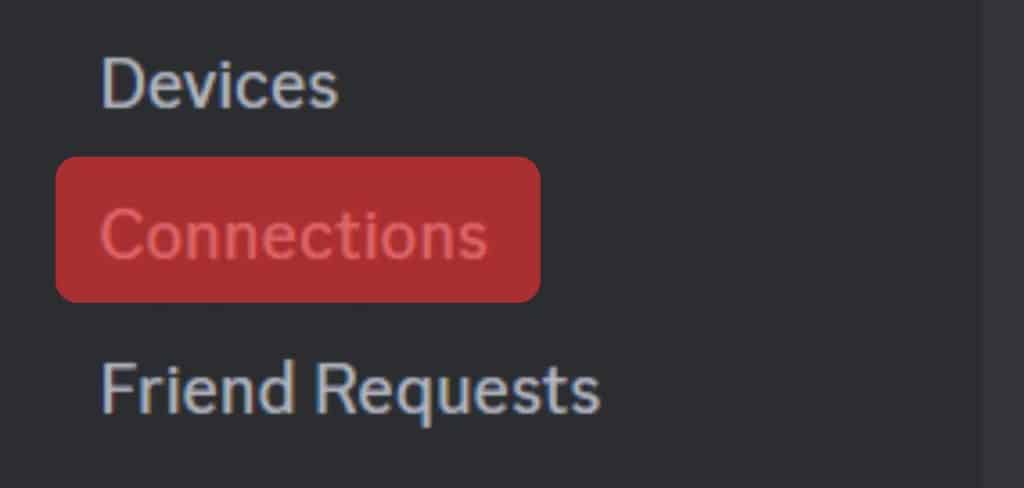
Select ‘Connections’ from the settings menu. ‘Connections’ is located in the ‘User Settings’ section.
Step #4: Select the Battle.net Icon
You will be presented with several applications you can connect to your Discord account. Select the Battle.net icon. If you cannot see the Battle.net icon tap on the arrow icon on the right. It will reveal more options.
If you use Discord’s mobile app, tap on the ‘Add’ button in the top right corner and select the Battle.net icon.
Step #5: Log In to Battle.net
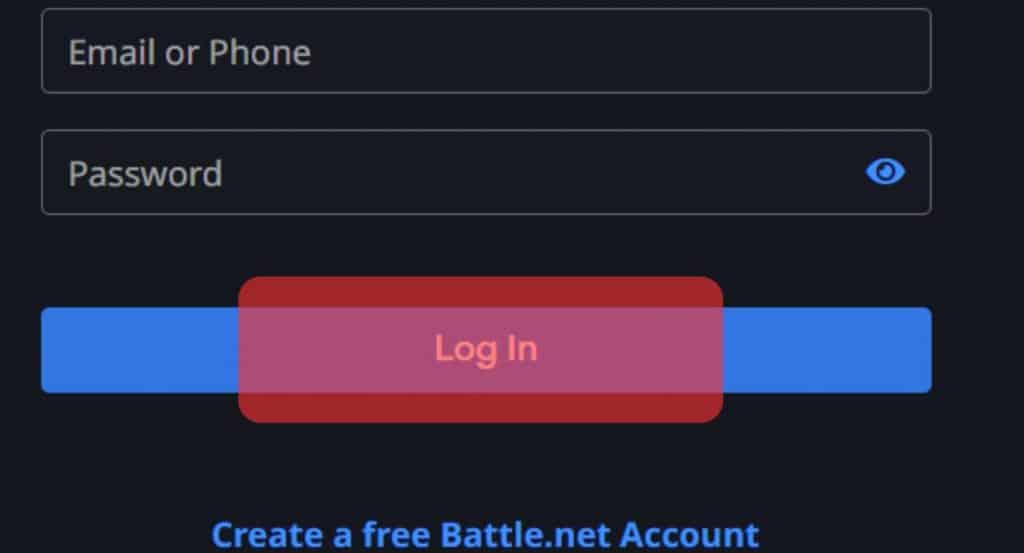
You are now directed to the us.battle.net login page. Enter your username and password and hit the ‘Login’ button to access your account.
If you have the two-factor authentication enabled, enter the code from the app and tap the ‘Submit’ button.
Step #6: Allow Permissions for Blizzard
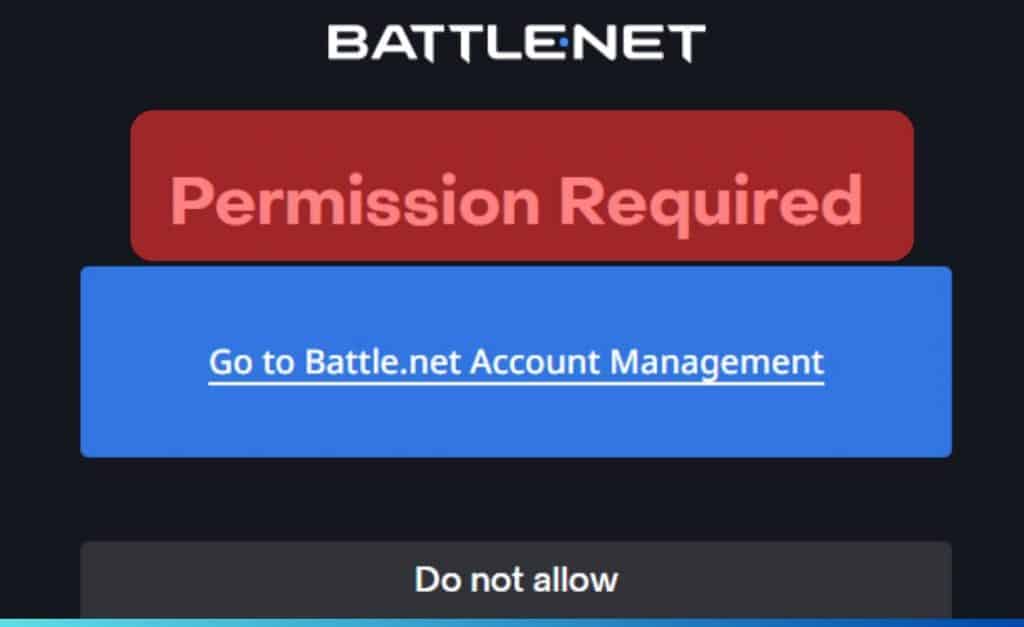
The final step is to allow permissions for Blizzard. This includes your Account ID, all your game profiles on the Blizzard platform, and the Battle Tag.
You may also check to see if there are other options you may want to include. If not, click on the ‘Allow’ button to finish the process.
Voila! You have successfully linked Blizzard (Battle.net) to Discord. You can verify if this is the case via Discord. Go to the settings, and select ‘Connections.’ Your Blizzard (Battle.net) connection should be visible there.
Conclusion
Discord is a popular and free voice chat application that gamers use extensively. The app allows you to connect to other applications seamlessly.
If you want to link Discord to an app like Blizzard, the steps have been outlined in this article. Go through it again to be sure of the steps, and follow them.