When you create a Discord community, you may wish to allow members to self-assign themselves to different roles in the server.
Giving members room to self-assign roles reduce the workload for the server admins.
The best way is by using reaction roles, such that whenever a user clicks on a given reaction role associated with a particular role, they will see its description and can self-assign themselves the role.
So, how can you let members choose roles on Discord?
Discord only supports admins assigning roles to members. To enable the option for self-assigning roles, you must use a bot like MEE6. Start by creating roles on the “Server Settings” page. Visit the MEE6 bot and invite it to your server. Access the MEE6 dashboard and click on “Reaction Roles.” Enable the plugin and create a new reaction role. Once you fill out the required fields, click “Publish” and update the @everyone permissions to allow the “Add reactions” permission.
This guide will detail everything about Discord roles. We will see how to allow server members to self-assign roles, from creating the Discord roles to using the MRR6 bot to create reaction roles. Let’s get started!
How Do Self-Assigning Roles Work in Discord?
When you create a Discord server, the first role you should create is the admin and mod roles.
The two will help you manage your Discord server after you assign them to members. Ideally, the Discord admin creates and assigns Discord roles to server members.
Discord has no setting that allows members to self-assign Discord roles.
The available solution involves using moderation bots that support creating reaction roles, allowing members to self-assign roles. An example of such a bot is the MEE6 bot.
How To Let Members Choose Roles in Discord
Before allowing server members to choose roles in Discord, we must create Discord roles that enable members to self-assign.
Once the roles are created, the next step is configuring the MEE6 bot.
Let’s cover the steps.
Step #1: Create Discord Roles
Here, we must create the various roles which members should select when they want to self-assign themselves the roles, depending on the permissions for each role.
Follow these steps:
- Open the Discord application and sign in to your account.

- Open the target server.
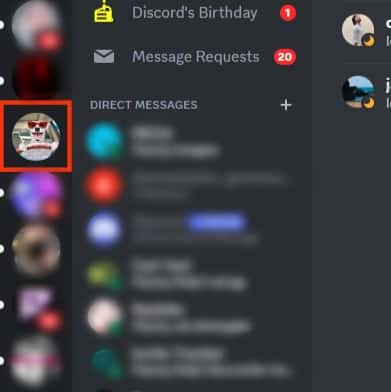
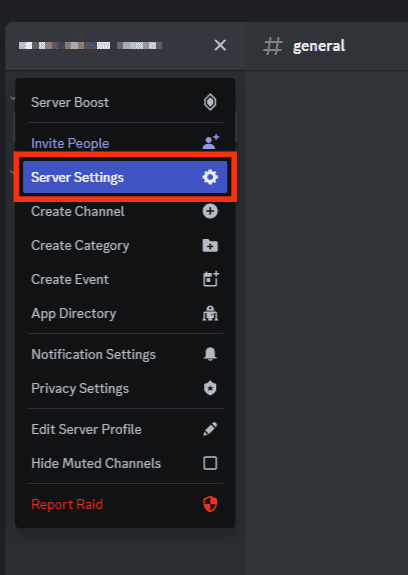
- Click the drop-down icon next to the server’s name at the top.
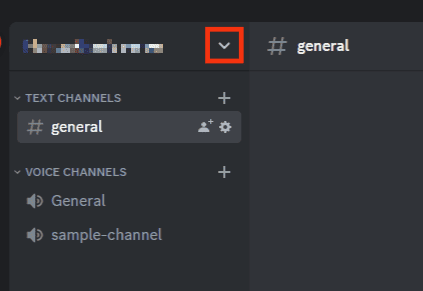
- In the drop-down menu, click the “Server Settings” option.
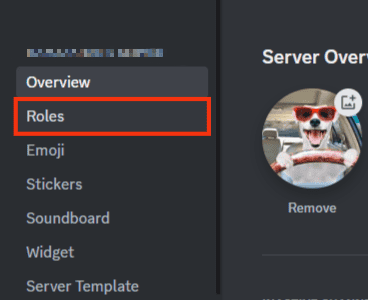
- Click the “Roles” tab on the left.
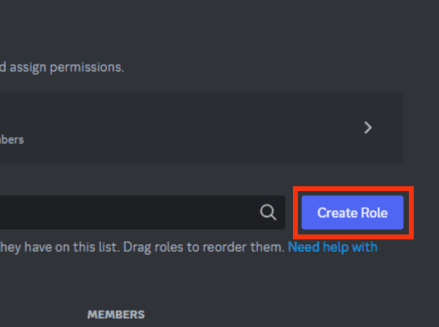
- Find the “Create Role” button and click on it.
- Add the role’s details, such as the name, permissions, color, etc.
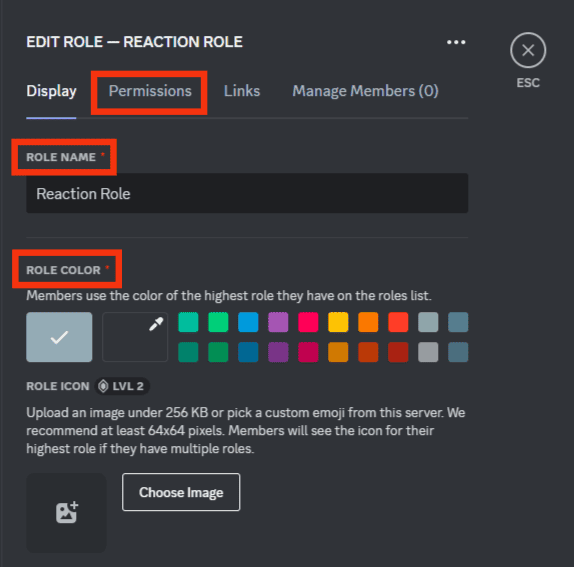
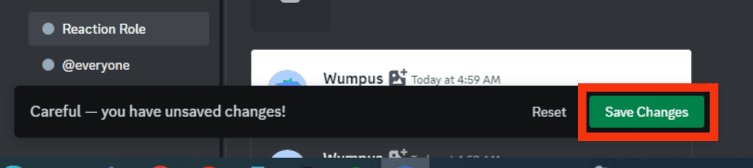
- Lastly, click the “Save Changes” option to complete creating your Discord role.
If you need multiple roles, repeat the process to create more ones. Once you have your roles, the next step is to use the MEE6 bot to create reaction roles. Read on!
Step #2: Configure MEE6
To use the MEE6 bot, we must create reaction roles and associate them with the channel that the members will use to assign themselves roles.
Follow these steps:
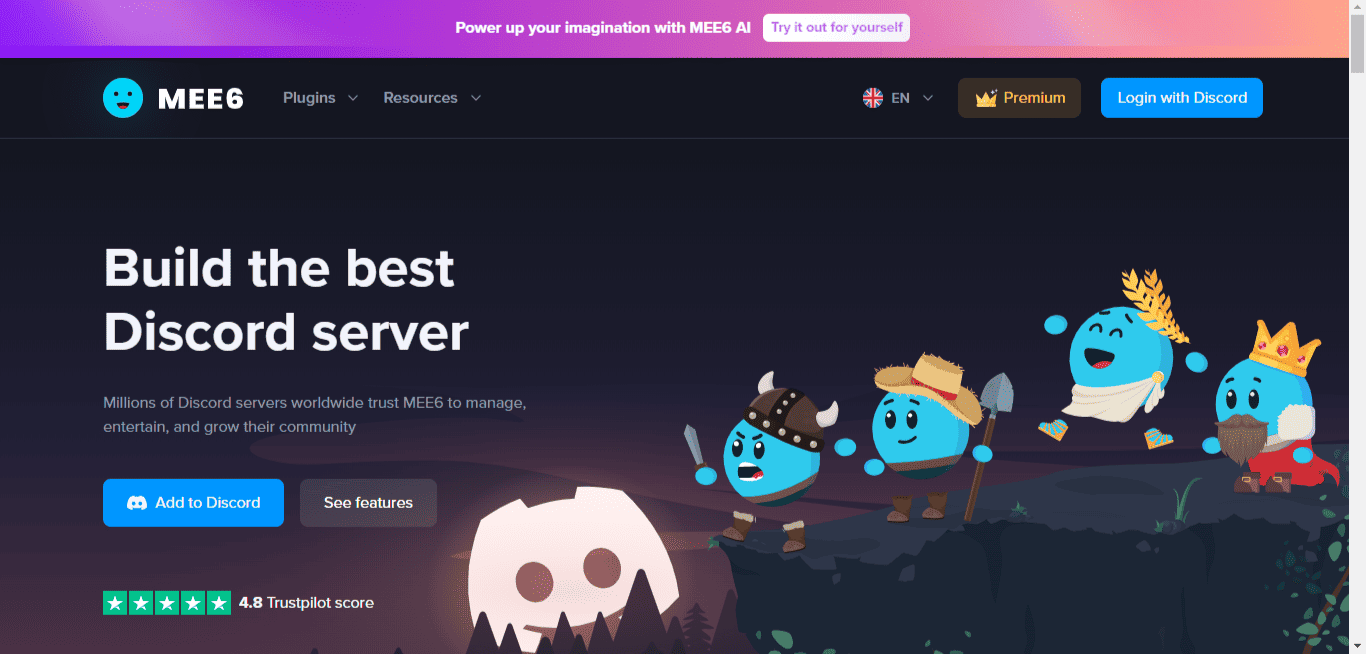
- Open your browser and access the MEE6 bot’s website.
- Click the “Add to Discord” button.

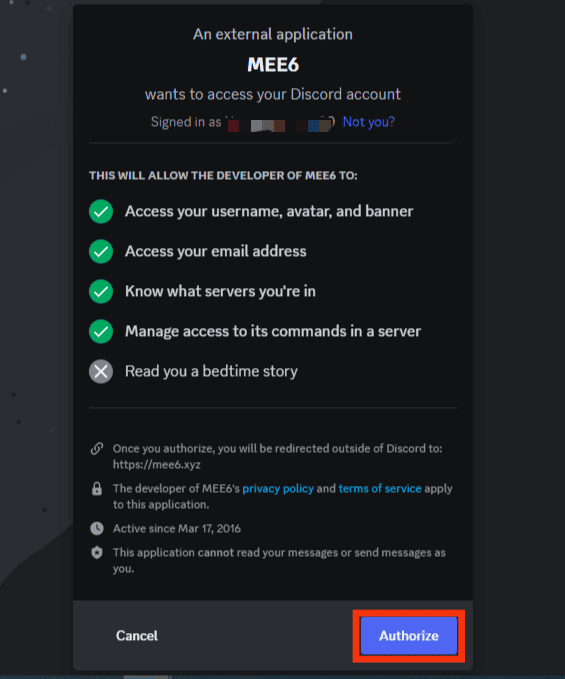
- Authorize the MEE6 to access your Discord account by clicking the “Authorize” button at the bottom.
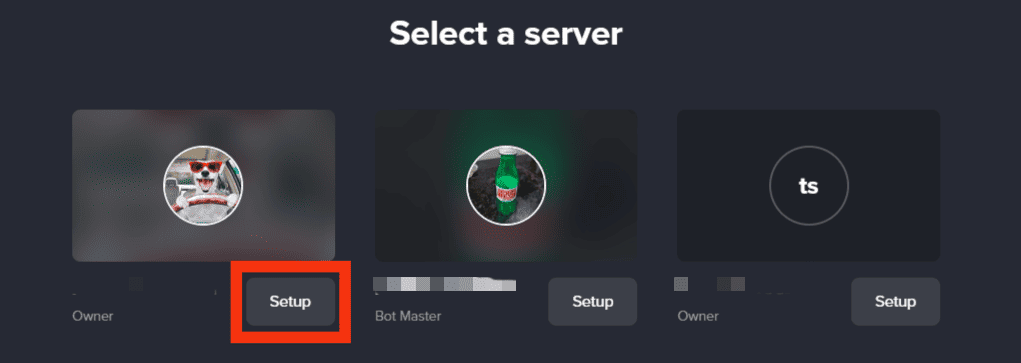
- Select the server where you want to add the MEE6 bot to your account by clicking the “Setup” button.
- When a new window opens, check if you selected the right server and click “Continue.”
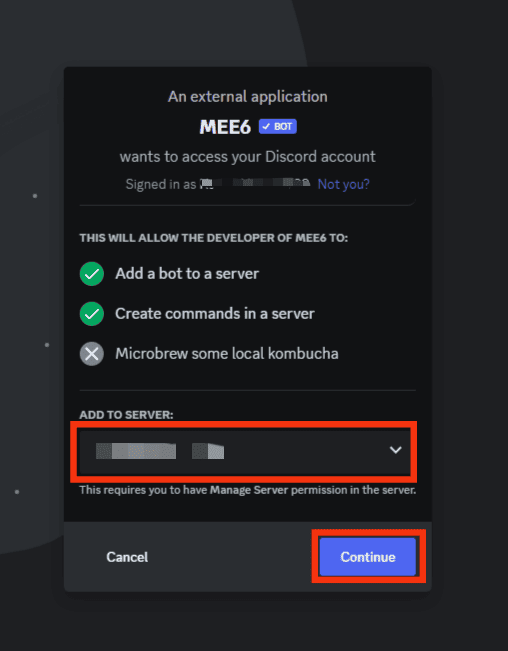
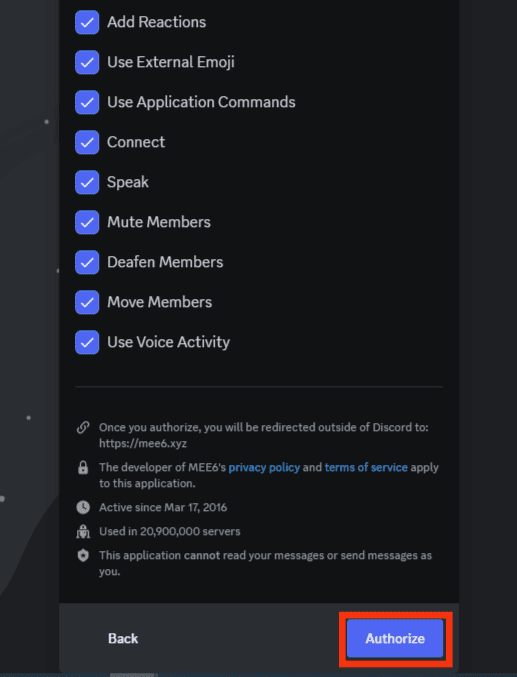
- Click the “Authorize” button.
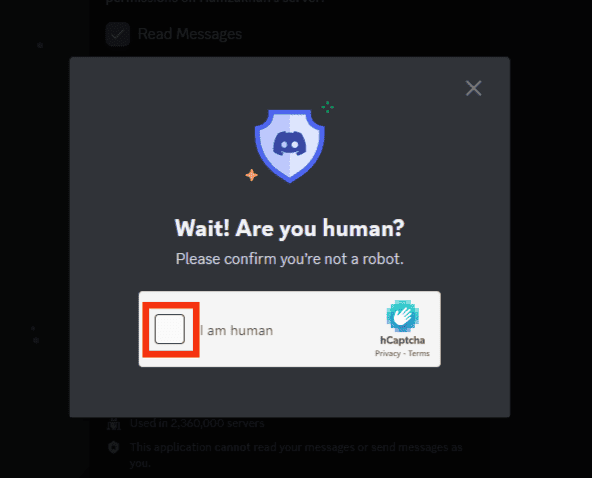
- Complete the captcha.
- Now, return to the MEE6 dashboard on your browser.
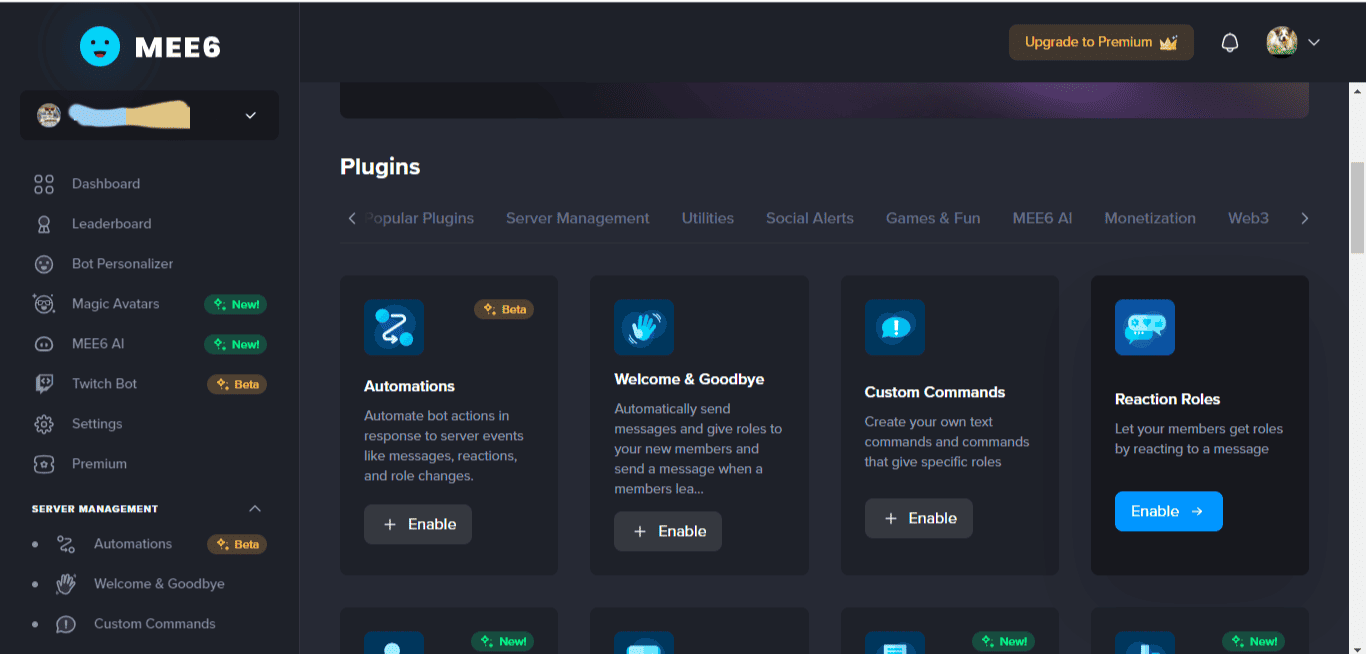
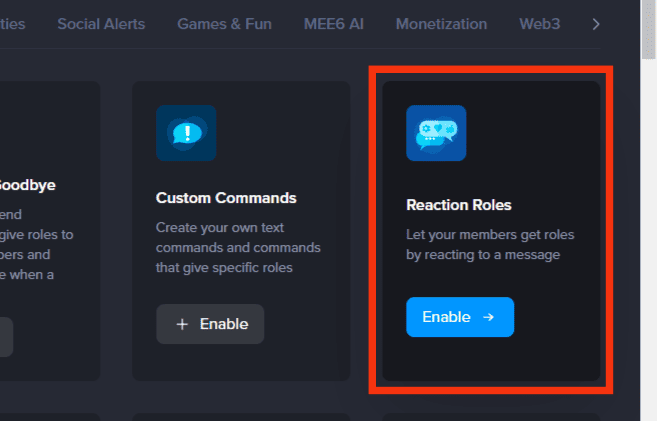
- On the dashboard, scroll down & click the “Reaction Roles” option.
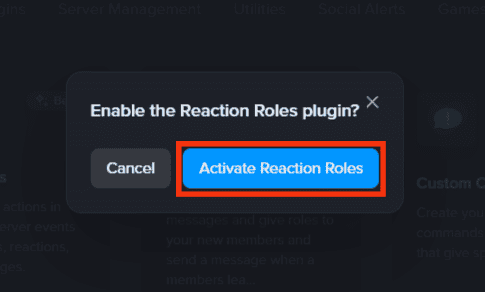
- When prompted to enable the plugin, click “Activate Reaction Roles.”
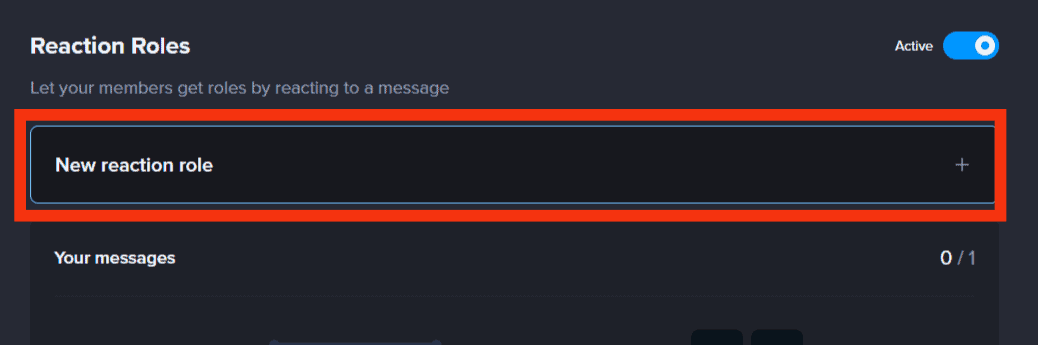
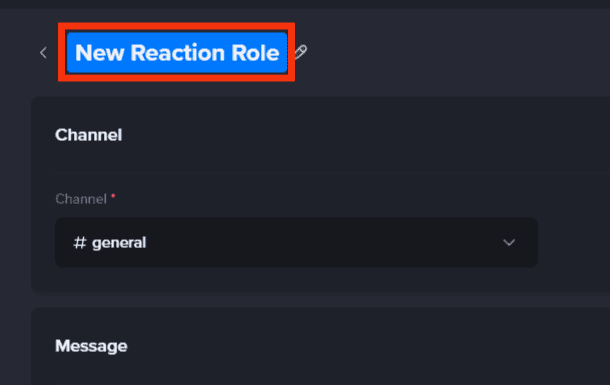
- Locate the “New reaction role” button and click on it.
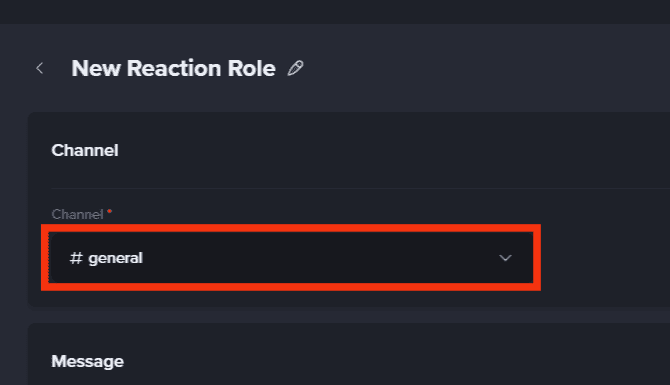
- Choose your channel where users will assign themselves the created roles.
- Add the name of the reaction role in the “New Reaction Role” name field above.
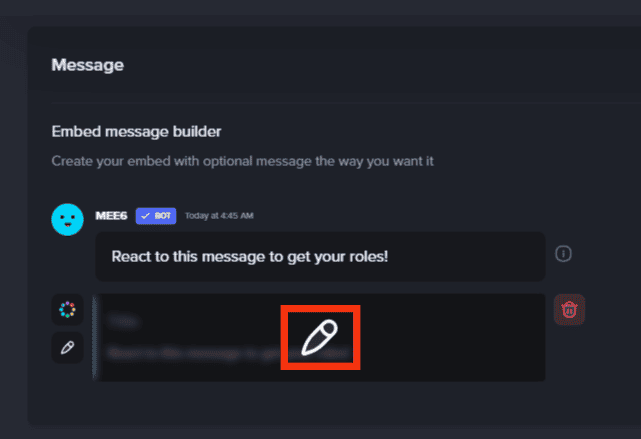
- Scroll to the “Message” field and add a description for the role to help members quickly understand what the role is about by clicking on the pencil icon.
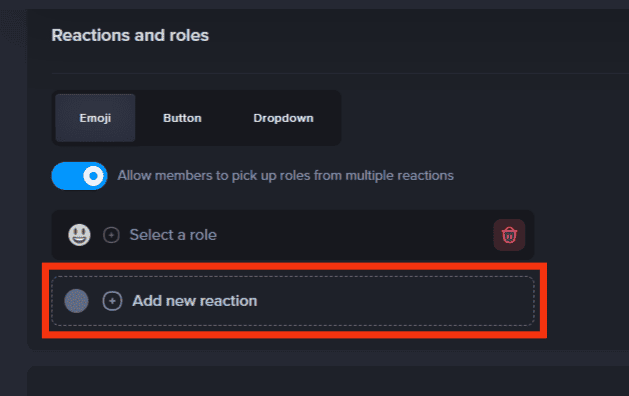
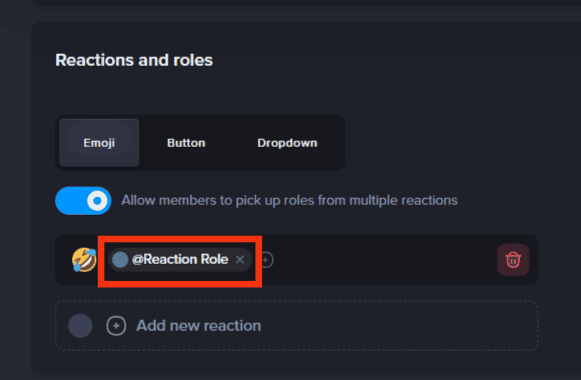
- Move to the “Reactions and roles” section and click the “Add new reaction” button.
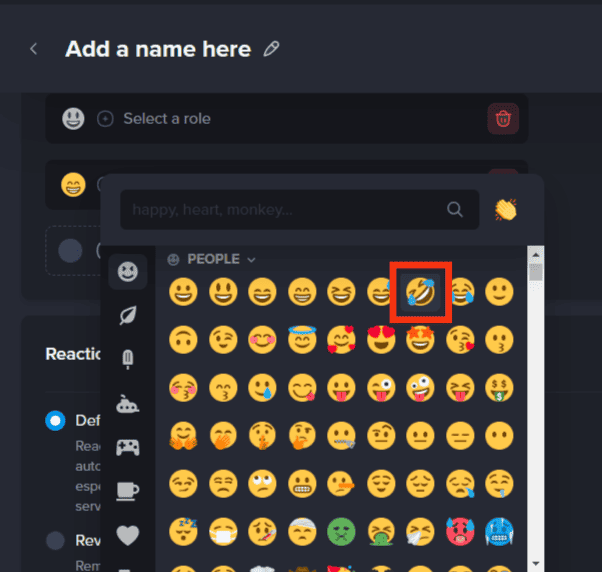
- Click on the emoji icon and choose your preferred emoji to associate it with the reaction role.
- Next, locate the plus icon next to the added emoji and click on it.
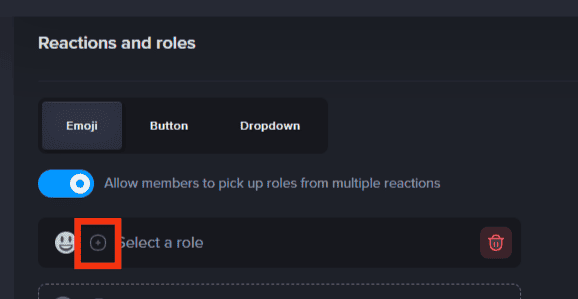
- Choose the role(s) you wish to associate with the reaction role.
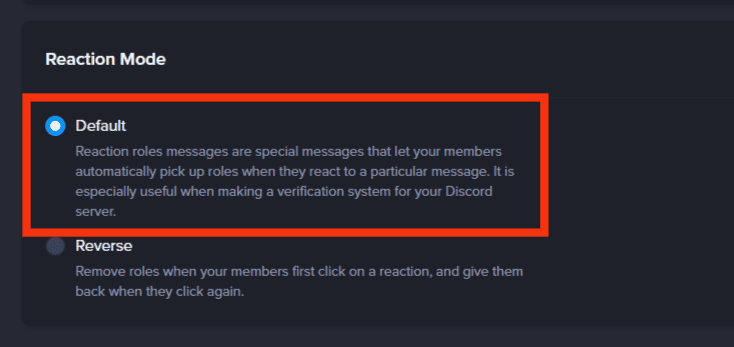
- Under the “Reaction Mode” section, select the “Default” mode. That way, once the user selects the particular role, they will be assigned the associated role by default.
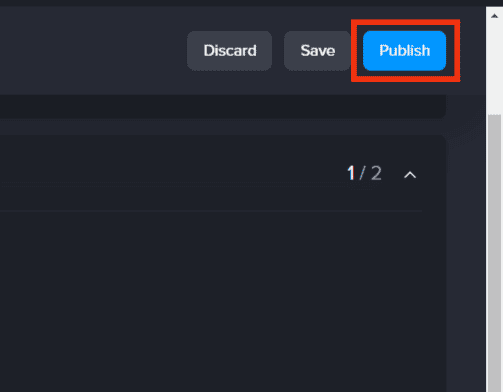
- Click the “Publish” button at the top right.
- Open your Discord application and access “Server Settings.”
- Click on “Roles” and click on the “Default Permissions” option.
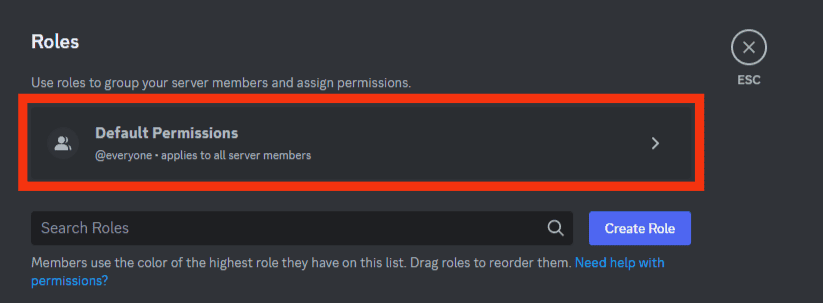
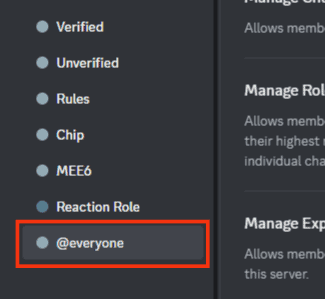
- Select the “@everyone” role.
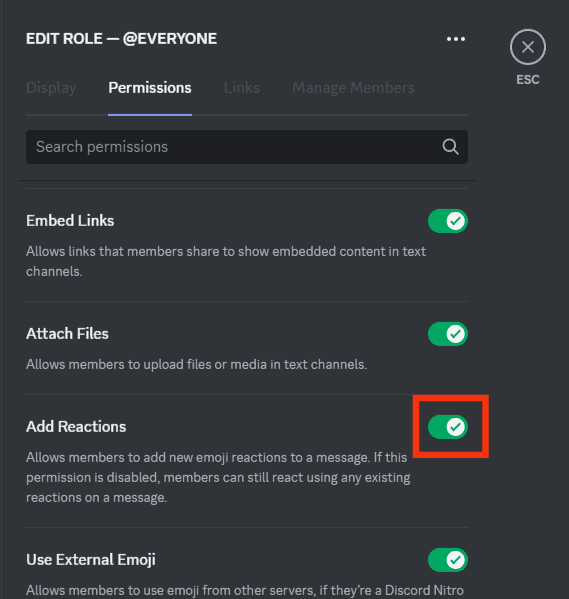
- Update it to allow permissions for “Add Reactions.”
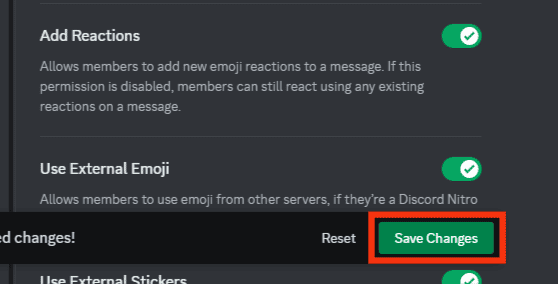
- Tap on the “Save Changes” button.
That’s it!
Conclusion
We’ve detailed the comprehensive guide for allowing members to choose roles in Discord.
Follow along and implement the same on your Discord server.