Instagram is constantly improving the platform with new effects and photo editing options. Blurring a picture is a common and popular way of improving the quality of an image on Instagram, and it has various benefits.
For instance, you can blur a picture you took at work to conceal the identity of your office or hide personal details.
Additionally, you can blur the background of a photo you took at the beach to place the focus on your face or beachwear.
So, how do you blur a picture on Instagram?
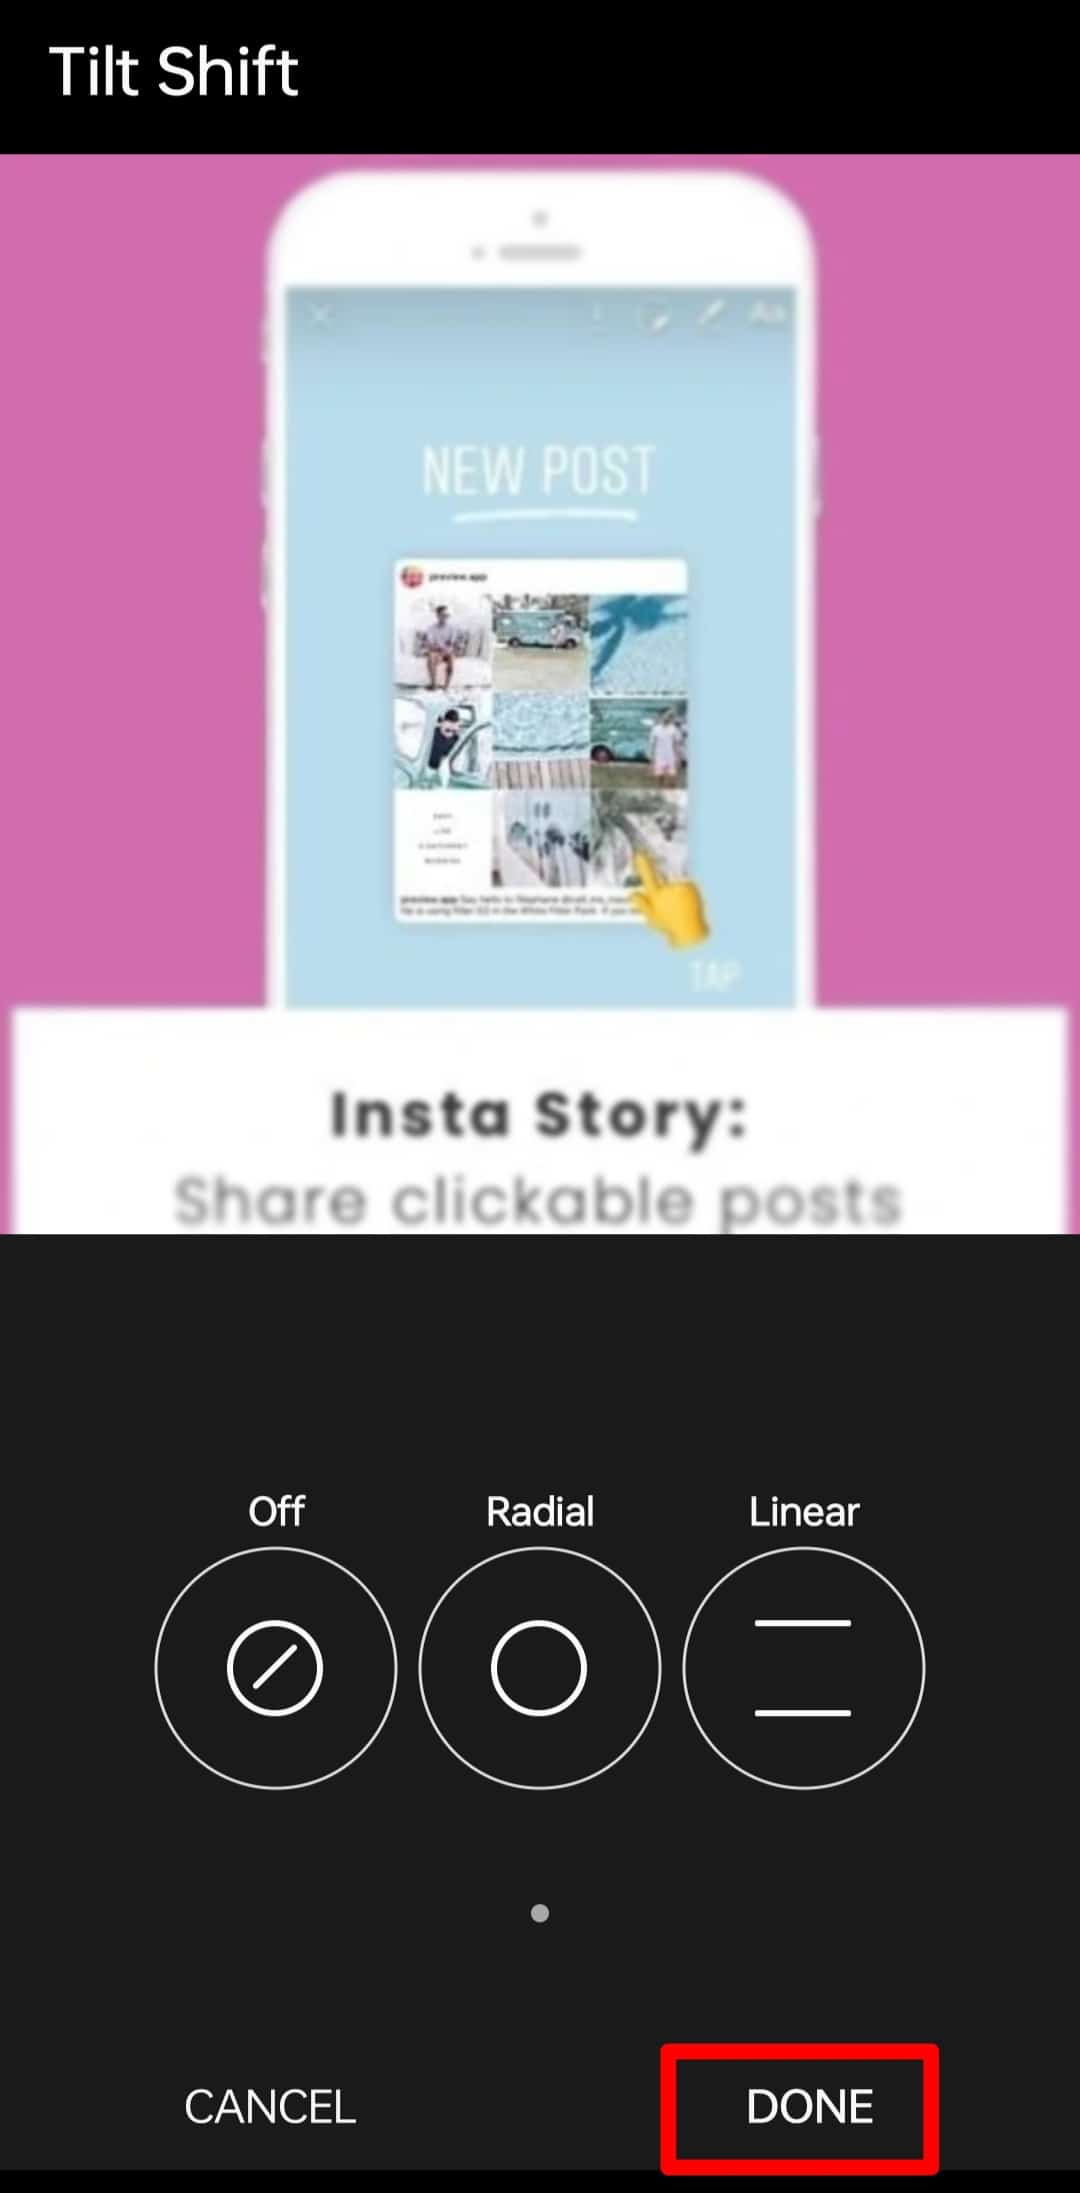
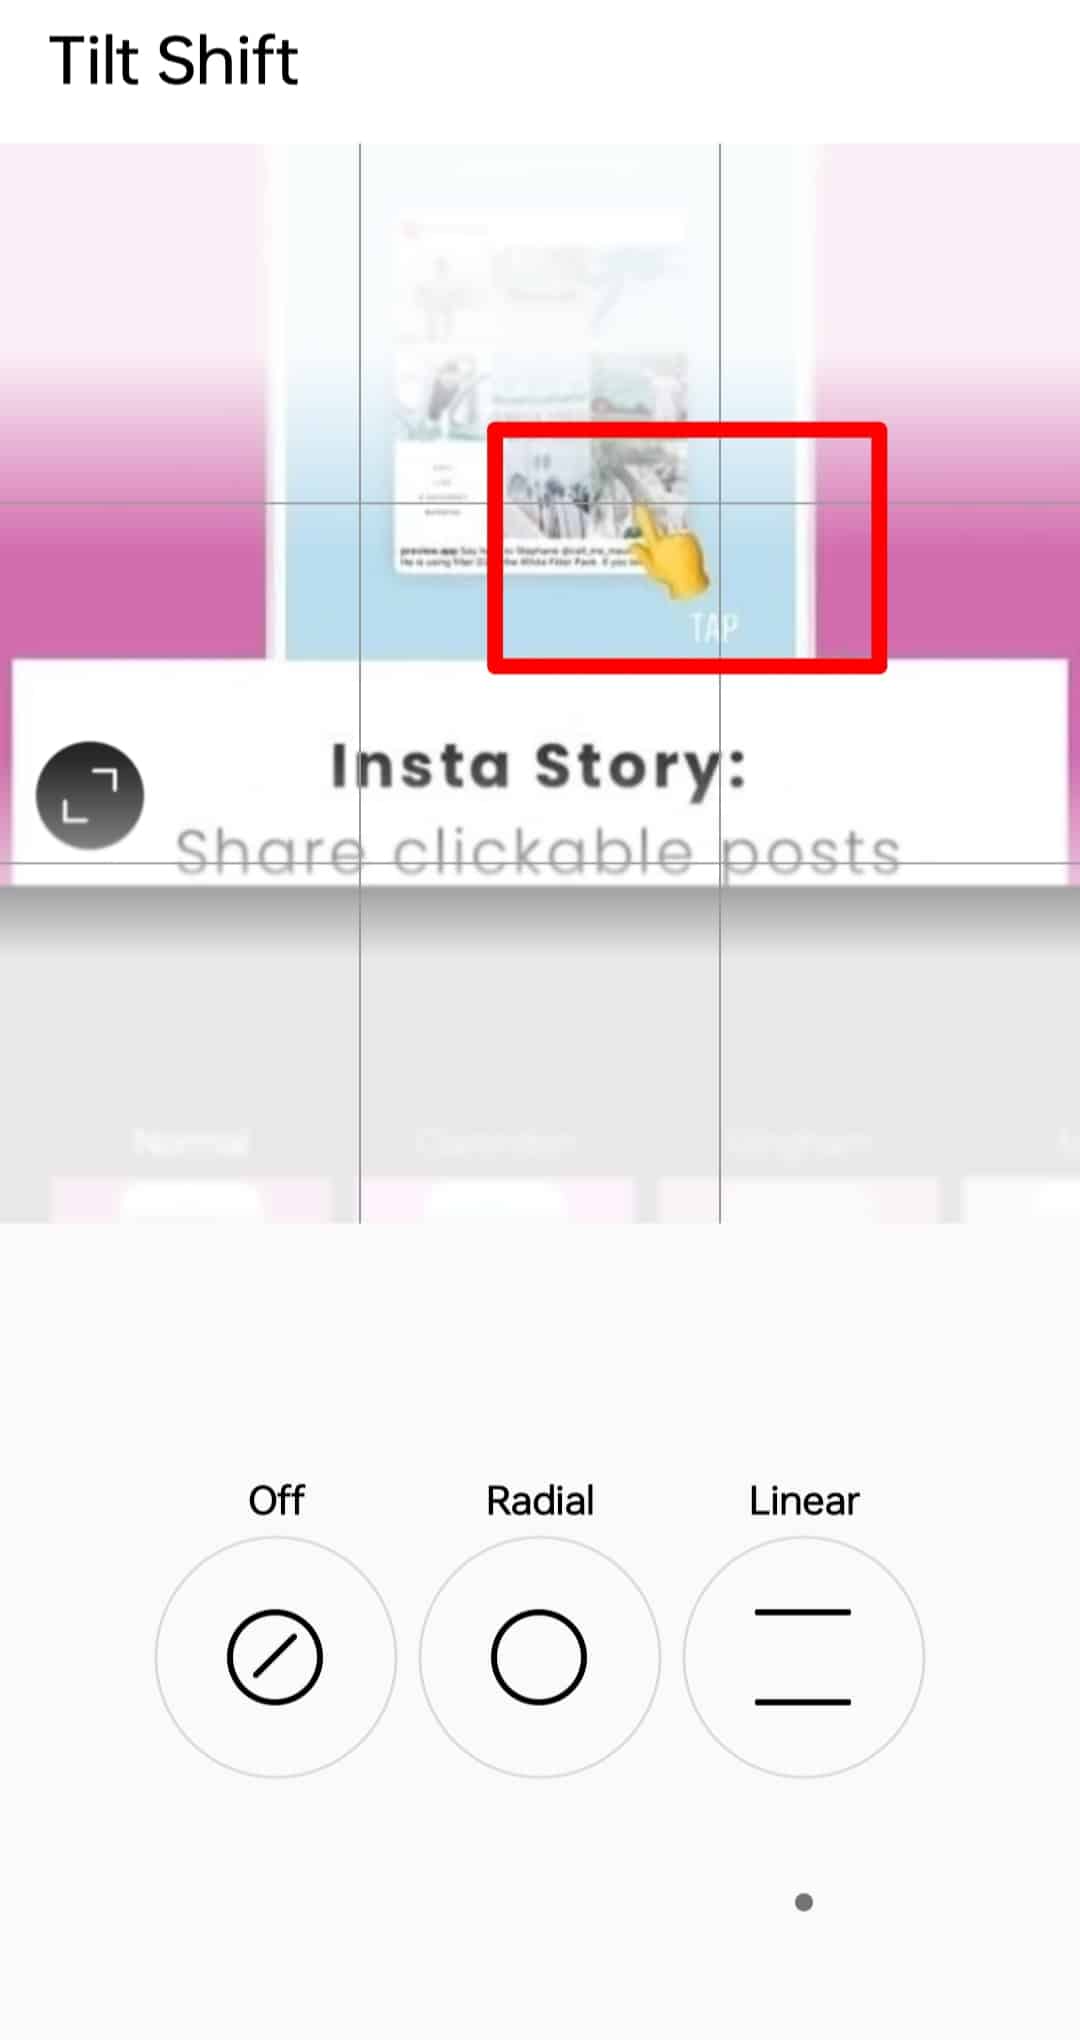
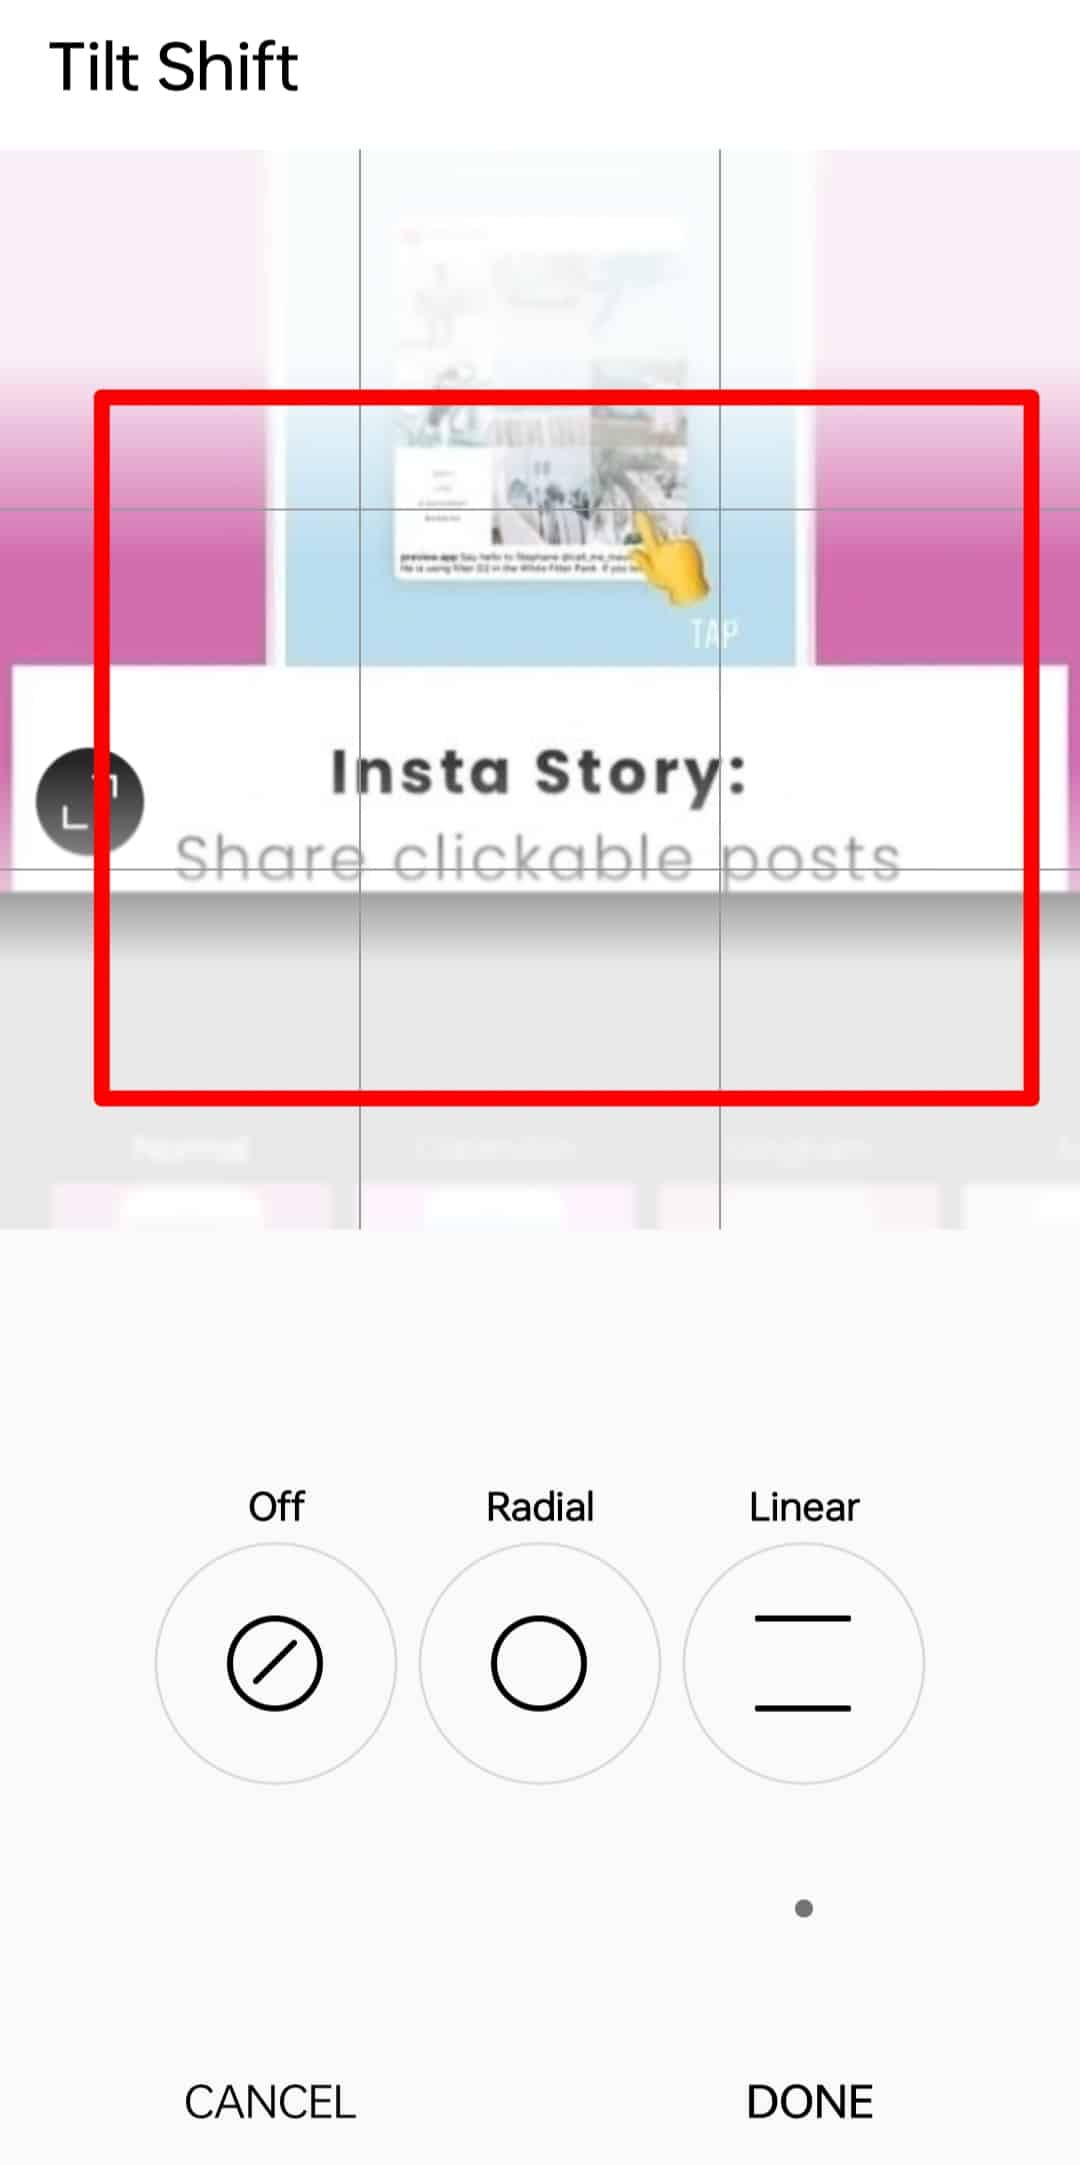
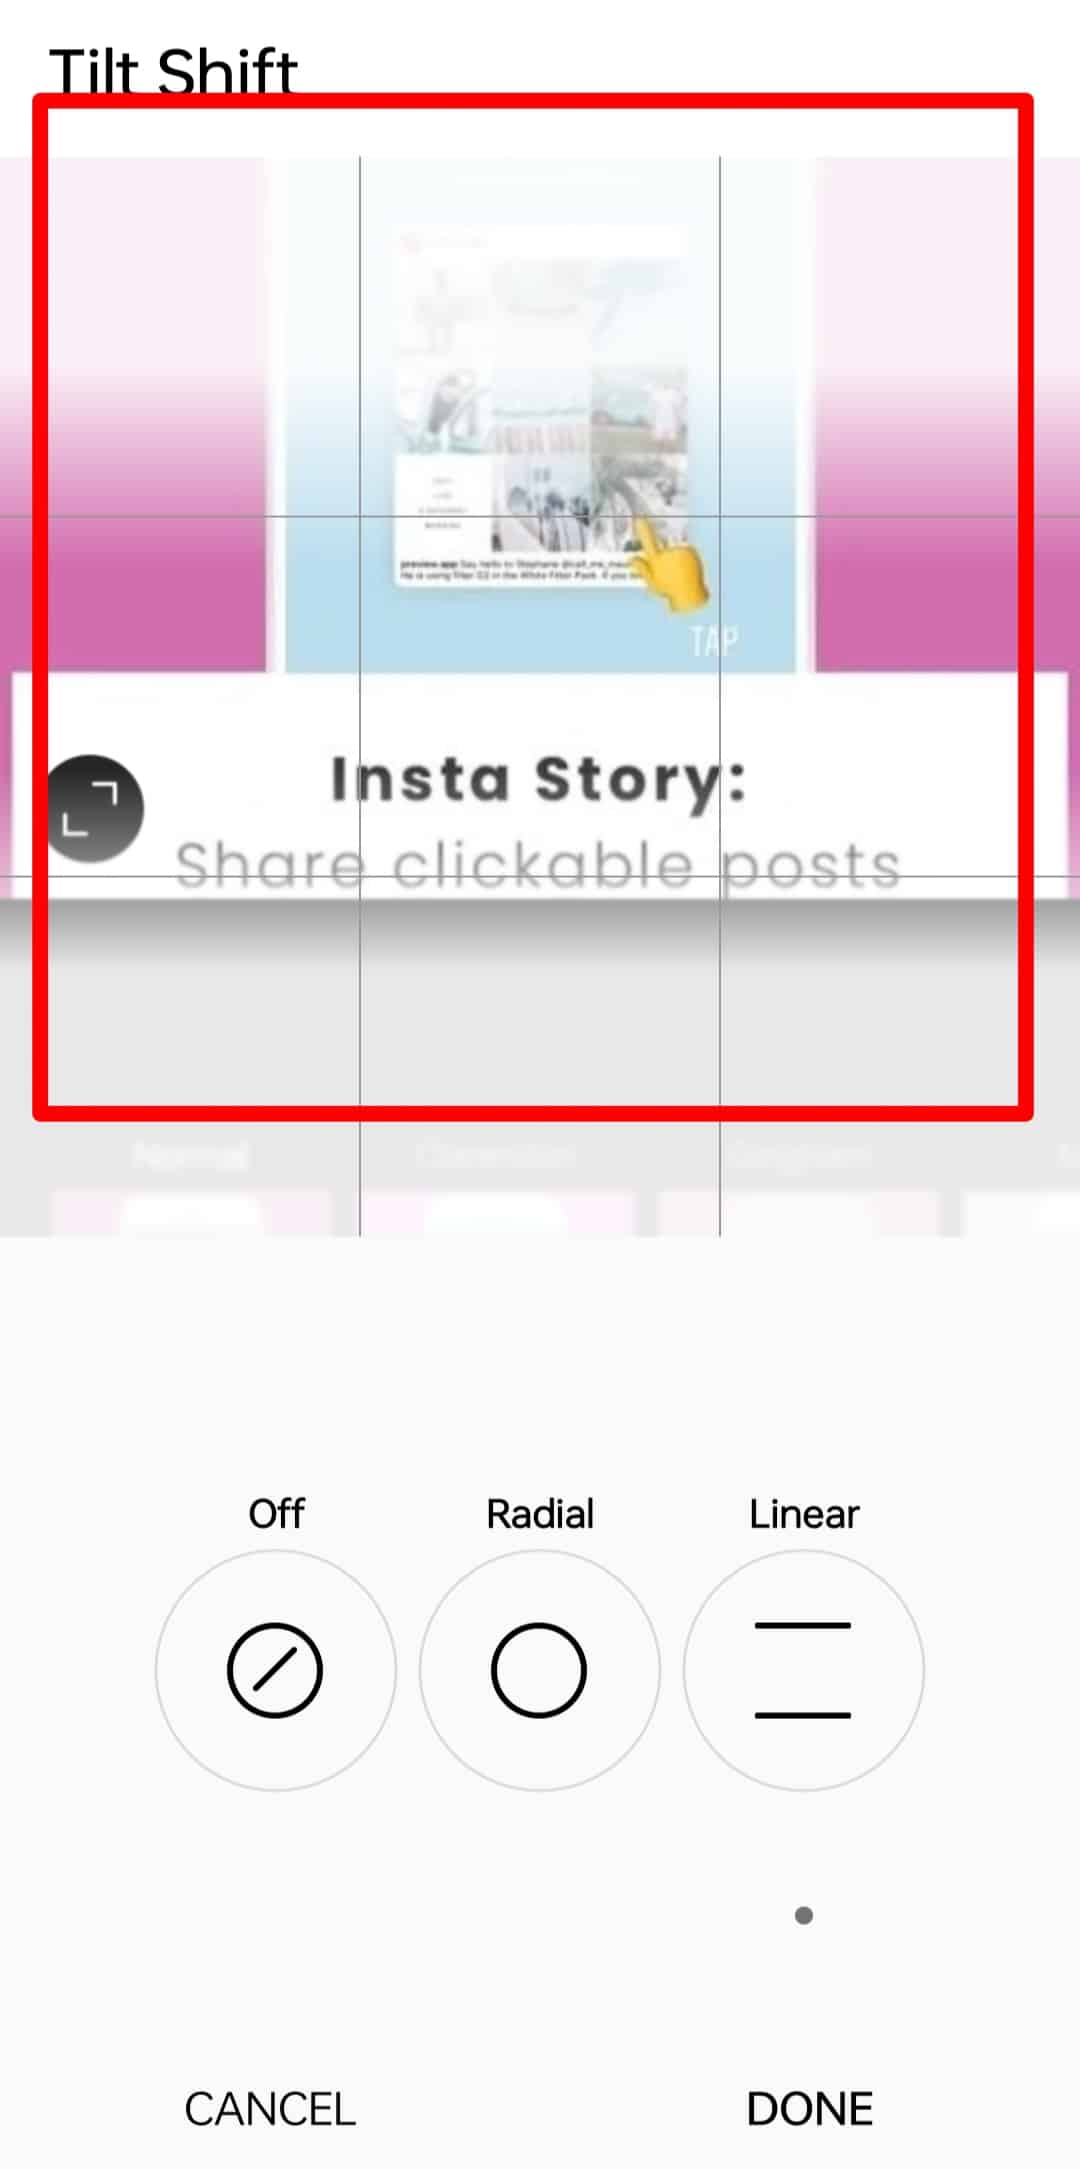
To blur a picture on Instagram, navigate to the new post screen and take a photo or choose one from your camera roll. Next, tap “Edit,” scroll right, and select “Tilt Shift.” Then choose “Radial” or “Linear” and use two fingers to pin in or out the picture to mark the boundaries of the blurring effect. Finally, press “Done” and post the image.
This guide will cover how to blur a picture on Instagram.
What Is the Tilt Switch on Instagram?
Instagram is famous for its many filters and effects that let you add quality to your pictures before posting them.
You can adjust the size of your image and set the desired brightness, contrast, saturation, shadows, and more stimulating effects.
These are edits that most people are aware of, but there is one that you may not be familiar with; the “Tilt Shift.”
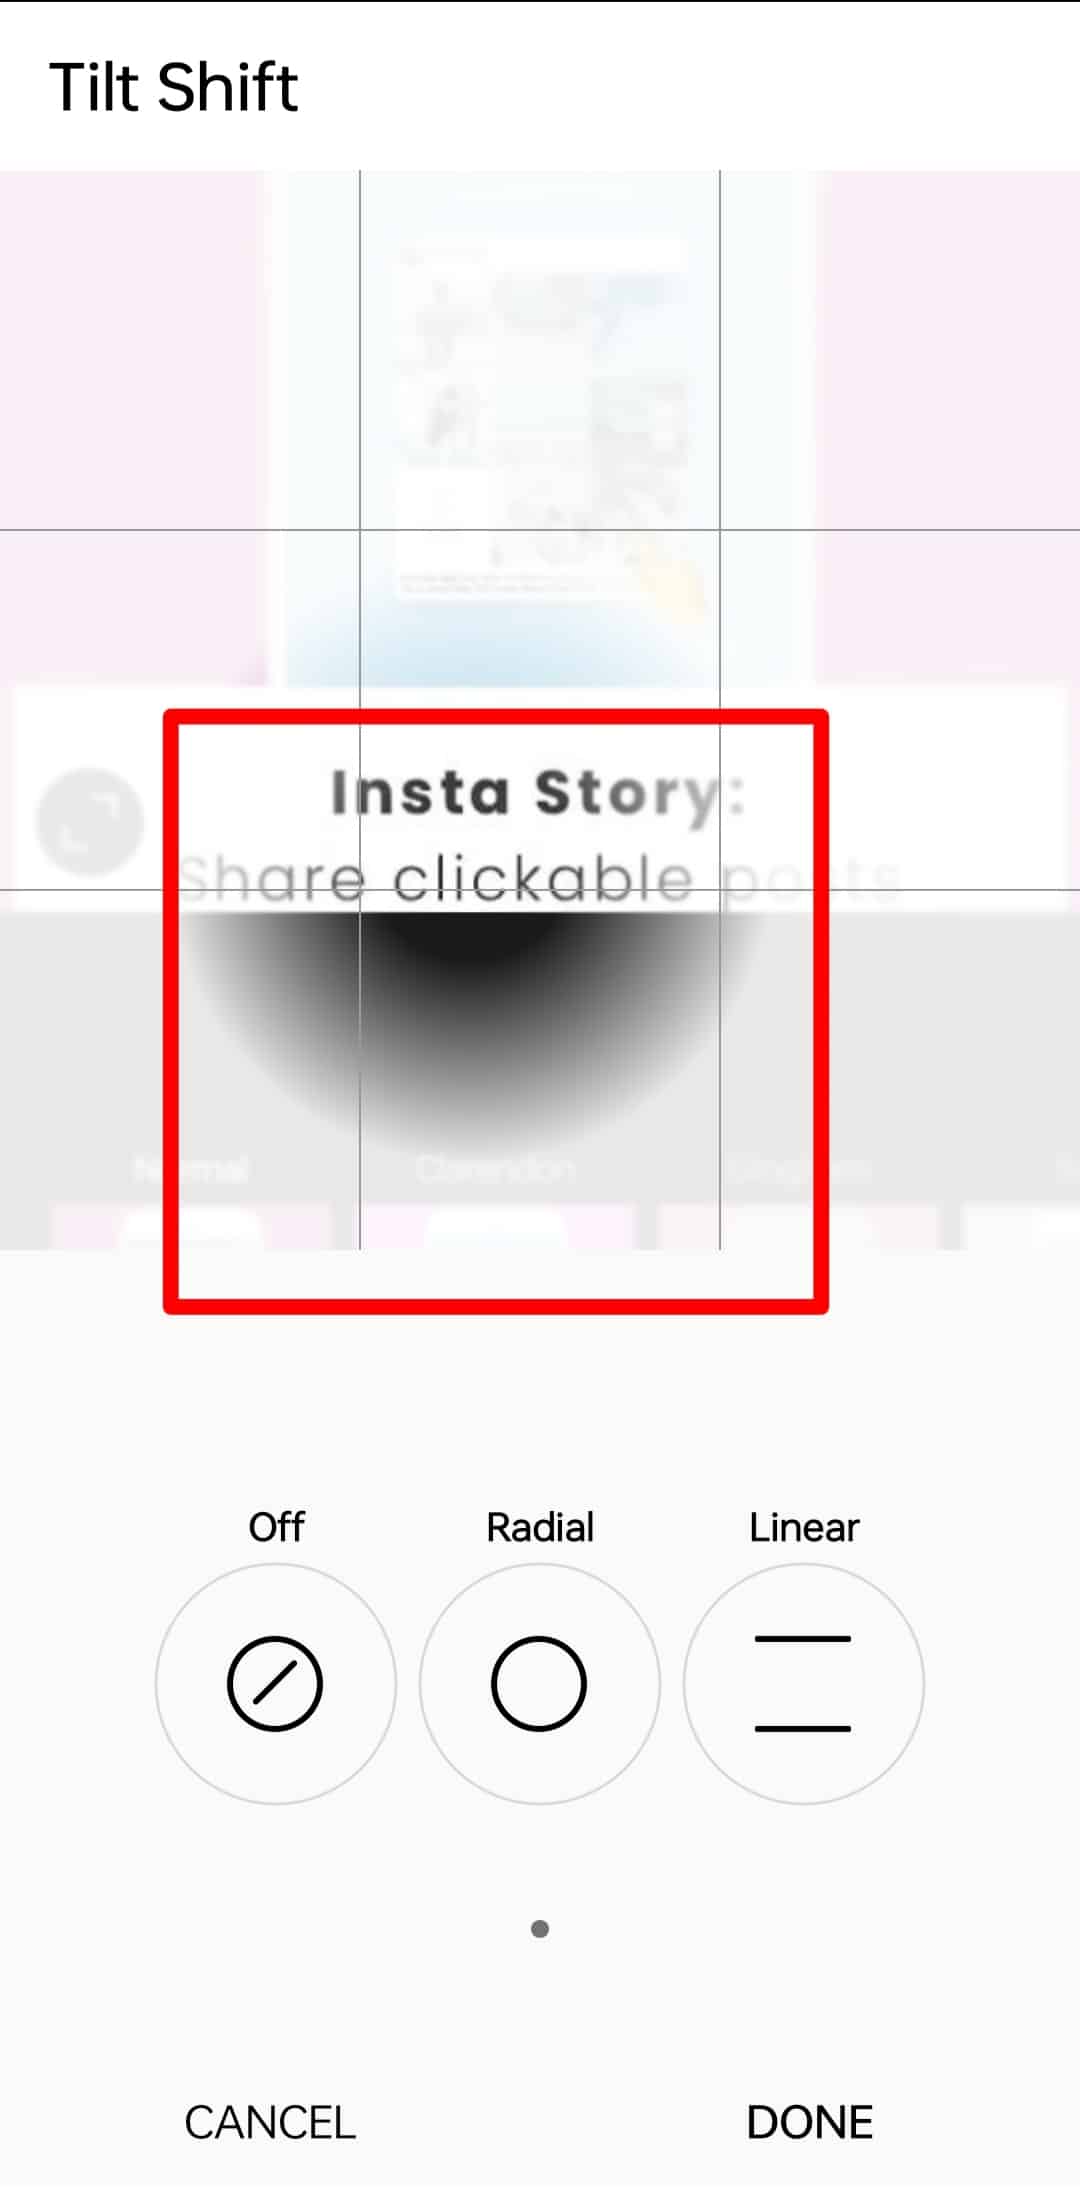
From its name, you may think the effect tilts your photo. However, that is not the case; The “Tilt Shift” enables you to blur parts of your picture to place the focus on particular aspects.
It has two options, “Radial” and “Linear.” The “Radial” option blurs the corners of your image to focus on a circular central part of the image.
For instance, if you apply a “Radial” effect on a picture of your cat, you’d blur the rest of the body and background and focus on its face.
On the other hand, the “Linear” effect blurs everything else, leaving the focus on a linear part of the photo.
For instance, if you want to highlight and focus on a paragraph in a book excerpt, you can blur the rest of the sections and leave the paragraph of interest in focus.
Let’s discuss how to blur a picture on Instagram in detail below.
Blurring a Picture on Instagram
Follow the below steps to blur a picture on Instagram:
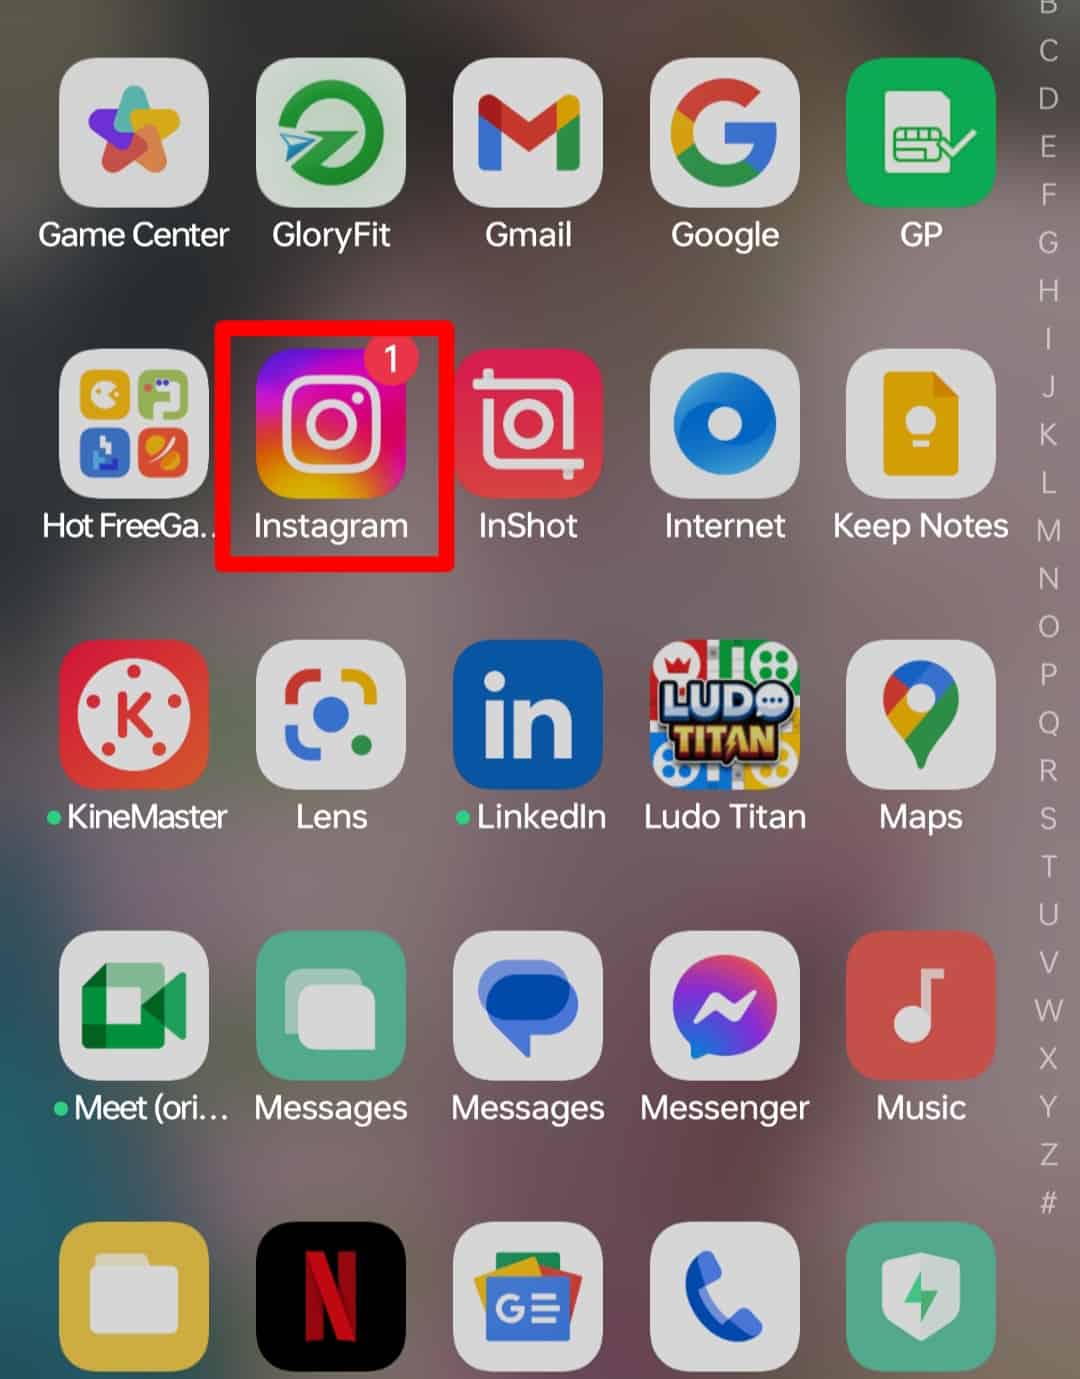
- Open the Instagram app on your mobile device.
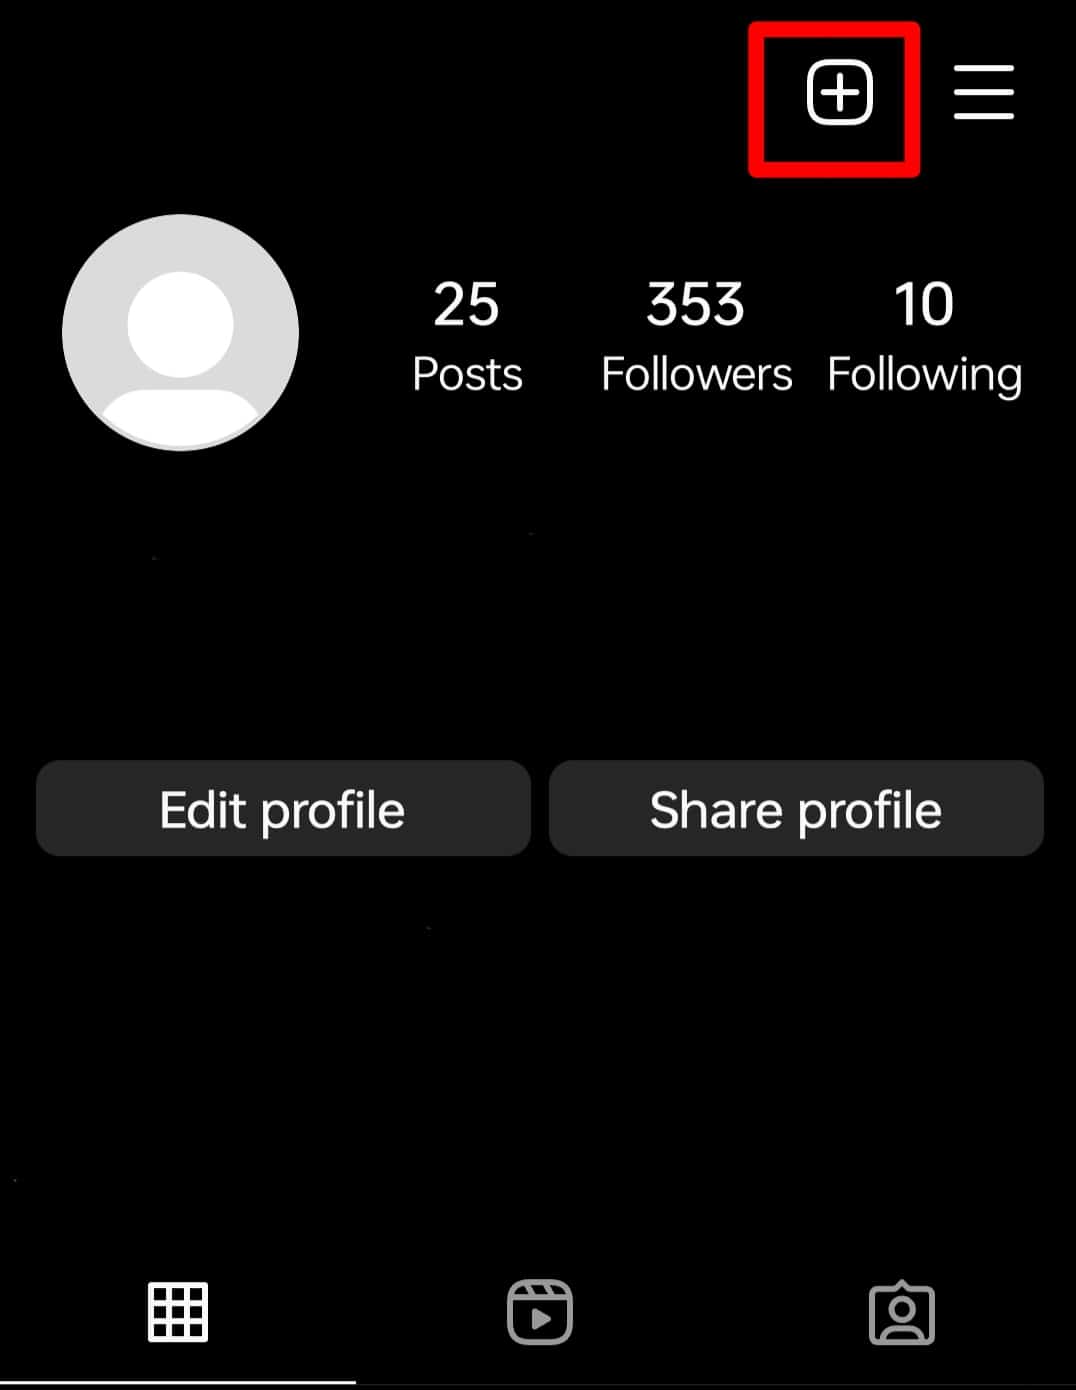
- Tap the “+” button at the top to create a new post.
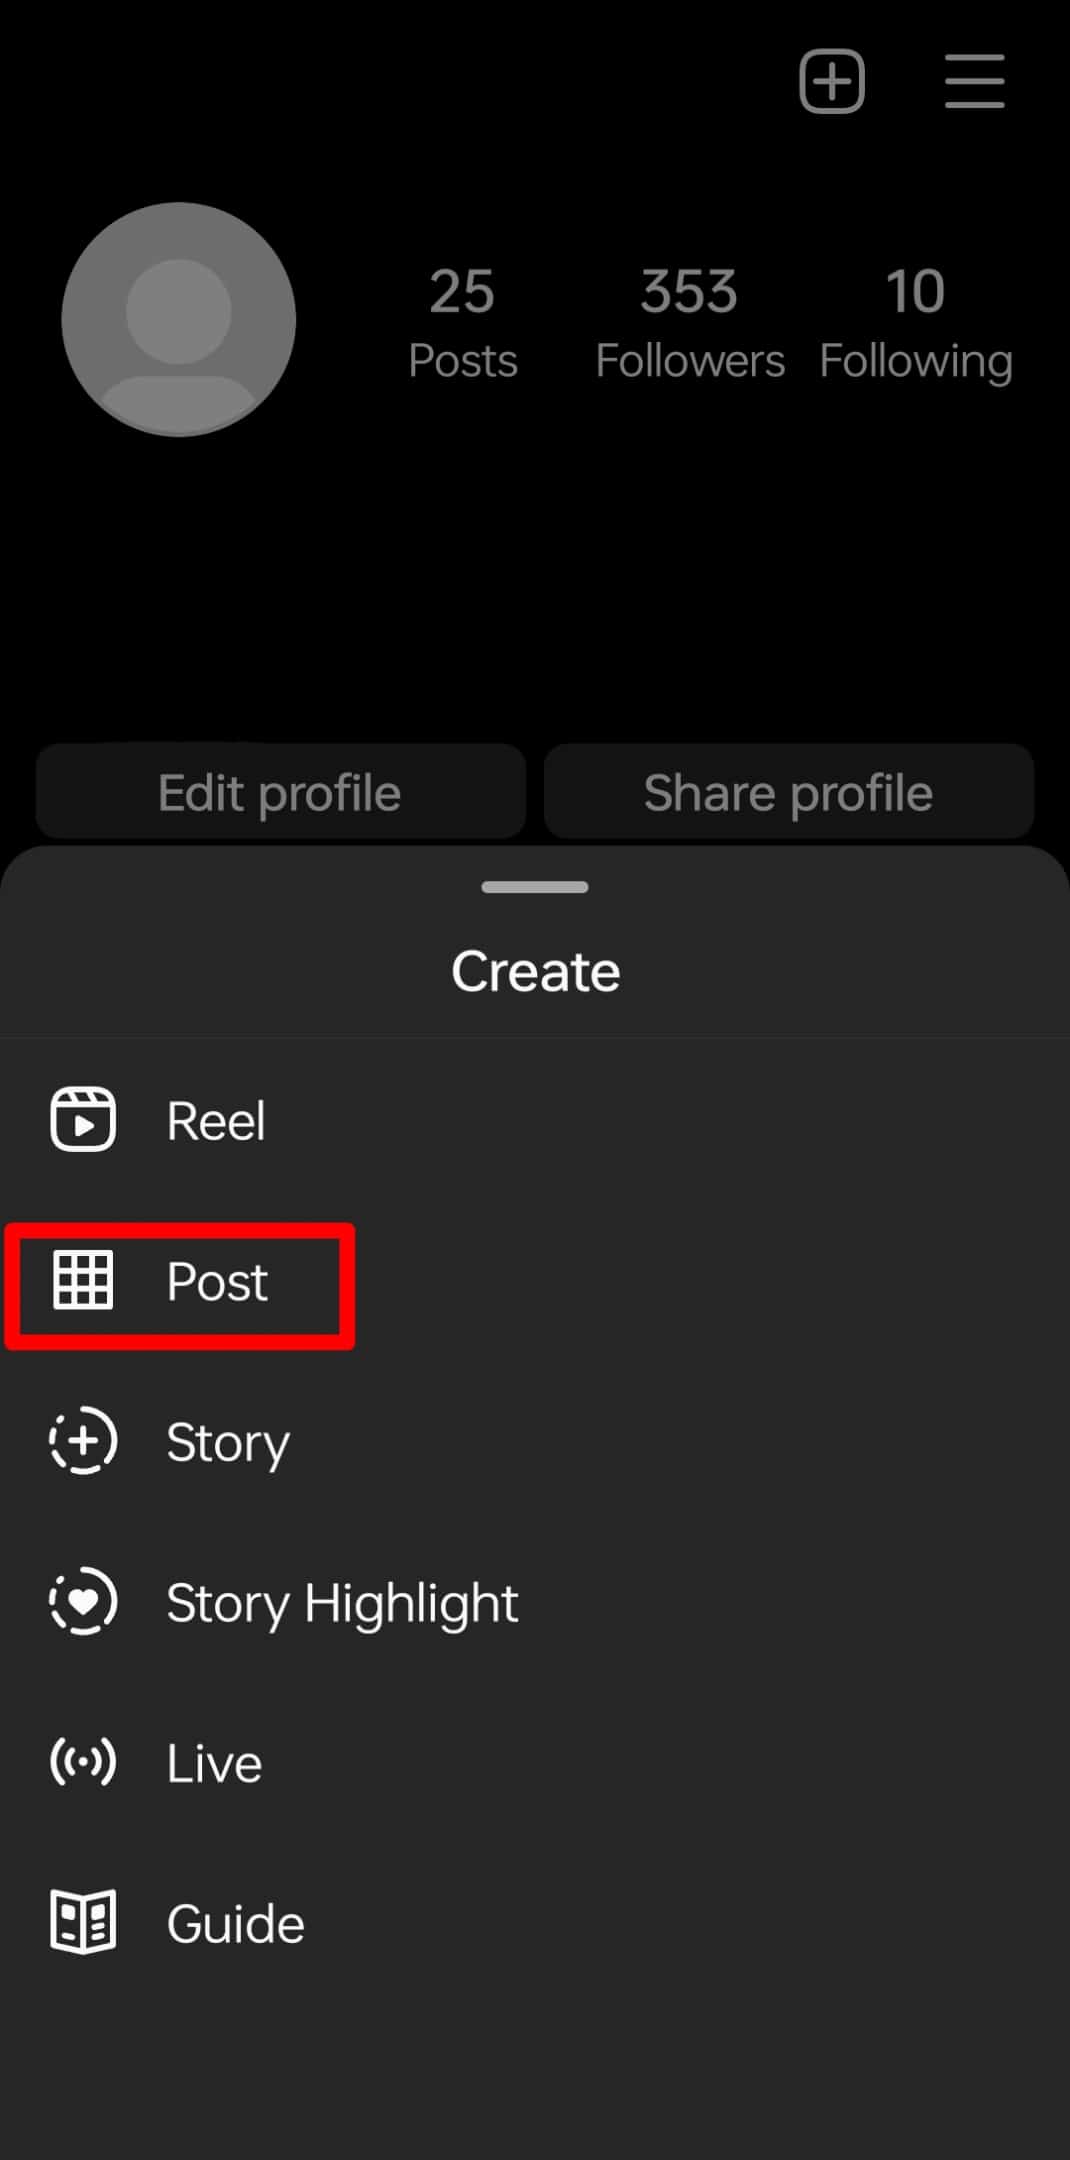
- Select “Post” at the bottom.
- Choose the image from your gallery, or take a new one.

- Tap “Next” in the top right corner.

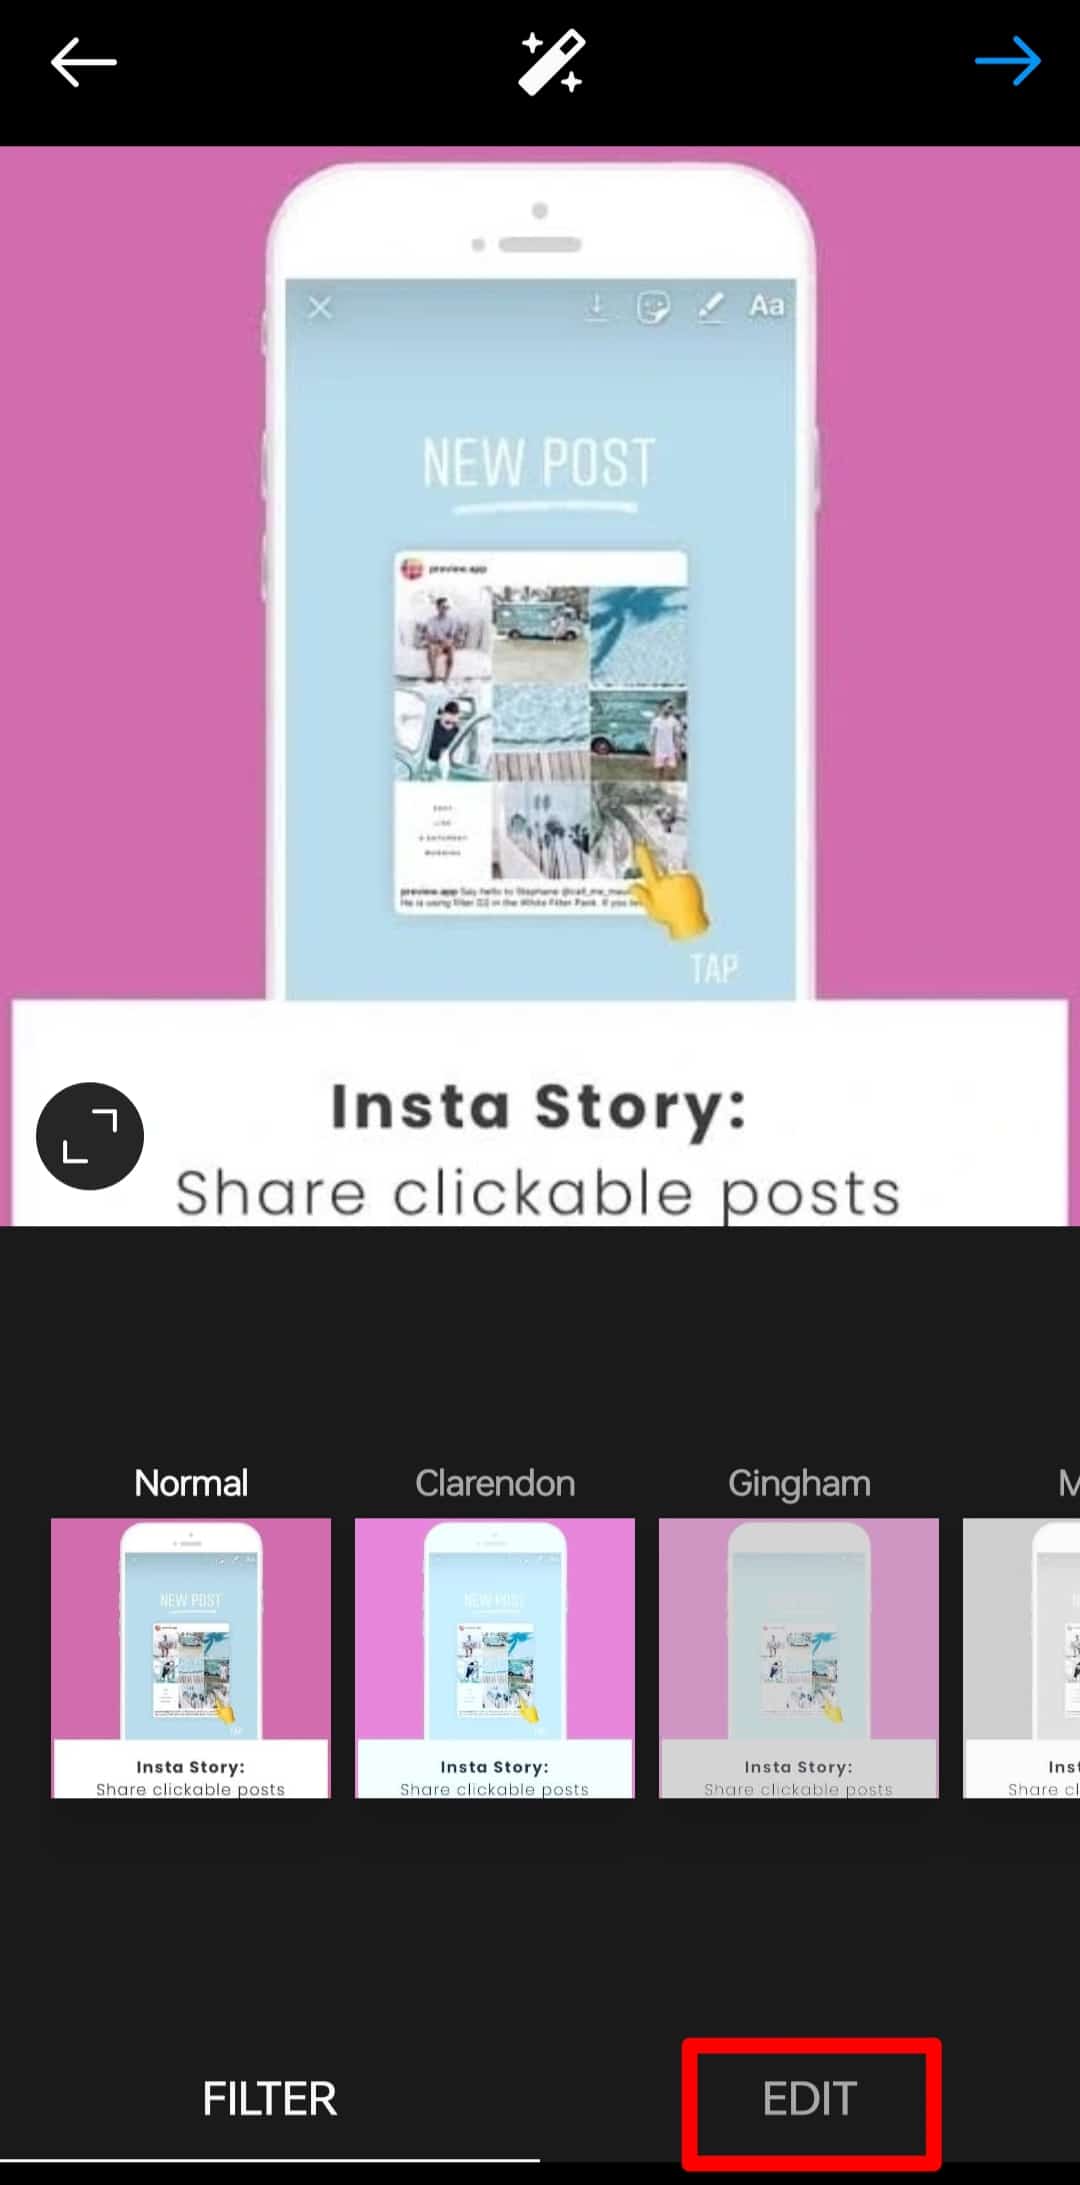
- Tap “Edit” at the bottom.
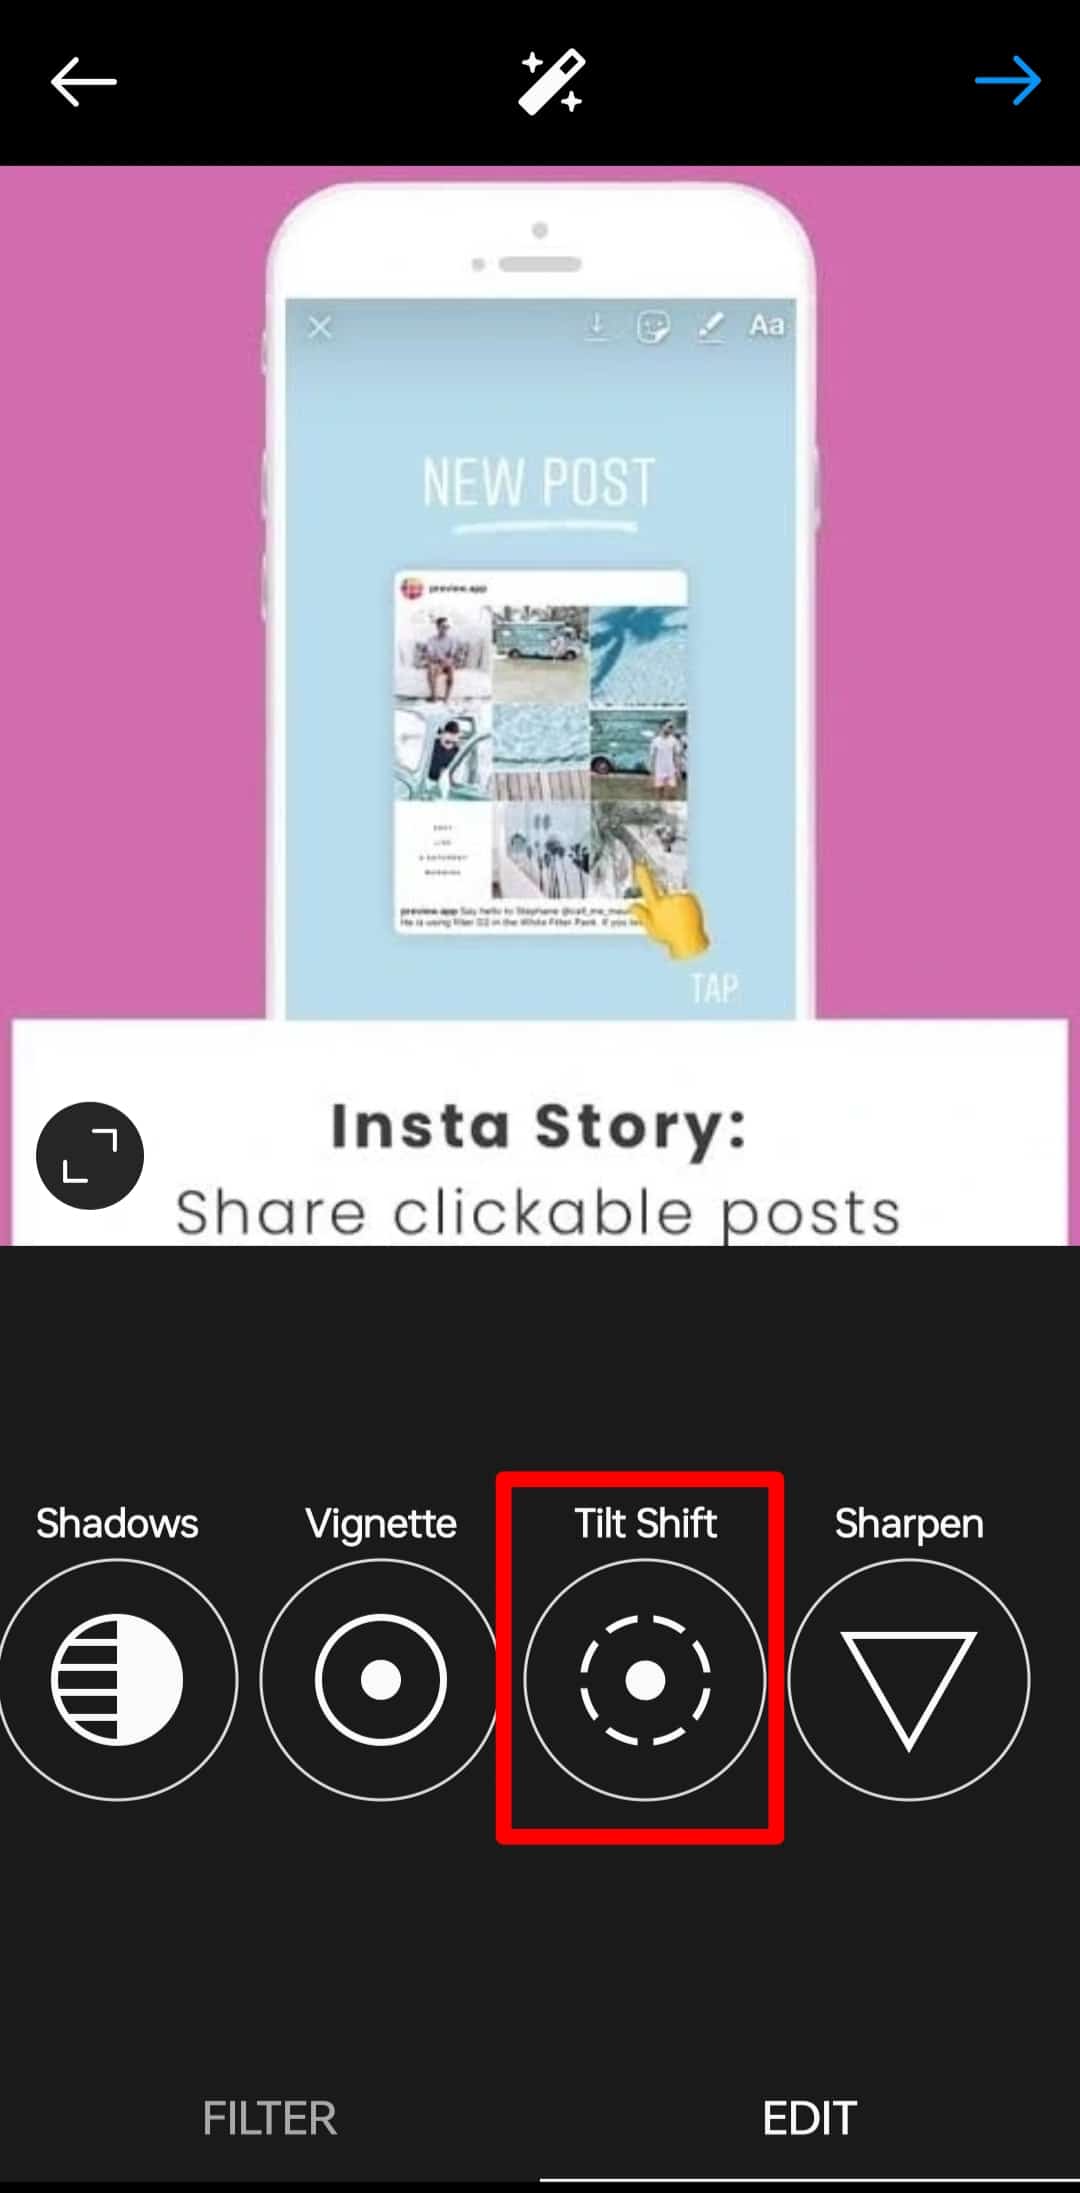
- Scroll right to locate “Tilt Shift,” then select it.
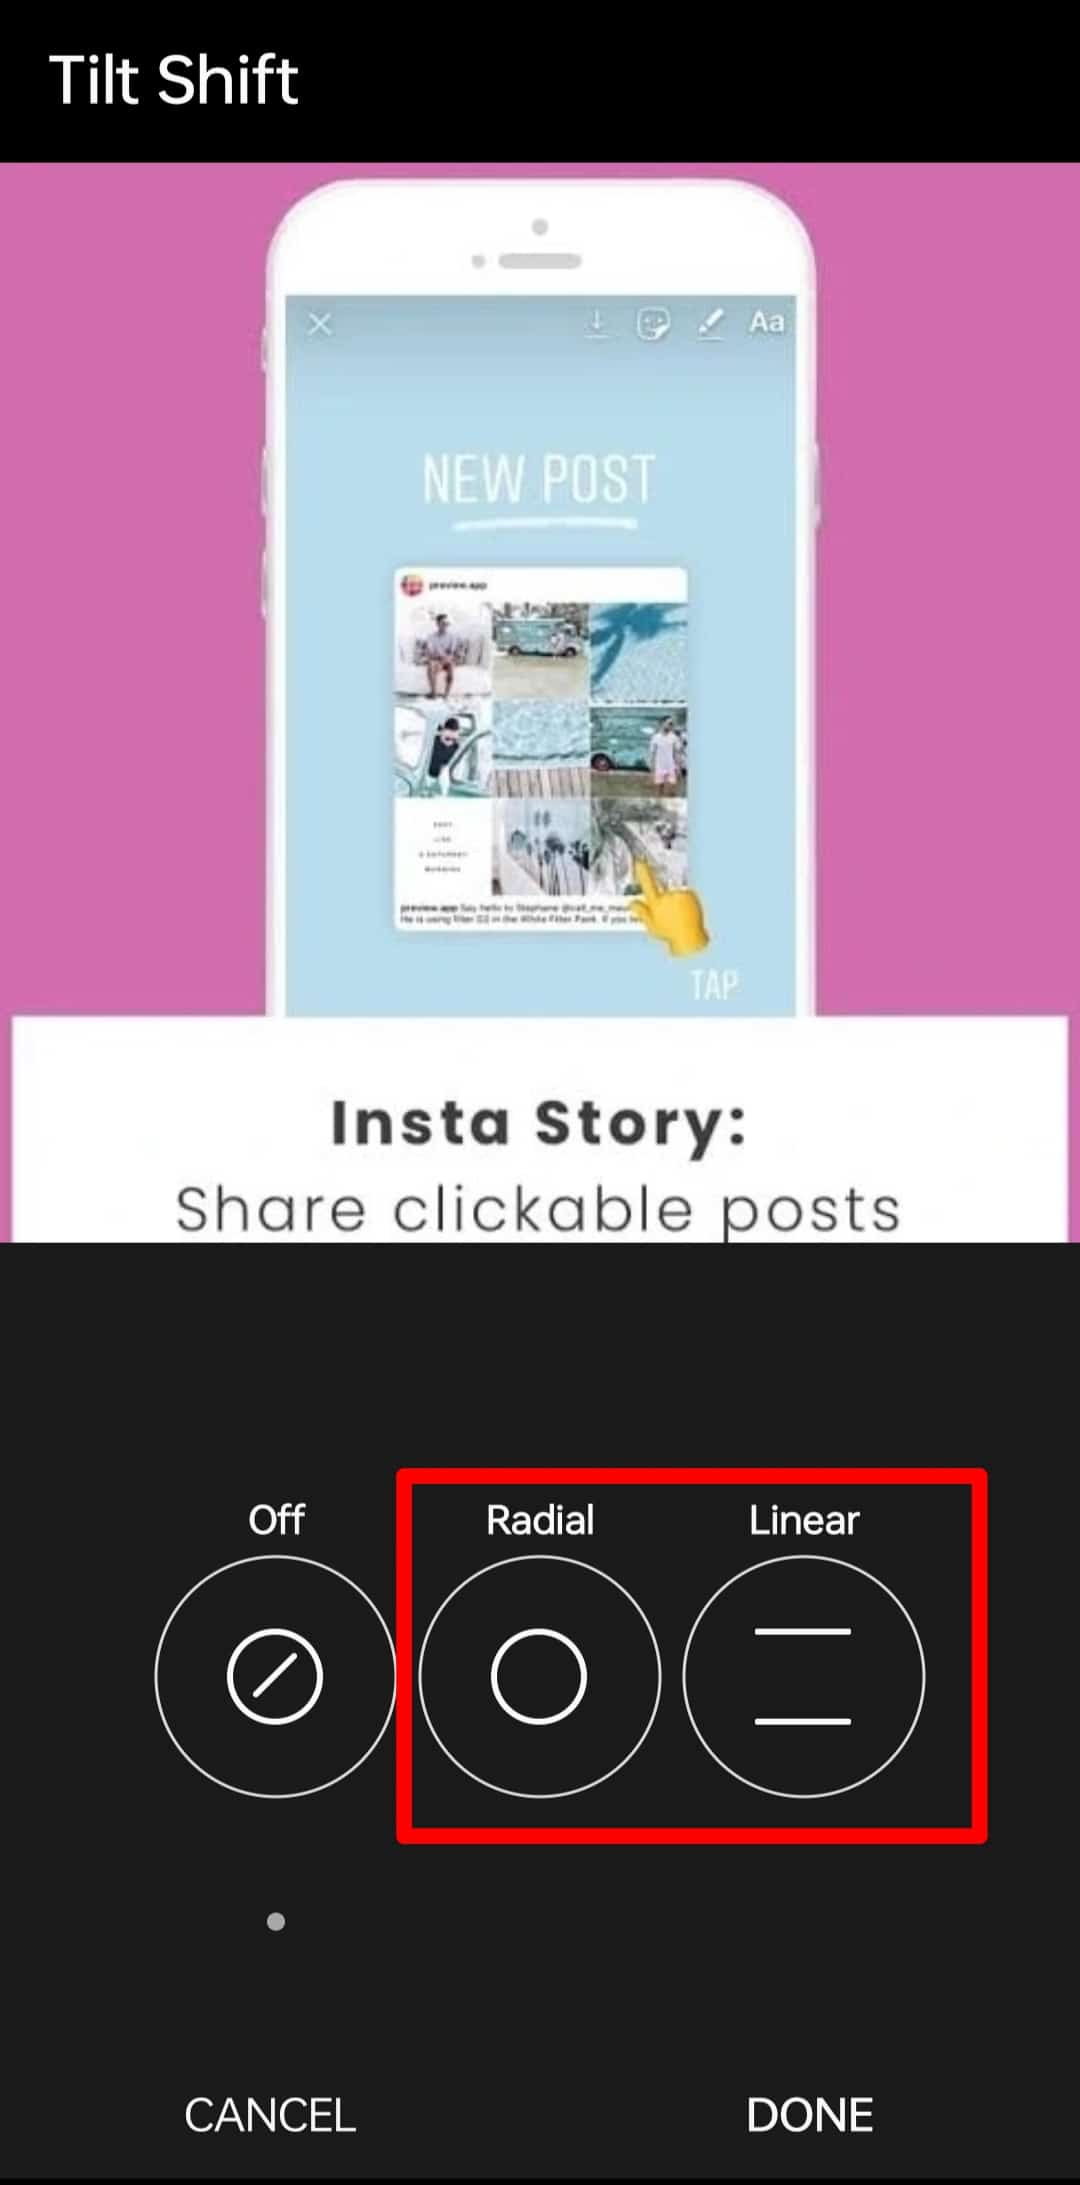
- Choose “Radial” or “Linear.”
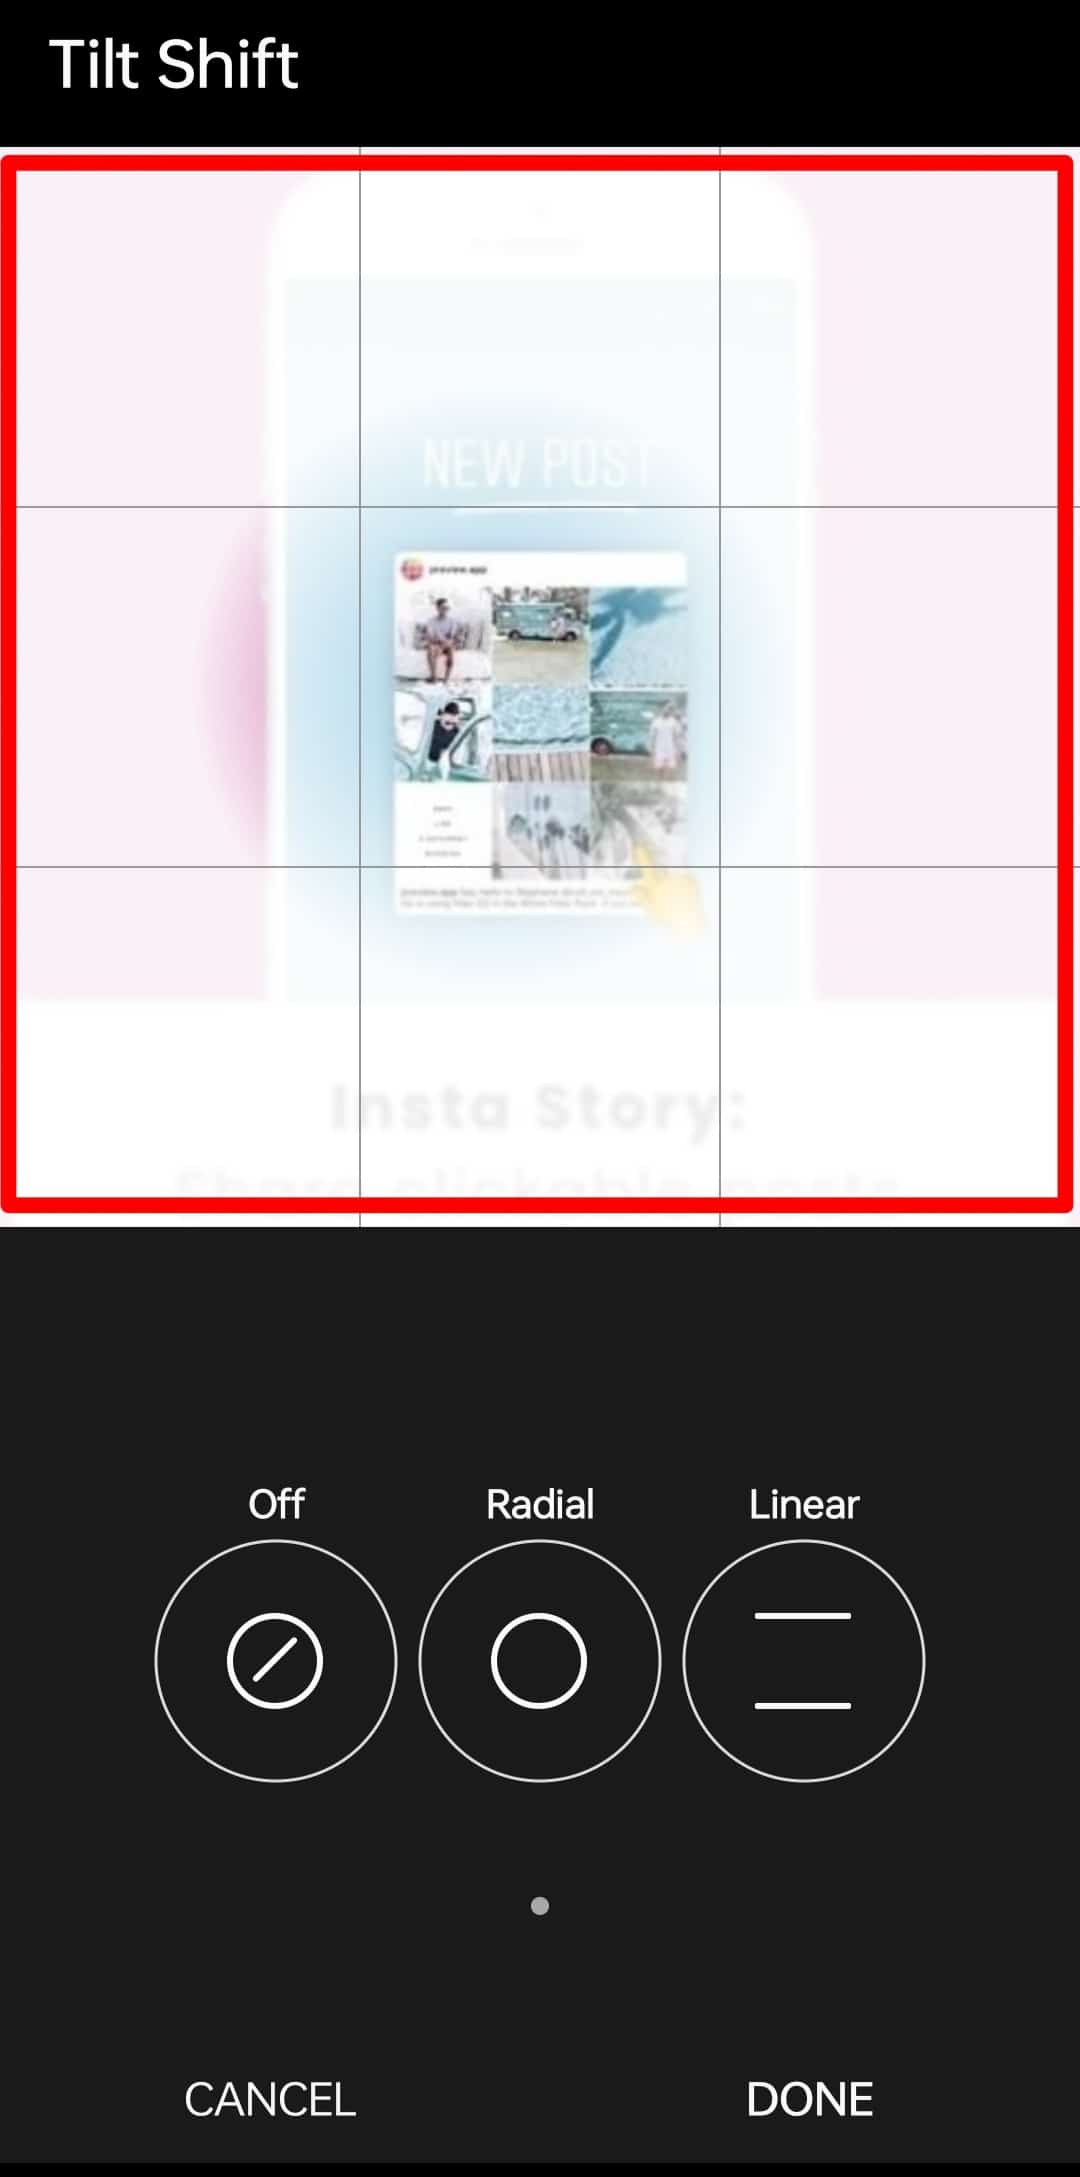
- Use two fingers to pin in or out the picture to mark the boundaries of the blurring effect.
- Press “Done” at the bottom.
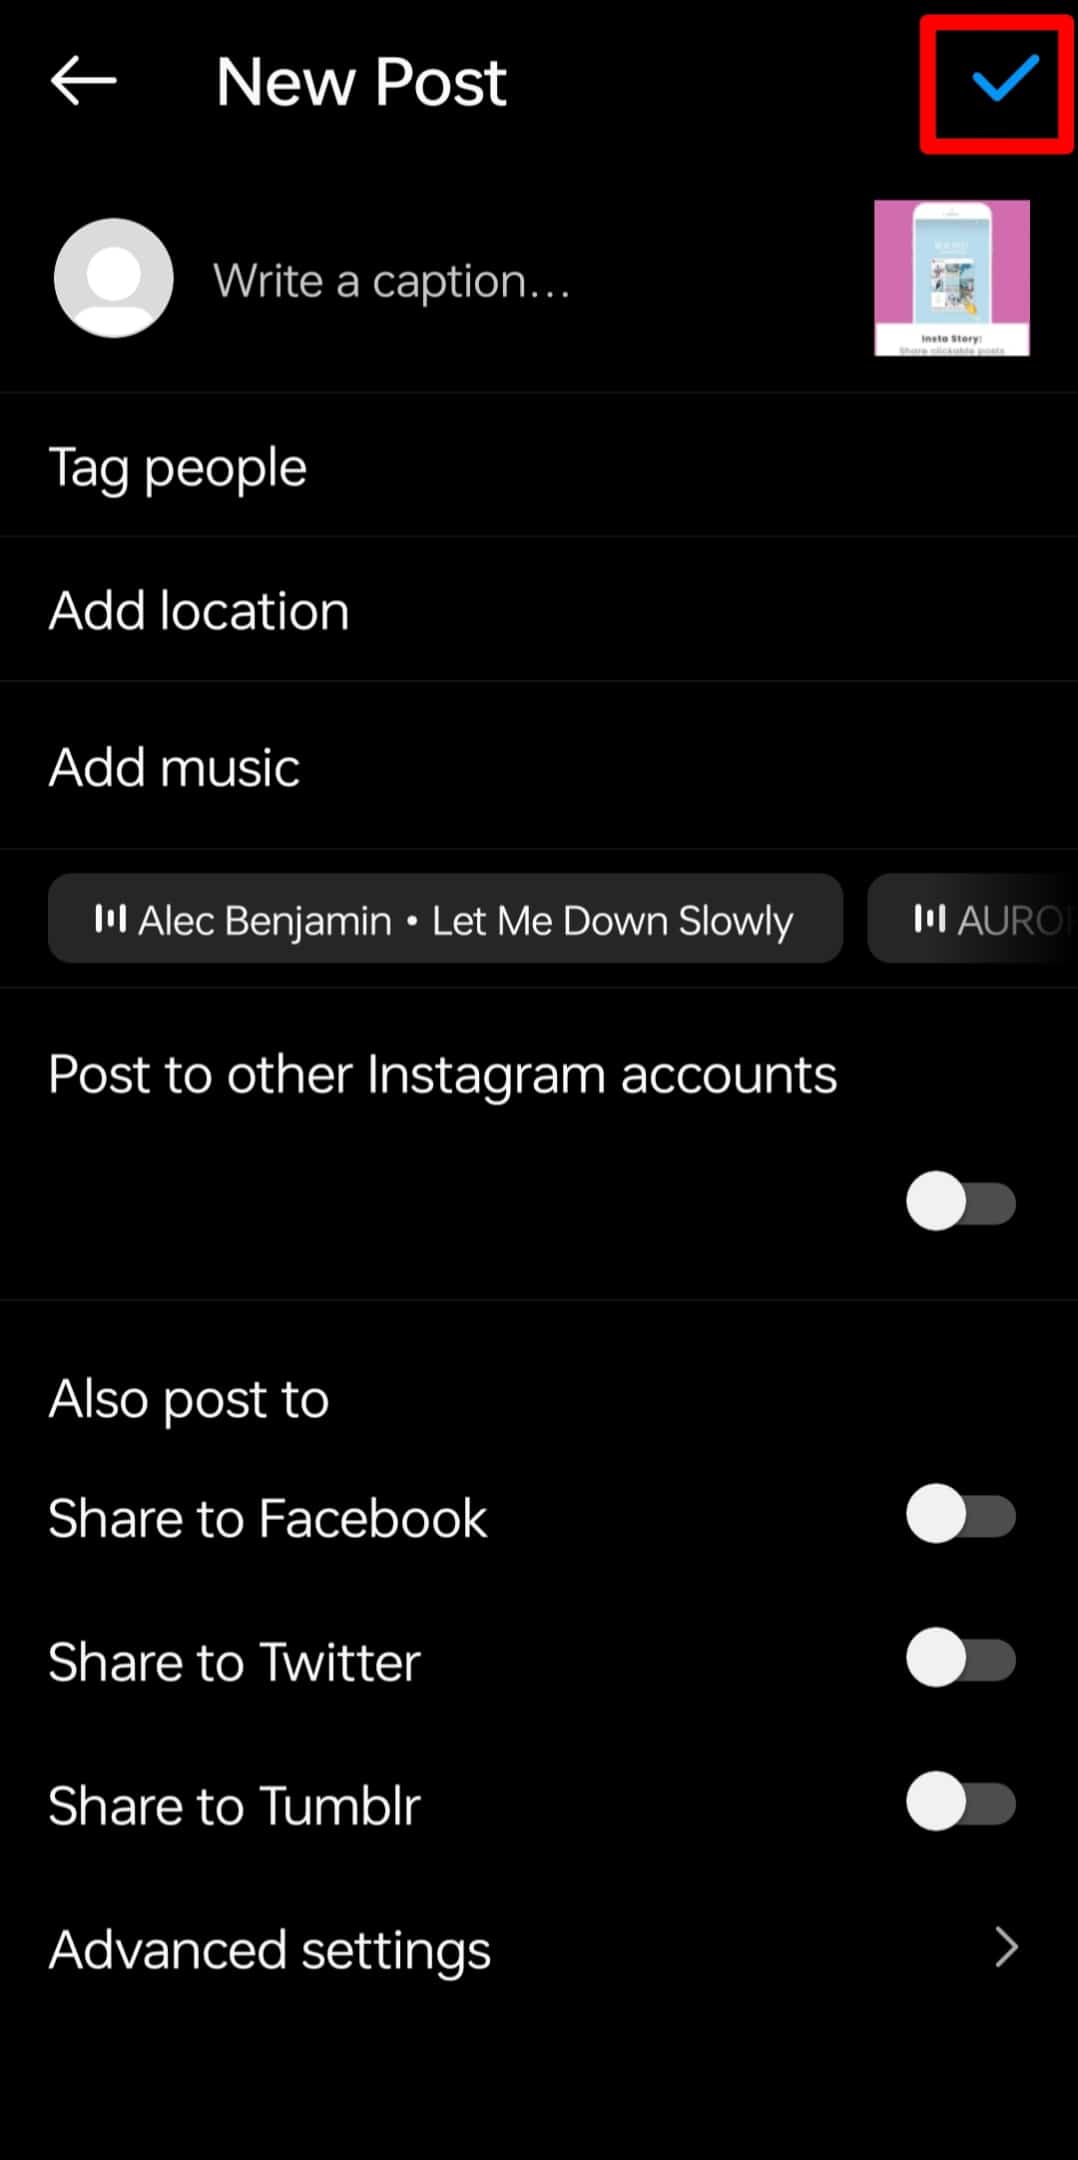
- Tap the “Next” button in the top right corner.

- Caption your image.
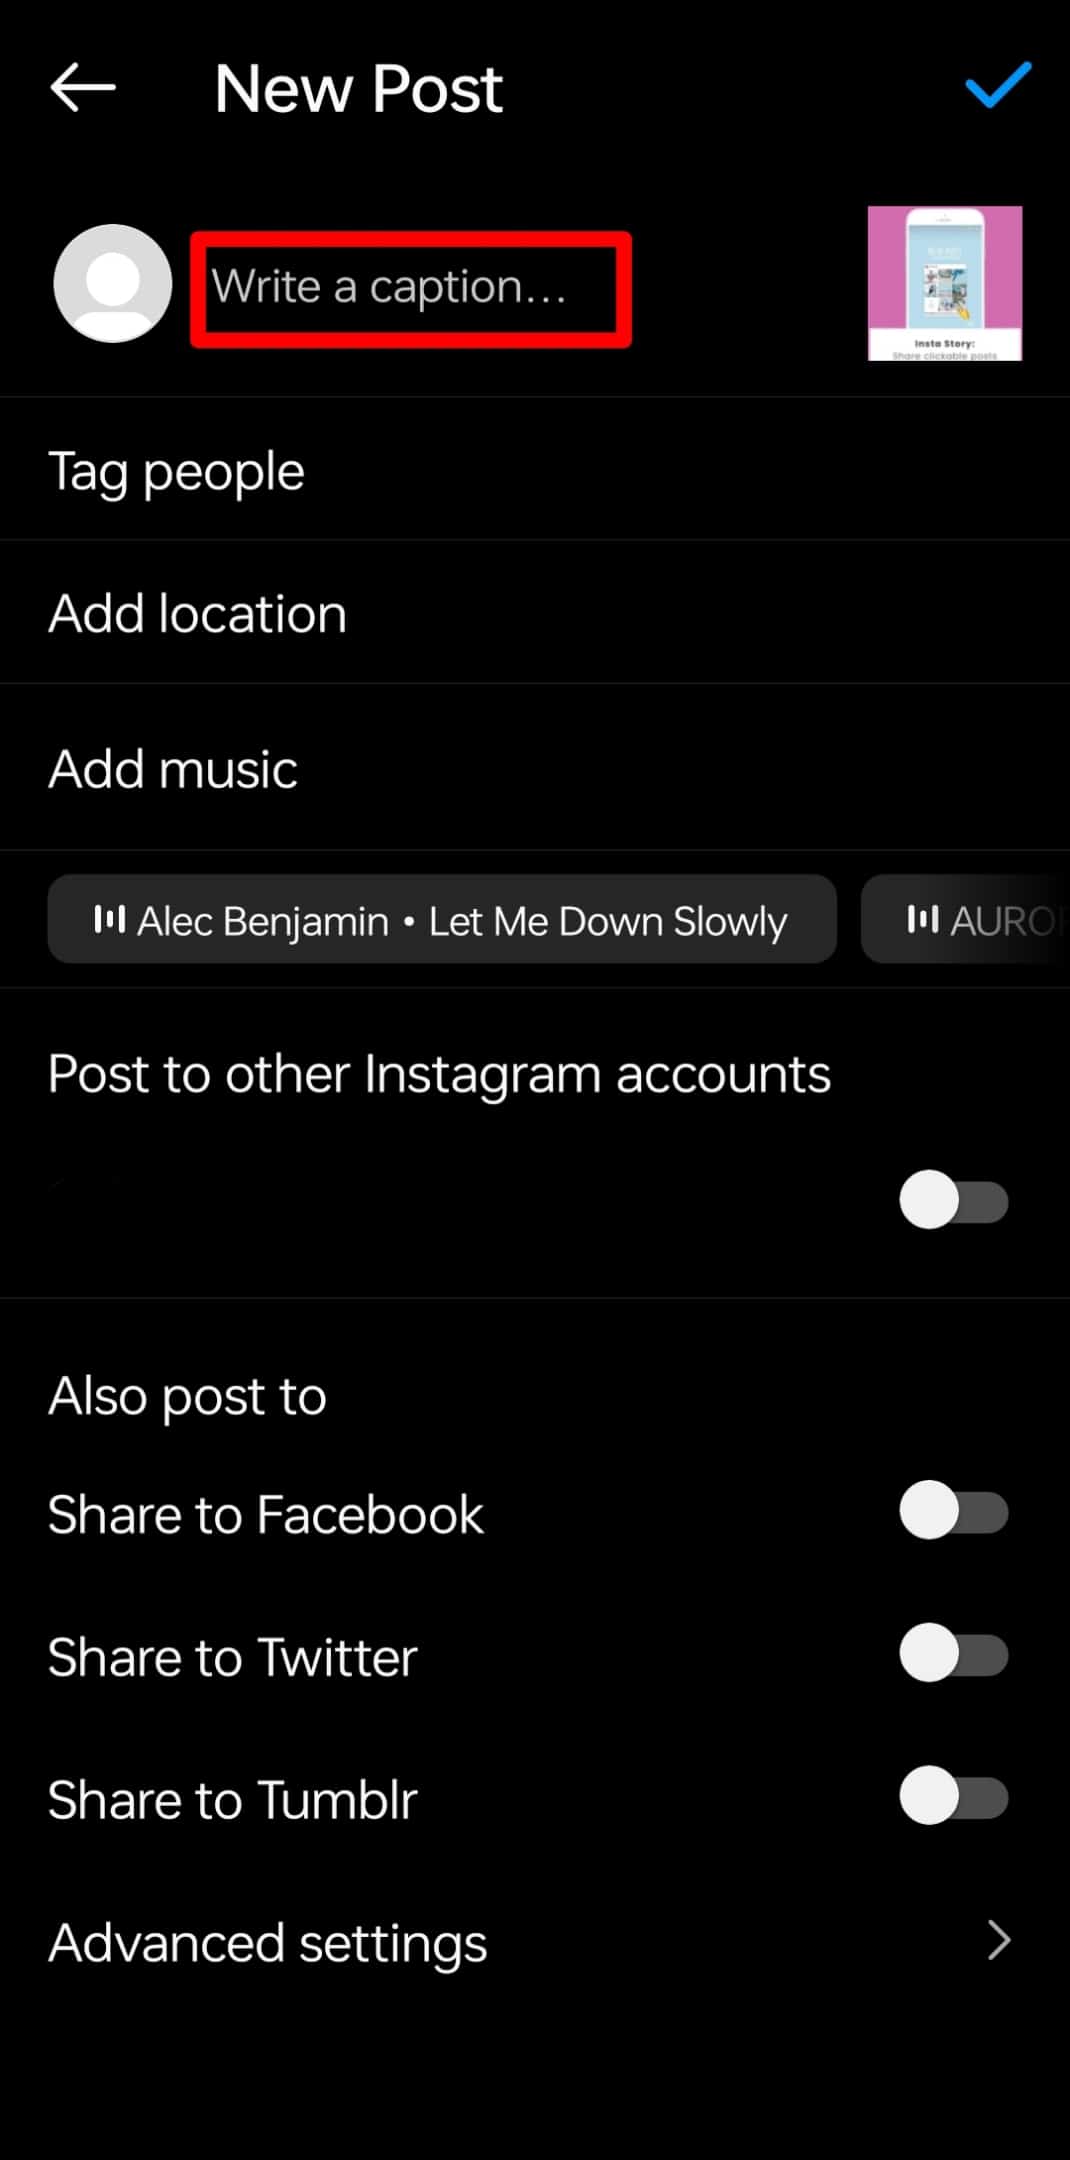
- Tap the “Share” button in the top right corner.
Using the Radial Option
The “Radial” option blurs the edges of your picture in a circumference design.
After selecting this effect, do the following to adjust the areas you want to blur:
- Slide a finger across the picture to mark the areas you want to remain in focus.
- Pinch your thumb and index finger, pulling the picture in or out to adjust where the blur boundaries reach.

Using the Linear Option
For the Linear option, the blurring effect occurs in a linear design.
Do the following to adjust the areas you want to blur:
- First, slide a finger across the picture to apply the effect randomly.
- Pinch your thumb and index finger, then pull them towards or away from each other to adjust the blurred area.
- To change the direction of the linear blur, rotate the two fingers while still pinching the picture.
Wrapping Up
Blurring a picture before posting it on social media can serve several purposes.
These purposes include concealing details you don’t want to show the public and placing the focus on particular parts of the picture.
To blur a picture on Instagram, find the “Tilt Shift” effect under the “Edit” option, then apply the “Radial” or “Linear” blur.
FAQs
The Instagram effect that blurs parts of a picture is known as “Tilt Shift.” To access it, tap the “Edit “option beside “Filter,” scroll through the edit options, and you’ll find “Tilt Shift” next to the “Sharpen” option. When you click on the effect, select either the “Radial” or “Linear” option to apply the blurring effect to your picture, click “Done,” then post the picture.
Yes, you can blur parts of a photo on Instagram using the “Tilt Shift” effect.
To adjust the blurred area of an image on Instagram after applying the radial or linear effect, pinch the image in or out with your thumb and index finger until you achieve the desired blur.