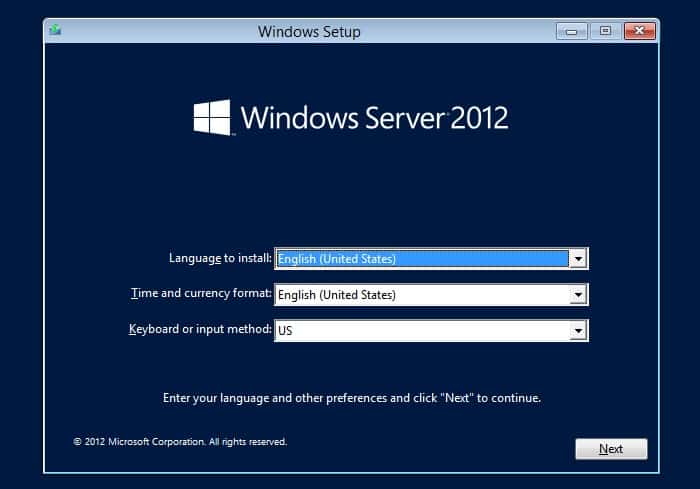
In this tutorial, we are going to go through the steps to install Windows Server 2012. Microsoft continues to improve the installation process. If you have installed Windows Server 2008/2008 R2, you will find that the installation of Server 2012 is very similar.
- If you already have Windows Server 2012 on DVD media, that’s great. If not, you can download a fully functional trial version from the Microsoft website.
- Boot from the DVD media, ISO, or VHD (if you are running this as a VM guest).
- The setup files will start to load.

- Review the selection and click Next.
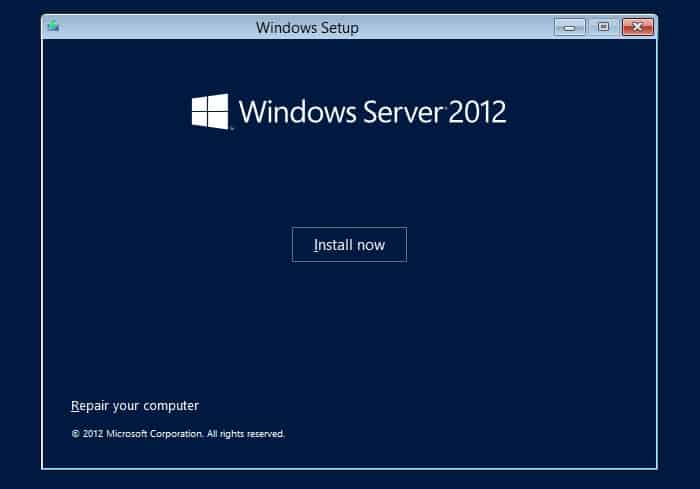
- Since you are performing an installation, click on Install Now. However, if you already had Windows Server 2012 installed and you needed to perform a repair, then you would click on the Repair your computer link on the lower left area. Once you click on Install Now, setup will continue.
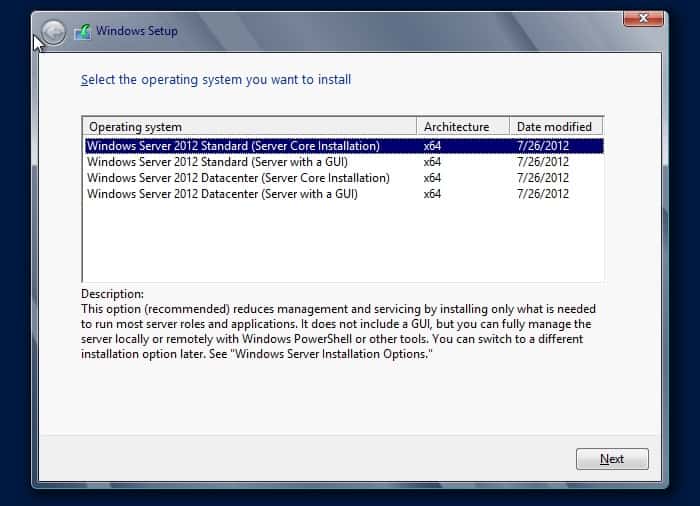
- In this tutorial, we are going to install Windows Server 2012 Standard Edition (GUI). The default is the Core Installation. You should note that Standard and Datacenter have the exact same roles and features. Datacenter is intended for those implementations that will depend on heavy workloads in a virtualized environment. You should also note that there are only x64 versions for Windows Server 2012.
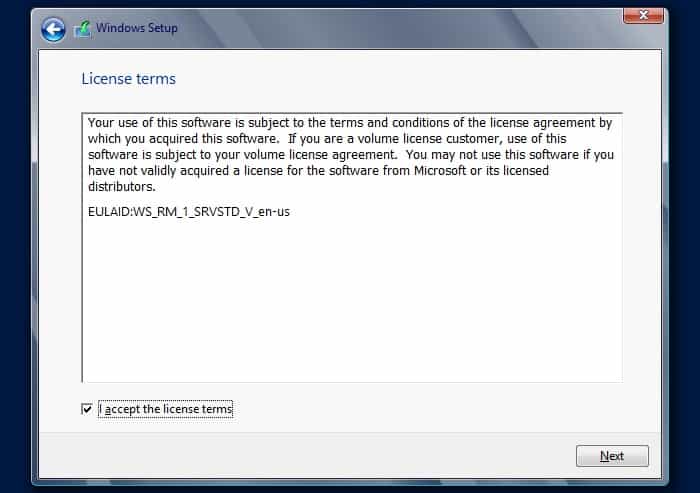
- Read License Agreement, click the Checkbox I accept the license terms, and then click Next.
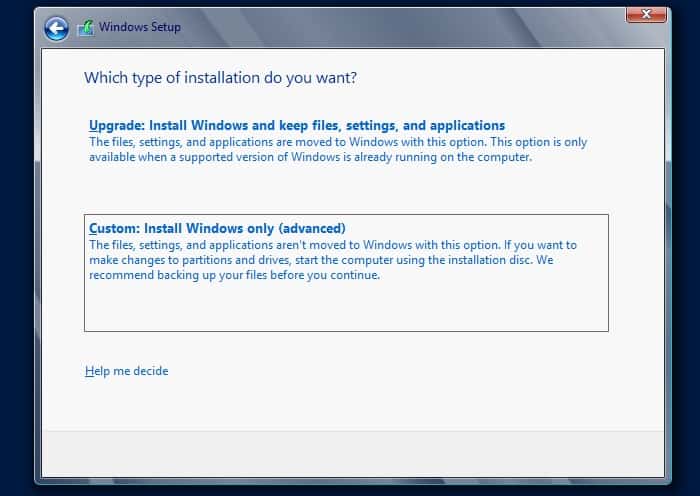
- Click Custom: Install Windows only (Advanced). If you were upgrading from Windows Server 2008 or 2008 R2, you could perform an upgrade.
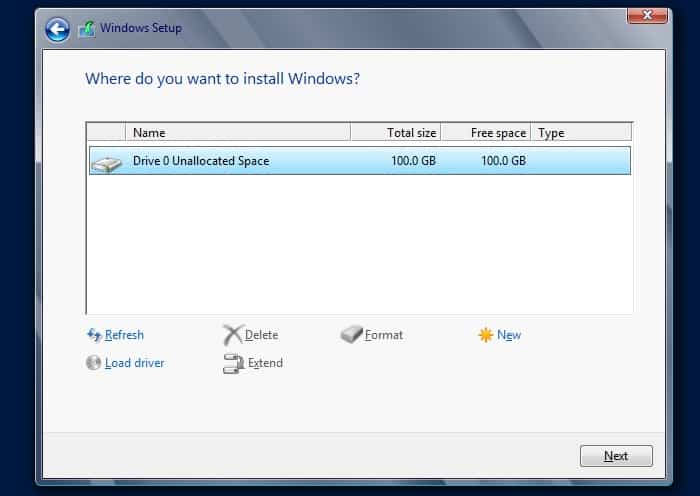
- The hard disk that you have attached should be listed. If not, you will most likely need to provide a driver. Select the disk you will be installing Server 2012 on. If you click on Drive options (advanced), you can perform other operations on your drive, such as formatting, creating new partitions, etc. Make sure that you install the operating system on a partition with enough space. Microsoft requires at least 32 GB. You will most likely need quite a bit more space than that. Click Next.
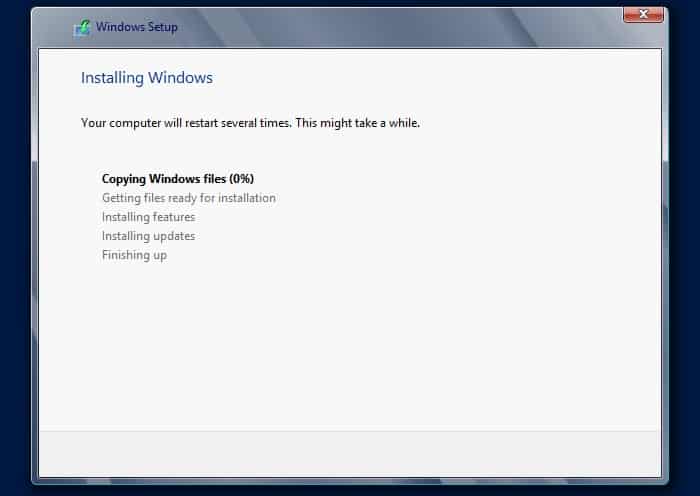
- The process of copying and installing files will begin. This portion of the installation process will vary depending on the hardware that you are installing Windows Server 2012 on. Faster storage will result in a shorter installation time. The server will reboot at the end of this process. After the first reboot, the setup will no longer require the installation files from the DVD or other installation media that you are using.
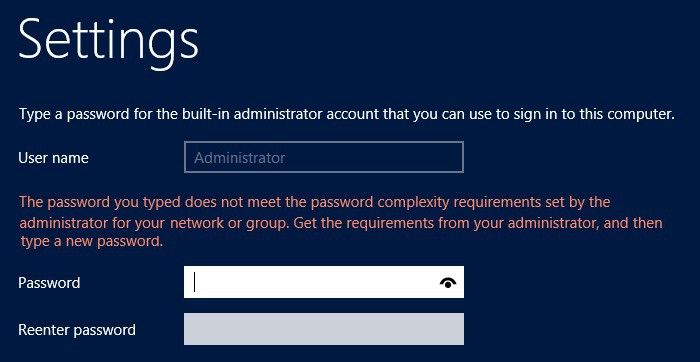
- You will eventually reach the Setup page where you are required to assign a password for the Administrator account. In the Password box, enter a new password for this user account. It must meet complexity requirements, otherwise you will receive an error message. Re-enter the password in the second password box, and then click Finish.
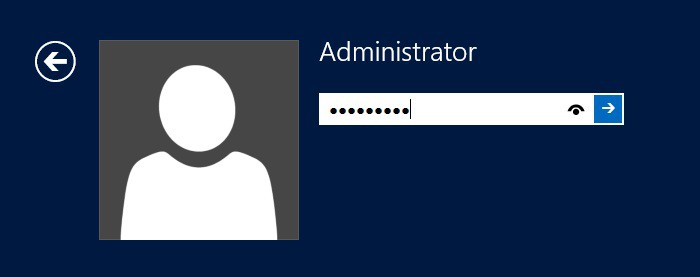
- You are now ready to login. Press CTRL-ALT-DEL to login with the Administrator account.

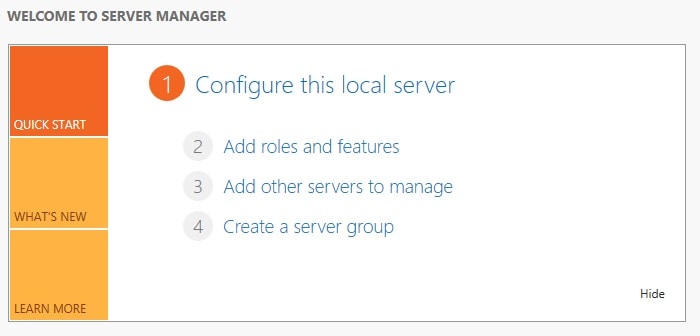
- Once your profile is created, Server Manager will automatically launch. The majority of the server’s configuration will be done using this console.