In this tutorial, we are going to look at a technique to vertically and horizontally center content where the width and height are unknown. There are a few techniques that can be used to accomplish this goal, but in this article, we will one of the methods that can be used using CSS and jQuery.
The Objective
The objective is to center an image with an unknown width and height. To accomplish the objective, the example below will incorporate a mix of CSS and jQuery to center the image.
The approach that we will take is to figure out the value of the image’s width and height client-side, then apply a top and left negative margin to offset the image’s position and have it centered vertically and horizontally.
The HTML
For this example, we only need a few lines of HTML markup. You will notice below that the image element is contained within a div element. We will use CSS styles to initially set the div’s width and height as well as the image’s top-left position.
<div id="imageContainer">
   <img id="img1" src="images/image1.png"  />
</div>
The CSS
There is very little CSS needed to style the div and image element.
#imageContent {
    position: relative;
    height:500px;
    background-color:#ababab;
}

#img1 {
    position: absolute;
    top: 50%;
    left: 50%;
}
At this point, we’ve placed the top, left corner of the image in the center of the div. However, we need to shift the image up and right 50% of its height and width. At this time, we do not know what either of those two values are.
Here is what the image position would be within the div element. Notice the top, left corner is placed in the center of the div element.
The jQuery
This is where things get interesting. We can use jQuery to gather the width and height of the image element. Once we have that information, we will then dynamically reposition the element using client-side jQuery.
$(document).ready(function() {
$('#img1').load(function() {
// Get the target image...
var srcImg = $("#img1");
var newImage = new Image();
newImage.src = srcImg.attr("src");
var imageWidth = newImage.width;
var imageHeight = newImage.height;
// Prepre the top and left margin values, the values need
// to be negative to move the image up and left within the div.
var marginTop = -Math.abs(imageHeight / 2);
var marginLeft = -Math.abs(imageWidth / 2);
// Assign the new margins to the image.
$("#img1").css( {"margin-top": marginTop + "px", "margin-left": marginLeft + "px" });
});
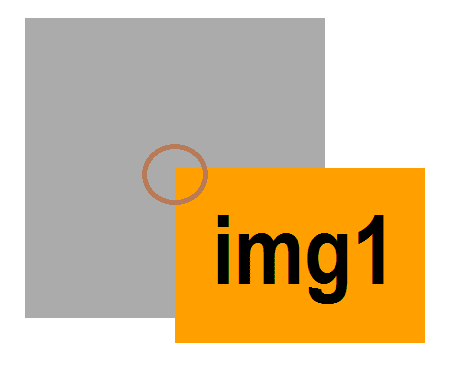
});Applying a negative margin of half the width and height will result in moving the image up and to the left as shown below…

Complete Example
Here is the HTML markup, CSS, and jQuery source code all put together in one file.
<!DOCTYPE html>
<html>
<head>
    <style>
        #imgContainer {
            position: relative;
            height:300px;
            width:300px;
            background-color:#ababab;
        }
        #img1 {
            position: absolute;
            top: 50%;
            left: 50%;
        }
    </style>
    <script src="https://ajax.googleapis.com/ajax/libs/jquery/1.9.1/jquery.min.js"></script>
</head>
<body>
    <div id="imgContainer">
       <img id="img1" src="images/image1.png"  />
    </div>
    <script>
        $(document).ready(function () {
            $('#img1').load(function () {
                var srcImg = $("#img1");
                var newImage = new Image();
                newImage.src = srcImg.attr("src");
                var imageWidth = newImage.width;
                var imageHeight = newImage.height;
                var marginTop = -Math.abs(imageHeight / 2);
                var marginLeft = -Math.abs(imageWidth / 2);
                $("#img1").css({ "margin-top": marginTop + "px", "margin-left": marginLeft + "px" });
            });
        });
    </script>
</body>
</html>