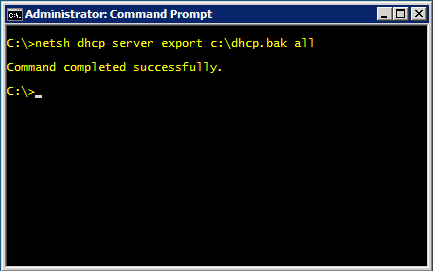
Moving the DHCP Server Database from one server to another is a fairly simple task. The first step is to export the DHCP database from the server that is running the Microsoft Windows DHCP Service. To move a DHCP database and configuration from a server that is running Windows Server 2003/2008 to another server that is running Windows Server 2003/2008, log on to the source DHCP server by using an account that is a member of the local Administrators group. Open a command prompt (for Windows 2008, open in Administrator mode). Type netsh dhcp server export C:\dhcp.bak all, and then press [ENTER].
On the target server, install the DHCP server service on the server that is running Windows Server 2003/2008. If you are running Windows Server 2003, add the service by using the Control Panel applet, Add or Remove Programs. If you are running Windows Server 2008, use Server Manager.
Next, import the DHCP database that you exported from the source server. Make sure that you are logged on to the target server as an administrator. Copy the exported DHCP database file to the local hard disk of the target Windows 2003/2008 Server. Verify that the DHCP service is started. Finally, open a command prompt (in Administrator mode) and type netsh dhcp server import c:\dhcp.bak all, and then press ENTER, where c:\dhcp.bak is the full path and file name of the database file that you copied to the server.
The final step is to Authorize the DHCP server. This step could be done prior to the import of the DHCP database. However, if your server is authorized, make sure that you do not have any scopes enabled that you do not plan to use in production. Once the server is authorized, it will have the ability to lease IP addresses to DHCP enabled computers. From the target DHCP Server, Click Start, point to All Programs, point to Administrative Tools, and then click DHCP.
Once again, you must be logged on to the server by using an account that is a member of the Administrators group. If the server is a member of an Active Directory domain, you must be logged on to the server by using an account that is a member of the Enterprise Administrators group. In the console tree of the DHCP snap-in, expand the new DHCP server. If there is a red arrow in the lower-right corner of the server object, the server has not yet been authorized. Right-click the server object, and then click Authorize.
After several moments, right-click the server again, and then click Refresh. A green arrow indicates that the DHCP server is authorized.